Tag: Yoga For Recovery

How To Get Rid Of Pain In Neck and Shoulder
8 Easy Exercises For Pain In Neck and Shoulders

Ultimate Guide To Hip Bursitis Yoga
This flow will gently stretch and strengthen the hips with special consideration to people practicing with bursitis pain. The seven postures of the sequence will help relax the muscles and increase range of motion and flexibility without causing stress and irritation on the hip joints. Practice with or without props for support. Enjoy the flow!

Often, what we feel in one area of our body will result in sensations elsewhere in the body. Obviously, this makes sense, since the body is a machine of many parts working together as one, but as we all know, figuring out which sensation is the source of another is not often so obvious. Frequent headaches, for example, can seem like an isolated problem of its own, but, in fact, almost never is. No smoke without fire, right? One of the most common causes of frequent headaches is simply poor posture. When the head is constantly pulled forward, it strains the neck and the jaw causing headache-inducing tension. As you can imagine, or perhaps already know, yoga can be truly magical for improving posture. Consequently, it stands to improve headaches and migraines as well. Researchers in this study concluded that in addition to conventional treatment, yoga therapy notably helped patients to reduce the frequency and intensity of migraines.Personally, I come from a military family, grew up taking dance classes and began my yoga practice early in college, so good posture has been reinforced throughout my entire life. I’m very lucky that it’s something my body has learned to do well, but for sure there are times when it forgets. This happens when something out of the ordinary is changing my regular habits, like spending lots of time reading on vacation, or too much time looking down at my phone/book/journal on a day of traveling from flight to flight. In these instances it’s extremely obvious for me that the pain and tension I begin to feel is coming from extended time in these hunched posturesThe American Council on Exercise praises yoga’s effectiveness for improving posture, explaining that the practice “massages the skeletal system, which supports bone mass and growth, while reducing tension in the supporting muscles and tendons.”If you find yourself suffering from frequent headaches, especially if you often have pain or tension in your neck and shoulders, see how your posture is looking these days. It could be time to bring a new intention to your yoga practice and get your posture into a proud and healthy position.
20 Minute Restorative Yoga Flow For Neck Pain and Headaches
This restorative flow for neck pain and headaches will cover a sequence of seven poses that will leave you feeling open and relieved in your neck and shoulders. These poses focus on opening through the upper back and neck in order to release tension and pain. These stretches can accommodate any level of practice from beginner to advanced yogi. This flow is perfect for relieving pain from poor posture, time spent over a desk or device, and residual soreness from other physical activities. For those suffering from chronic pain in the neck and shoulders, practicing this sequence daily will maximize the benefits of the postures. No props are needed for this sequence and it’s perfect for practicing anytime, anywhere!
Yoga For Neck and Shoulder Pain Infographic

Easy Pose – Sukhasana
Starting from an easy sitting posture, we’ll begin this practice by warming up the neck and shoulders with some gentle rolling movements. With the hands resting gently on the knees, raise the shoulders towards the ears and roll the shoulder blades down the back. Continue this movement while breathing into the space at the base of the neck and between the shoulders. After a few breaths, reverse the direction and continue the same movement in the forward direction.
From Easy Pose, make sure the spine is tall with heart over hips and head over heart. Breathe deeply from the base of the spine all the way to the crown of the head. Exhale and follow the nose down toward the chest. Inhale and follow the nose toward the sky. Exhale the nose back down toward the chest and continue the flow matching your breath with each movement allowing space to open in the back of the neck.Return the gaze to neutral, inhale. Exhale turn the gaze over the right shoulder. Inhale back to center, exhale look over the left shoulder. Continue inhaling back to center and exhaling over the shoulder for a few breaths.
Coming back to neutral in the center, inhale and exhale drop the right ear to the right shoulder. Inhale to center and exhale the left ear to the left shoulder. Continue this for a few breaths, making sure to focus the breath on expanding the space in the neck and tops of the shoulders.

Thread The Needle Pose – Parsva Balasana
Come into a table top position, perhaps taking a moment to move through a few cat/cows and when you’re ready, open the right hand up towards the sky allowing the gaze to follow and opening across the chest and through the back of the right shoulder. Exhale, return the right hand to the mat, palm spread wide. Inhale, repeat by opening on the left side. Exhale the left hand back to the mat. Inhale the right arm up, open through the chest.
Exhale, bring the right arm down and “thread” underneath the left arm as the hips sink back to heels. Let the right arm, shoulder and cheek rest against the mat. Breathe deeply here into the shoulder blades and neck, keeping the left arm active and palm wide. Breathe. On an inhale, unwind, exhale return to table top. Inhale the left arm up, exhale “thread” the left hand under the right arm and repeat on this side. After a few breaths, return to Table Top.

Rabbit Pose – Sasangasana
Come to a kneeling position with toes tucked under the glutes. Inhale and reach both hands behind the body to cup the heels with thumbs on the outside of the foot. Exhale the chin towards the chest and fold forward bringing the crown of the head to the floor with the forehead coming as close to the knees as comfortable. Inhale and lift the hips to the sky allowing the arms to extend. Breathe deeply into the back body, especially focusing on the thoracic spine. Be careful not to place too much weight on the head. Allow the legs to support the posture. Release the posture by lifting the head and rolling the torso up one vertebrae at a time.

Eagle Pose Variation – Garudasana
Return to sitting on the knees and heels. Inhale the arms wide into a T position, exhale and cross the arms in front of the chest, left arm over right. Bend the elbows and hook thumbs together allowing the forearms to connect. Lift the hands toward the sky, feeling the stretch in the back of the neck and shoulders. Breathe here. Uncross the arms, inhaling again to a T shape and exhale cross the arms again, this time bringing the right arm over the left. Hook the thumbs, raise the hands, and breathe again, creating space with each inhalation and finding release and ease with each exhalation. After a few breaths, release the posture.

Half Lord of the Fishes Pose – Ardha Matsyendrasana
Come into a seated position, sit bones on the floor and legs extended in front of the body. Flex the feet and acctivate through both legs. Make the spine tall. Bend the right knee bringing the right heel parallel with the left knee. Inhale the right arm over head and exhale bring it behind the body, pressing the palm into the ground and the arm against the back body for support. Inhale the left arm over head and exhale, bend the left elbow as it crosses over to the outside of the right knee. Tuck the navel into the spine and twist from the lower abdomen. Press the elbow and knee into each other and turn the gaze over the right shoulder.
With each inhale think about lifting the spine, with each exhale think about opening through the chest and right shoulder. On an exhale, unwind releasing the posture. Change the legs, extending the right and bending the left. Repeat the posture on the left side.

Camel Pose – Ustrasana
Come into Easy Pose. Inhale both arms above the head and exhale bring fingertips to tops of shoulders. Ground through sit bones, open through chest. Inhale and with the exhale quickly twist the whole torso and gaze to the right. Inhale quickly unwinding to center and carry the movement across on the exhale, twisting to the left. Continue this movement for twenty exhales, maintaining momentum and the same pace for each breath.
The focus of the breath should be on the exhale, the inhale will occur naturally as the body unwinds back to center. This breathing practice helps open the whole spine and move breath and prana throughout the entire torso.
Camel Pose – Ustrasana

Kundalini Pranayama – Side Twists
Come into Easy Pose. Inhale both arms above the head and exhale bring fingertips to tops of shoulders. Ground through sit bones, open through chest. Inhale and with the exhale quickly twist the whole torso and gaze to the right. Inhale quickly unwinding to center and carry the movement across on the exhale, twisting to the left. Continue this movement for twenty exhales, maintaining momentum and the same pace for each breath.
The focus of the breath should be on the exhale, the inhale will occur naturally as the body unwinds back to center. This breathing practice helps open the whole spine and move breath and prana throughout the entire torso.

Featured Video: 7 Neck and Shoulder Yoga Poses For Instant Pain Relief
Yoga for Neck and Shoulder Pain Relief
To begin reconditioning the body with better posture, start by finding more mobility in the neck and shoulders. This helps loosen up the muscles, thus relieving tension, and with consistency of practice, will lead to a greater range of motion. Having more range of motion and strength in the muscles are keys to creating good posture to support the body. Before jumping into any deep stretches in this area, start by working out a little tension and creating a little space with simple warm ups. An easy way to warm up the area is to take a minute or two doing some gentle neck and shoulder rolls. Take semi-circles with the neck, leading the motion from the tip of your nose in order to protect the neck from hyper-extension. Hunch the shoulders up and down and alternate rolling them forward and then backward. Keep in mind that you can always incorporate this into postures like Cat and Cow, Downward Facing Dog, Reverse Prayer, or any stabilized posture that allows you to safely find organic movement in your neck and shoulders. If you spend many hours at a desk, computer, in a vehicle, etc., try giving yourself some moments throughout the day to open this space a little. It will relieve tension and allow the body to release stress and pain.
Yoga for Upper Back and Neck Pain
For upper back and neck pain, especially pain coming from posture, finding that happy balance between flexibility and strength is key. There are many postures that give us the option to explore these benefits in a way that meets us wherever we are in our practice, whether we’ve just begun our first yoga classes, or we’re half-way to enlightenment. Cobra and Child’s Pose are two of my favorites that offer this range of depth.Cobra Pose, Bhujangasana, is practiced on the floor, so right from the get-go we have the benefit of the ground right below us supporting this posture. (Remember Newton’s third law and don’t forget to use the energy of the ground in your postures!) The movement of Cobra stretches from the lower abs and hip flexors to the chest, the upper back and into the neck. By pushing into the earth and keeping the elbows tucked close to the body, we build strength in the muscles of our arms, back and chest and shoulders. This “baby backbend” is so good for opening and strengthening the upper body.Counter your Cobra Pose with restorative Child’s Pose, Balasana. This is a very gentle, semi-inversion that lowers the heart rate and calms the nervous system, allowing the mind to become calm and the body to relax. Not a bad complement to relieving painful tension. For an active experience in this posture, keep the arms lifted away from the ground and breath deeply, extending from the tailbone to the crown of the head.
Healing Your Neck and Shoulders After Pain
Exploring modifications of poses is one of the best ways to bring more healing into your yoga practice. There is so much respect and wisdom that comes from honoring the body where it is, rather than forcing it to where it “should” be. Don’t be afraid to have props on standby when you go to a studio class. If you don’t have blocks, bolsters and straps at home, get creative with books, blankets and scarves! Matsyasana, Fish Pose, is a beautiful and highly beneficial posture for neck and shoulder pain. None of this is lost when practiced with the support of a block or two. Placing a block between the space of the shoulder blades allows the chest to lift and the shoulders to stretch and open. Support from the block alleviates stress in the neck if your muscles are not yet strong enough to hold the backward extension on their own. If you are practicing with a migraine or neck injury, definitely support the head with a block, rather than dropping it entirely to the floor.This supported Fish Pose opens the lumbar, thoracic and cervical spine, conditioning the body for better posture. It also opens the chest, the heart space, physically and energetically, which is so critical for the process of healing. This healing posture gets its name from the incarnation of Lord Vishnu as the fish, Matsya, who came to Earth during a time of extreme corruption. A flood was filling the planet, purging it from the excessive evil. In order to preserve goodness and balance, Matsya saved the sages of the earth, protecting their wisdom and knowledge for new generations.As you practice this pose and breathe space and healing into your body, connect to the innate wisdom of your body as a self-healing machine and the wisdom that has been carried through generations of yogic tradition.
How Yoga Can Help Shoulder Blade Pain
For relieving pain and tension in the upper body, Child’s Pose is an anytime, anywhere go-to pose. If you want to take it a little further to get deeper into your shoulder blades, thread the needle pose is a great variation to practice.The restorative nature of this posture is already great for relaxing the parasympathetic nervous system, allowing both the mind and body to find stillness. The twist of the torso and extension of the raised arm helps you to find a deeper stretch in the back of the shoulder blade, the chest and in the neck. From the rotation you can also feel the release of some tension in the lower back. Vinyasa teacher Jason Crandell writes, “Yoga is the perfect opportunity to be curious about who you are.” I love that and couldn’t agree more. I encourage you to see your practice as an opportunity to explore who you are and who you could be, and practice letting go of any “should bes”. Allow your healing process to unfold without force, to blossom. Be curious in your poses, in your mind and with your spirit. May you be well!
Conclusion
Finish the practice by coming into Savasana and allow the body to relax completely, letting go of control of the breath. Hopefully this flow has helped to release any excess tension of stress that’s been held in the neck and shoulders.
The chest and upper back should feel much more open and the posture of the torso overall should feel more lifted and straightened. Try practicing these postures every day to relieve stiffness and pain and to improve your posture.
About
Hillary
Hillary is a natural-born wanderer and wonderer. A digital nomad and pilgrim of the heart, she often feels herself a poster child of the Spiritual Millennial. As a writer, health coach and yoga instructor Read More..
Yoga For Disc Problem
In Traditional Chinese Medicine it is said that a healthy spine is the secret to a long life. While yoga as exercise is great for conditioning strength and flexibility in the back, it can also be extremely therapeutic for individuals suffering from chronic or acute pain in the spine. When practicing with injury or pain it is especially important to know how to safely practice postures in a way that nourishes the body and avoids any additional agitation. This video teaches you how to safely practice postures that strengthen and support the spine without irritation to existing disc problems. Practicing these postures regularly will help alleviate pain and prevent future injury.

Often, what we feel in one area of our body will result in sensations elsewhere in the body. Obviously, this makes sense, since the body is a machine of many parts working together as one, but as we all know, figuring out which sensation is the source of another is not often so obvious. Frequent headaches, for example, can seem like an isolated problem of its own, but, in fact, almost never is. No smoke without fire, right? One of the most common causes of frequent headaches is simply poor posture. When the head is constantly pulled forward, it strains the neck and the jaw causing headache-inducing tension. As you can imagine, or perhaps already know, yoga can be truly magical for improving posture. Consequently, it stands to improve headaches and migraines as well. Researchers in this study concluded that in addition to conventional treatment, yoga therapy notably helped patients to reduce the frequency and intensity of migraines.Personally, I come from a military family, grew up taking dance classes and began my yoga practice early in college, so good posture has been reinforced throughout my entire life. I’m very lucky that it’s something my body has learned to do well, but for sure there are times when it forgets. This happens when something out of the ordinary is changing my regular habits, like spending lots of time reading on vacation, or too much time looking down at my phone/book/journal on a day of traveling from flight to flight. In these instances it’s extremely obvious for me that the pain and tension I begin to feel is coming from extended time in these hunched posturesThe American Council on Exercise praises yoga’s effectiveness for improving posture, explaining that the practice “massages the skeletal system, which supports bone mass and growth, while reducing tension in the supporting muscles and tendons.”If you find yourself suffering from frequent headaches, especially if you often have pain or tension in your neck and shoulders, see how your posture is looking these days. It could be time to bring a new intention to your yoga practice and get your posture into a proud and healthy position.

TRAINING TYPE: FLOW SEQUENCE
CATEGORY:YOGA
SUBCATEGORY:RECOVERY
PLANNED TIME:15 MIN
LEVEL:ALL LEVELS
PROPS:NONE
20 Minute Restorative Yoga Flow For Neck Pain and Headaches
This restorative flow for neck pain and headaches will cover a sequence of seven poses that will leave you feeling open and relieved in your neck and shoulders. These poses focus on opening through the upper back and neck in order to release tension and pain. These stretches can accommodate any level of practice from beginner to advanced yogi. This flow is perfect for relieving pain from poor posture, time spent over a desk or device, and residual soreness from other physical activities. For those suffering from chronic pain in the neck and shoulders, practicing this sequence daily will maximize the benefits of the postures. No props are needed for this sequence and it’s perfect for practicing anytime, anywhere!
Yoga For Neck and Shoulder Pain Infographic
Easy Pose – Sukhasana
Starting from an easy sitting posture, we’ll begin this practice by warming up the neck and shoulders with some gentle rolling movements. With the hands resting gently on the knees, raise the shoulders towards the ears and roll the shoulder blades down the back. Continue this movement while breathing into the space at the base of the neck and between the shoulders. After a few breaths, reverse the direction and continue the same movement in the forward direction.
From Easy Pose, make sure the spine is tall with heart over hips and head over heart. Breathe deeply from the base of the spine all the way to the crown of the head. Exhale and follow the nose down toward the chest. Inhale and follow the nose toward the sky. Exhale the nose back down toward the chest and continue the flow matching your breath with each movement allowing space to open in the back of the neck.Return the gaze to neutral, inhale. Exhale turn the gaze over the right shoulder. Inhale back to center, exhale look over the left shoulder. Continue inhaling back to center and exhaling over the shoulder for a few breaths.
Coming back to neutral in the center, inhale and exhale drop the right ear to the right shoulder. Inhale to center and exhale the left ear to the left shoulder. Continue this for a few breaths, making sure to focus the breath on expanding the space in the neck and tops of the shoulders.
Thread The Needle Pose – Parsva Balasana
Come into a table top position, perhaps taking a moment to move through a few cat/cows and when you’re ready, open the right hand up towards the sky allowing the gaze to follow and opening across the chest and through the back of the right shoulder. Exhale, return the right hand to the mat, palm spread wide. Inhale, repeat by opening on the left side. Exhale the left hand back to the mat. Inhale the right arm up, open through the chest.
Exhale, bring the right arm down and “thread” underneath the left arm as the hips sink back to heels. Let the right arm, shoulder and cheek rest against the mat. Breathe deeply here into the shoulder blades and neck, keeping the left arm active and palm wide. Breathe. On an inhale, unwind, exhale return to table top. Inhale the left arm up, exhale “thread” the left hand under the right arm and repeat on this side. After a few breaths, return to Table Top.
Rabbit Pose – Sasangasana
Come to a kneeling position with toes tucked under the glutes. Inhale and reach both hands behind the body to cup the heels with thumbs on the outside of the foot. Exhale the chin towards the chest and fold forward bringing the crown of the head to the floor with the forehead coming as close to the knees as comfortable. Inhale and lift the hips to the sky allowing the arms to extend. Breathe deeply into the back body, especially focusing on the thoracic spine. Be careful not to place too much weight on the head. Allow the legs to support the posture. Release the posture by lifting the head and rolling the torso up one vertebrae at a time.
Eagle Pose Variation – Garudasana
Return to sitting on the knees and heels. Inhale the arms wide into a T position, exhale and cross the arms in front of the chest, left arm over right. Bend the elbows and hook thumbs together allowing the forearms to connect. Lift the hands toward the sky, feeling the stretch in the back of the neck and shoulders. Breathe here. Uncross the arms, inhaling again to a T shape and exhale cross the arms again, this time bringing the right arm over the left. Hook the thumbs, raise the hands, and breathe again, creating space with each inhalation and finding release and ease with each exhalation. After a few breaths, release the posture.
Half Lord of the Fishes Pose – Ardha Matsyendrasana
Come into a seated position, sit bones on the floor and legs extended in front of the body. Flex the feet and acctivate through both legs. Make the spine tall. Bend the right knee bringing the right heel parallel with the left knee. Inhale the right arm over head and exhale bring it behind the body, pressing the palm into the ground and the arm against the back body for support. Inhale the left arm over head and exhale, bend the left elbow as it crosses over to the outside of the right knee. Tuck the navel into the spine and twist from the lower abdomen. Press the elbow and knee into each other and turn the gaze over the right shoulder.
With each inhale think about lifting the spine, with each exhale think about opening through the chest and right shoulder. On an exhale, unwind releasing the posture. Change the legs, extending the right and bending the left. Repeat the posture on the left side.
Camel Pose – Ustrasana
Come into Easy Pose. Inhale both arms above the head and exhale bring fingertips to tops of shoulders. Ground through sit bones, open through chest. Inhale and with the exhale quickly twist the whole torso and gaze to the right. Inhale quickly unwinding to center and carry the movement across on the exhale, twisting to the left. Continue this movement for twenty exhales, maintaining momentum and the same pace for each breath.
The focus of the breath should be on the exhale, the inhale will occur naturally as the body unwinds back to center. This breathing practice helps open the whole spine and move breath and prana throughout the entire torso.
Camel Pose – Ustrasana
Kundalini Pranayama – Side Twists
Come into Easy Pose. Inhale both arms above the head and exhale bring fingertips to tops of shoulders. Ground through sit bones, open through chest. Inhale and with the exhale quickly twist the whole torso and gaze to the right. Inhale quickly unwinding to center and carry the movement across on the exhale, twisting to the left. Continue this movement for twenty exhales, maintaining momentum and the same pace for each breath.
The focus of the breath should be on the exhale, the inhale will occur naturally as the body unwinds back to center. This breathing practice helps open the whole spine and move breath and prana throughout the entire torso.
Featured Video: 7 Neck and Shoulder Yoga Poses For Instant Pain Relief
Yoga for Neck and Shoulder Pain Relief
To begin reconditioning the body with better posture, start by finding more mobility in the neck and shoulders. This helps loosen up the muscles, thus relieving tension, and with consistency of practice, will lead to a greater range of motion. Having more range of motion and strength in the muscles are keys to creating good posture to support the body. Before jumping into any deep stretches in this area, start by working out a little tension and creating a little space with simple warm ups. An easy way to warm up the area is to take a minute or two doing some gentle neck and shoulder rolls. Take semi-circles with the neck, leading the motion from the tip of your nose in order to protect the neck from hyper-extension. Hunch the shoulders up and down and alternate rolling them forward and then backward. Keep in mind that you can always incorporate this into postures like Cat and Cow, Downward Facing Dog, Reverse Prayer, or any stabilized posture that allows you to safely find organic movement in your neck and shoulders. If you spend many hours at a desk, computer, in a vehicle, etc., try giving yourself some moments throughout the day to open this space a little. It will relieve tension and allow the body to release stress and pain.
Yoga for Upper Back and Neck Pain
For upper back and neck pain, especially pain coming from posture, finding that happy balance between flexibility and strength is key. There are many postures that give us the option to explore these benefits in a way that meets us wherever we are in our practice, whether we’ve just begun our first yoga classes, or we’re half-way to enlightenment. Cobra and Child’s Pose are two of my favorites that offer this range of depth.Cobra Pose, Bhujangasana, is practiced on the floor, so right from the get-go we have the benefit of the ground right below us supporting this posture. (Remember Newton’s third law and don’t forget to use the energy of the ground in your postures!) The movement of Cobra stretches from the lower abs and hip flexors to the chest, the upper back and into the neck. By pushing into the earth and keeping the elbows tucked close to the body, we build strength in the muscles of our arms, back and chest and shoulders. This “baby backbend” is so good for opening and strengthening the upper body.Counter your Cobra Pose with restorative Child’s Pose, Balasana. This is a very gentle, semi-inversion that lowers the heart rate and calms the nervous system, allowing the mind to become calm and the body to relax. Not a bad complement to relieving painful tension. For an active experience in this posture, keep the arms lifted away from the ground and breath deeply, extending from the tailbone to the crown of the head.
Healing Your Neck and Shoulders After Pain
Exploring modifications of poses is one of the best ways to bring more healing into your yoga practice. There is so much respect and wisdom that comes from honoring the body where it is, rather than forcing it to where it “should” be. Don’t be afraid to have props on standby when you go to a studio class. If you don’t have blocks, bolsters and straps at home, get creative with books, blankets and scarves! Matsyasana, Fish Pose, is a beautiful and highly beneficial posture for neck and shoulder pain. None of this is lost when practiced with the support of a block or two. Placing a block between the space of the shoulder blades allows the chest to lift and the shoulders to stretch and open. Support from the block alleviates stress in the neck if your muscles are not yet strong enough to hold the backward extension on their own. If you are practicing with a migraine or neck injury, definitely support the head with a block, rather than dropping it entirely to the floor.This supported Fish Pose opens the lumbar, thoracic and cervical spine, conditioning the body for better posture. It also opens the chest, the heart space, physically and energetically, which is so critical for the process of healing. This healing posture gets its name from the incarnation of Lord Vishnu as the fish, Matsya, who came to Earth during a time of extreme corruption. A flood was filling the planet, purging it from the excessive evil. In order to preserve goodness and balance, Matsya saved the sages of the earth, protecting their wisdom and knowledge for new generations.As you practice this pose and breathe space and healing into your body, connect to the innate wisdom of your body as a self-healing machine and the wisdom that has been carried through generations of yogic tradition.
How Yoga Can Help Shoulder Blade Pain
For relieving pain and tension in the upper body, Child’s Pose is an anytime, anywhere go-to pose. If you want to take it a little further to get deeper into your shoulder blades, thread the needle pose is a great variation to practice.The restorative nature of this posture is already great for relaxing the parasympathetic nervous system, allowing both the mind and body to find stillness. The twist of the torso and extension of the raised arm helps you to find a deeper stretch in the back of the shoulder blade, the chest and in the neck. From the rotation you can also feel the release of some tension in the lower back. Vinyasa teacher Jason Crandell writes, “Yoga is the perfect opportunity to be curious about who you are.” I love that and couldn’t agree more. I encourage you to see your practice as an opportunity to explore who you are and who you could be, and practice letting go of any “should bes”. Allow your healing process to unfold without force, to blossom. Be curious in your poses, in your mind and with your spirit. May you be well!
Conclusion
Finish the practice by coming into Savasana and allow the body to relax completely, letting go of control of the breath. Hopefully this flow has helped to release any excess tension of stress that’s been held in the neck and shoulders.
The chest and upper back should feel much more open and the posture of the torso overall should feel more lifted and straightened. Try practicing these postures every day to relieve stiffness and pain and to improve your posture.
About
Hillary
Hillary is a natural-born wanderer and wonderer. A digital nomad and pilgrim of the heart, she often feels herself a poster child of the Spiritual Millennial. As a writer, health coach and yoga instructor Read More..
Shoulder Neck Stretch Yoga: Daily Routine to Ease Pain and Boost Mobility
As a digital nomad and thus, frequent backpacker, I tend to spend more time than the average person with a heavy weight on my shoulders.

Shoulder Neck Stretch Yoga for Backpackers and Beyond
As a digital nomad and frequent backpacker, I often carry the literal weight of my life on my back. This lifestyle brings me joy, freedom, and the occasional discomfort—especially in my shoulders and neck. That’s why finding a consistent shoulder neck stretch yoga practice has been a game-changer. The heavy 40-liter pack, paired with a laptop-filled daypack, can lead to inevitable bouts of neck and shoulder pain.
Pain With Purpose: A Lifestyle Side Effect
While I willingly accept the aches that come with my adventurous life, it’s important to ask yourself: “Is this pain worth it?” Sometimes, the answer is a resounding yes. Other times, we need tools to manage the discomfort so we can continue doing what we love. Practicing shoulder neck stretch yoga becomes a form of mindfulness, a way to restore balance and bring awareness to the body’s needs.
The Philosophy Behind the Stretch
Yoga, as teacher Amit Ray puts it, “is not just repetition of a few postures — it is more about the exploration and discovery of the subtle energies of life.” I carry these words with me on and off the mat. A targeted yoga practice for shoulder and neck pain does more than offer physical relief—it nurtures self-inquiry, presence, and healing.
TRAINING TYPE: FLOW SEQUENCE
CATEGORY:YOGA
SUBCATEGORY:RECOVERY
PLANNED TIME:20 MINUTES
LEVEL:ALL LEVELS
PROPS:NONE
What Are The Best Stretching Exercises For Neck and Shoulders?
In this sequence I’m going to show you a fantastic set of stretches for your neck and shoulders that you can use after a nice workout or even to help with pain or recovery.
Whether you use these stretches to compliment your workout or to support recovery, you’ll be improving your flexibility, opening the body where we often hold our stress and tension, and as a result of opening physically, you’ll very likely experience a greater sense of openness and calm in your mood and energy as well.
Shoulder Neck Stretch Yoga Infographics

Shoulder – Neck Rolls
We always want to start with some warm-ups before practicing deep stretches so the easiest and most effective way to do this to prepare the neck and shoulders it with simple neck and shoulder rolls. You’re probably pretty familiar with these.
As you go through these movements, really try to bring your attention to your breath and allow it to guide the motion. Breathing into the space we stretch with attention always the muscles to relax and thus expand with more ease.

Upward Salute Pose, hands behind back variation – Urdhva Hastasana
After warming up with the neck and shoulder rolls, bringing the hands together behind the back at the base of the spine, interlacing the fingers. Bring the energy of the elbows and shoulder blades towards each other and lift the hands up and away from the body. Open through the chest and lift the gaze towards the sky.
Breath into the stretch for at least five breaths.

Cow Face Pose – Gomukhasana
Next, let’s look at Cow Face Pose. You may want to use a strap in this stretch, or if you don’t have one, simply use a tshirt or small towel, anything like that will work perfectly. Hold your strap (or other prop) in your right hand and raise the hand high above the shoulder. Bend the elbow and bring the hand to touch the back between the shoulders. Bring your arm behind the back, bend the elbow, and with your left hand, reach up and grab your right hand or the strap. Lift the sternum and your gaze.
Breathe into the stretch for five breaths. Release and repeat on the opposite side.

Reverse Prayer Pose – Viparita Namaskarasana
Now, we’ll do Prayer Pose. To do this stretch you may want to begin with the modified version. Simply bring the arms behind the back grabbing each elbow or forearm with the opposite hand. To deepen the stretch, bring the hands into a prayer position at the base of the spine and bend the elbows to move the hands up the spine and in between the shoulder blades. Roll the shoulders away from the chest and down the back, open through the chest and take five to ten breaths.

Upward Salute Pose, hands behind head variation – Urdhva Hastasana
Our next stretch is going to feel really great for that space where the top of the ribs meets the underside of the armpits. Open the arms wide and raise them to the sky with palms wider than the shoulders. Bend the elbows and bring the hands together at the base of the skull with the fingers interlaced. Lift the gaze and the sternum and reach the elbows higher toward the sky lifting out of the armpits. Recline the upper back creating a small backbend. Send the hips forward here for better balance. Take five breaths.

Standing Forward Bend, hands behind head variation – Uttanasana
With hands still together behind the head, straighten posture to a neutral standing position and slowly bring the elbows towards each other in front of the face, opening through the shoulder blades, keeping the shoulders away from the ears. To begin a spinal fold, gently press the head into the hands and begin to bring the nose toward the chest. Tuck the navel into the spine and bring the nose toward the navel.
Continue folding bringing the chest toward the tops of the thighs. Continue bringing the forehead towards the shins. When you reach the extent of your fold, release the hands down, allow the neck and head to hang gently, and slowly roll the body back to standing, pressing into the feet and activating through the legs and hips.
Camel Pose – Ustrasana

Standing Forward Bend, table top variation – Uttanasana
Standing tabletop is our next stretch to open the back of the shoulders and release tension in the neck. Use blocks to bring the ground closer to the palms so that the arms and legs can be fully extended. Just like in regular table top position, you want to have the wrists below the shoulders and the knees below the hips.
Spread the fingers wide and press into all parts of the hands, really pressing away from the earth and feel the shoulders open wide across the back, lifting out of the armpits. Press the hips back, lengthen the spine from the tailbone, through the sides of the body and allow the neck to be an extension of the spine. Breathe for 10 breaths.

Standing Forward Bend, revolved variation – Uttanasana
From your standing tabletop, maintain the activation and awareness throughout the body and bring the left palm directly below the face. Press into the feet, keeping the hips squared forward and open the right arm to the sky, rotating from the abdomen and bringing the right shoulder back in space to open the chest.
Bring the gaze to the lifted palm. Breathe for five to ten breaths. Release and repeat on the opposite side.

Rabbit Pose – Sasangasana
Rabbit is the last posture we’ll explore. It’s not as commonly known as other poses but it delivers a deep and restorative stretch to the neck, shoulders and upper back, and after discovering how yummy it feels, you’ll definitely want to be using this as part of your regular practice. Also, fun fact, the pose offers a lot of the same wonderful benefits as inversions, so if you’re looking for an alternative to getting the whole body upside down, this is the pose you’ve been waiting for. To get into a rabbit stretch, come to a seated kneeling position. Reach the hands back and grab the heels, thumbs on the outside of the foot. Fold forward and bring the crown of the head to the mat. Tuck the navel into the spine and lift the hips as high as you can.
Feel the stretch throughout the body. Breathe deeply. Take five to ten breaths.

Featured Video: Good Stretching Exercises for Neck and Shoulders
Physical Therapy Or Yoga for Neck and Shoulder Pain?
As yoga becomes more normalized in the West, its benefits for recovery are being recognized in conventional medicine and more doctors are integrating the practice into treatment for patients. Among physical therapists this is especially true and many are prescribing yoga in addition to standard physical therapy. In a recent medical study published by Annals.org, researchers found yoga to be as effective in pain recovery as physical therapy. This is promising evidence for skeptics and believers of yoga alike who are using this ancient and time-tested system for recovery. In both physical therapy and yoga asana, we want to support the body in recovery and at the same time, prepare it for prevention. We do this by reconditioning with the appropriate balance of stretching and strengthening the muscles. Creating a flow that alternates between Cobra and Child’s Pose is an excellent way to gently recover and strengthen the neck and shoulders. If it doesn’t add to your pain or injury, add a “modified Chaturanga” when transitioning from child’s pose back to cobra.
I suggest knees-chest-chin pose, Ashtanga Namaskar. In this Vinyasa of Cobra will open the chest, neck and shoulders, while strengthening the arms and back. Countering with Child’s Pose will stretch the spine, neck and shoulders. Transitioning with Knees-Chest-Chin will strengthen and tone the abs, arms, shoulders and back. Try taking a few rounds of these daily shoulder neck stretch yoga poses you can try to manage neck and shoulder pain and to prevent future injury.
Can Neck Stretches Help With A Pinched Nerve?
If you are suffering from a pinched nerve in your neck, you probably already know some basic stretches you can be doing to relieve your symptoms. Simple stretching movements like nodding the head up and down or looking side-to-side over each shoulder are go-to exercises you can and should do anytime, anywhere to recover your neck. So how can you get more relief? I have two simple, yet highly effective techniques I’ll share with you. Technique number one is be consistent! I promise you this is absolutely the number one way to see progress with anything! Especially when reconditioning the body, consistency in your practice is what will yield faster and more significant results than sporadically doing the work here and there. Remember, mood is not the same as motivation! Which one will you let be greater?Technique number two is a little more concrete and it’s a technique I learned in my first-ever somatics class. It’s so very simple, but try it yourself and you will immediately see the difference it makes! It’s like this: when you are doing your stretches up and down and side-to-side, move your eyeballs even further in that direction.
So if you are looking over your right shoulder, when you have reached your edge in the stretch, turn your gaze as far to the right corner of your eye as you can and hold it there for the stretch. When you do this, you will notice that when you return to the next round of the stretch, you are able to go even deeper. Give it a try and see (literally, ha-ha) how it works for you!
Whats The Best Shoulder Stretches For Pain?
Thread the Needle Pose is an excellent posture to practice to stretch and relieve the shoulders. As an inversion, it’s extra restorative as it supports blood flow back towards the heart and activates the parasympathetic nervous system. Additionally, the twisting movement of the posture gives a gentle massage to the internal abdominal organs, encouraging detox and assisting digestion.Explore two variations of thread the needle to find which one brings you the best relief in your practice. One option is to raise the “unthreaded” arm to the sky, opening through the chest and finding a deeper stretch in the sides of the body. Alternatively, you can leave the arm on the mat, extending it in front of the body and away from the armpit for a deep stretch in the shoulder.
How Neck Stretches Can Help Headaches
Recent research studies have confirmed that yoga is an effective therapy for improving headaches, but what has long been known is that posture is one of the most common reasons for headaches. Could poor posture be the underlying culprit of yours? Regular yoga practice is excellent for improving posture because it doesn’t simply stretch and strengthen the body to encourage good posture, it also flexes the mind and creates a greater sense of self-awareness that allows you to notice and correct your posture when it begins triggering a symptom. Shoulder stand and plow pose are two postures that go well when practiced in sequence together, beginning with shoulder stand and transitioning to plow. They both offer a stretch in the back of the neck, in the shoulders and through the top of the spine. Additionally, they engage the core muscles of the spine and abdominals, strengthening the body’s ability to support itself in proper posture. These poses can help relieve pain and headaches, but are not recommended if you are suffering from migraines or a neck injury. Practice mindfully, making sure to allow the weight of the body to be supported by the shoulders and arms and not with compression on the neck.
Conclusion: Practice with Intention
Not only is a good stretch critical to any physical activity, it also has a huge influence on our body’s ability to manage stress. The neck and shoulders are especially vulnerable to bearing the weight of our life’s circumstances. As we all know, this isn’t just a figure of speech. Poor sleep, bad posture, intense exercise, physical labor, worry, fear, sadness, etc. all find their way into the muscles of the upper body, especially closest to the heart and the head. Go figure. Stretching well and stretching often helps the body recover, while also making it more resilient. Incorporate these stretches into your practice regularly to experience the most benefits from them. As you practice, connect to your breath and remember the mind-body connection. Integrating shoulder neck stretch yoga into your wellness routine can be a simple yet powerful step toward lasting physical and emotional relief.
Ready to relieve tension and reconnect with your purpose? Click here to explore our guided stretch sequences and bring ease into your daily practice.
About
Hillary
Hillary is a natural-born wanderer and wonderer. A digital nomad and pilgrim of the heart, she often feels herself a poster child of the Spiritual Millennial. As a writer, health coach and yoga instructor Read More..
Yoga for Tight Hip Flexors: Release Tension and Improve Mobility Fast
When we push for immediate results and instant healing, we never inhabit the important in-between phase, which is where much of the learning and growth actually happen.” ― Bo Forbes, Yoga for Emotional Balance
Yoga for Tight Hip Flexors: Stretch to Relieve and Realign
Yoga for tight hip flexors offers a powerful, natural way to reduce chronic pain, improve posture, and prevent injury. The hip flexors are a group of muscles responsible for essential movements in the spine, hips, and legs. When these muscles become tight—often due to prolonged sitting or repetitive motion—it can lead to serious issues including back pain, misalignment, and mobility limitations.
Understanding the Hip Flexors and Their Role
The hip flexors connect the legs to the pelvis and spine, making them critical for walking, bending, running, and sitting. These muscles run from the lumbar spine down through the pelvis into the upper thighs. When they remain in a flexed position too long, such as during extended periods of sitting, they shorten and become tight, leading to discomfort or even injury when you attempt to extend or lengthen them.
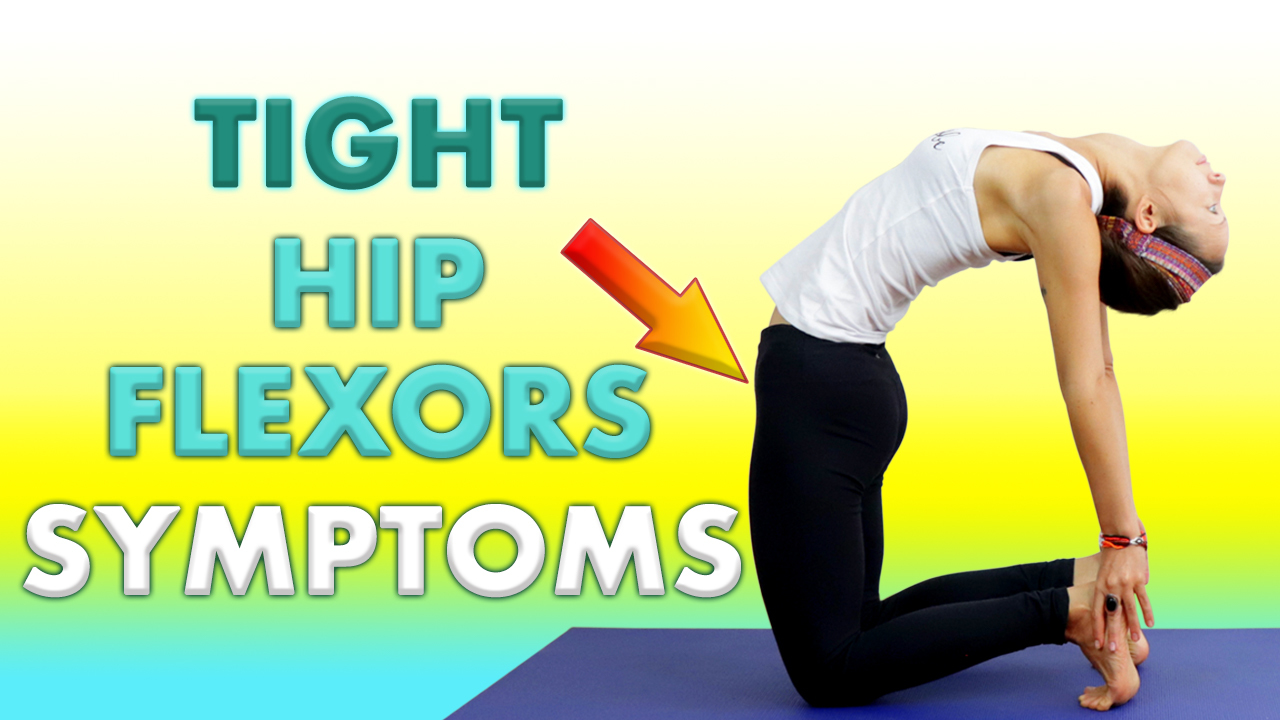
Common Symptoms of Tight Hip Flexors
The most reported symptom is lower back pain, particularly after movements like bending or squatting. Additional signs include:
- Discomfort in the upper legs and groin
- Limping or cramping while walking
- Difficulty with extension-based movements like kicking or sprinting
A simple way to test tightness: lie flat on your back in a corpse pose. If your lower back arches significantly off the floor, your hip flexors may be tight and are affecting spinal alignment.
Root Causes of Tight Hip Flexors
While genetics and activity level play roles, the most common causes include:
- Sitting for extended periods (desk work, driving)
- Lack of proper stretching before and after exercise
- Overtraining with poor form in sports like running or martial arts
Runners, dancers, and martial artists are particularly prone to tight hip flexors, as their movements often involve high-impact flexion and extension.
How Yoga Can Help
Yoga for tight hip flexors combines conscious breathing with intentional stretching, promoting both flexibility and awareness. Yoga poses that focus on hip extension help lengthen these muscles and restore functional range of motion.
A Holistic Approach To Tight Hip Flexor Muscles
There is no one reason for tight hip flexors and there is no one solution. A holistic approach that considers biology and lifestyle and targets the whole body rather than one specific area is most likely to give the greatest relief. When working to create more flexibility or relieve pain, be consistent everyday. At the same time, be patient. Don’t try everything at once, this will likely only stress these muscles even more, resulting in more soreness and tightness. Just choose one or two gentle stretches or exercises to practice and practice it consistently for two weeks.
Featured Video: Tight Hip Flexor Symptoms
Conclusion
Advice for dealing with tight hip flexors: give your body the most range of motion that you can. Incorporate more activity into your daily routines, especially if your circumstances require you to be sitting for long amounts of time. By taking even just one minute a day to stand up, make some circles with your hips, and take a few stationary lunges, overtime will increase your flexibility and relieve tightness and pain.
About
Hillary
Hillary is a natural-born wanderer and wonderer. A digital nomad and pilgrim of the heart, she often feels herself a poster child of the Spiritual Millennial. As a writer, health coach and yoga instructor Read More..
Want to learn more about yoga to unlock your hip flexors? Click here to access our complete guide and start your journey to pain free movement today.
Best Hip Abductor Stretches to Instantly Improve Flexibility and Mobility
Strengthening and stretching the hips properly is a critical component of any exercise regime. The hips are truly a powerhouse of the body, not only bearing the weight of most of our activity, but also giving us the range of motion we need to do so.
How Posture and Pain Connect: Discover the Best Hip Abductor Stretches to Relieve Tension
The best hip abductor stretches can play a crucial role in relieving body tension that leads to discomfort in unexpected areas—like your head and neck. Often, we experience pain in one area of the body that actually stems from dysfunction somewhere else. This connection is especially true when it comes to posture and its widespread impact. If you suffer from frequent headaches, the root cause might surprise you. The culprit? Poor posture and weak hip stabilizers, including the hip abductors.
Understanding the Chain Reaction of Pain
What feels like a head problem often starts elsewhere. Take frequent headaches as an example. These are rarely isolated issues. There’s almost always an underlying cause. In many cases, it’s the forward-head posture that places continuous strain on the neck and jaw, building tension that translates into persistent headaches. The body functions as an interconnected system—and when one link weakens, the others compensate, often painfully.
One area that silently contributes to poor posture is the hip. The hip abductors, which stabilize the pelvis and support upright alignment, often become underused or tight. This imbalance leads to compensatory movements, increasing strain on the spine and neck. By incorporating the best hip abductor stretches into your routine, you help reset the posture chain and relieve the pressure.
Why Yoga Works: Healing Through Movement
Yoga is one of the most effective tools to correct posture and release stored tension. It strengthens weak muscles, elongates tight areas, and encourages body awareness. Research shows that when yoga is added to conventional treatments, it significantly reduces the intensity and frequency of migraines.
In particular, yoga stretches that focus on the hips, spine, and shoulders can correct misalignments that strain the head and neck. Incorporating the best hip abductor stretches into a yoga sequence can have an upstream effect on your posture and pain levels.
Personal Insight: How Habit Shifts Reveal the Pain Source
I grew up in a military family, took dance classes, and started practicing yoga in college—so I was trained early on to value good posture. But even with that foundation, it’s easy to slip. Whether it’s reading all day on vacation or staring down at my phone during long travel days, I notice immediate shifts in my posture and, consequently, tension in my neck and shoulders.
This tension often starts in the hips. When my hips tighten, my posture collapses, and the stress travels up. By adding the best hip abductor stretches into my daily routine, I bring my body back into balance and reduce overall discomfort.
Expert Validation: Science Supports Stretching for Posture
According to the American Council on Exercise, yoga supports better posture by massaging the skeletal system, maintaining bone mass, and releasing muscular tension. The hip abductors are key players in this system. When they are functioning properly, your posture becomes naturally upright and relaxed.
If you frequently experience headaches and shoulder pain, your posture might be trying to tell you something. Improving your posture with the best hip abductor stretches could unlock the relief you’ve been missing.
TRAINING TYPE: FLOW SEQUENCE
CATEGORY:YOGA
SUBCATEGORY:RECOVERY
PLANNED TIME:15 MIN
LEVEL:ALL LEVELS
PROPS:NONE
20 Minute Restorative Yoga Flow For Neck Pain and Headaches
This restorative flow for neck pain and headaches will cover a sequence of seven poses that will leave you feeling open and relieved in your neck and shoulders. These poses focus on opening through the upper back and neck in order to release tension and pain. These stretches can accommodate any level of practice from beginner to advanced yogi. This flow is perfect for relieving pain from poor posture, time spent over a desk or device, and residual soreness from other physical activities. For those suffering from chronic pain in the neck and shoulders, practicing this sequence daily will maximize the benefits of the postures. No props are needed for this sequence and it’s perfect for practicing anytime, anywhere!
Yoga For Neck and Shoulder Pain Infographic
Easy Pose – Sukhasana
Starting from an easy sitting posture, we’ll begin this practice by warming up the neck and shoulders with some gentle rolling movements. With the hands resting gently on the knees, raise the shoulders towards the ears and roll the shoulder blades down the back. Continue this movement while breathing into the space at the base of the neck and between the shoulders. After a few breaths, reverse the direction and continue the same movement in the forward direction.
From Easy Pose, make sure the spine is tall with heart over hips and head over heart. Breathe deeply from the base of the spine all the way to the crown of the head. Exhale and follow the nose down toward the chest. Inhale and follow the nose toward the sky. Exhale the nose back down toward the chest and continue the flow matching your breath with each movement allowing space to open in the back of the neck.Return the gaze to neutral, inhale. Exhale turn the gaze over the right shoulder. Inhale back to center, exhale look over the left shoulder. Continue inhaling back to center and exhaling over the shoulder for a few breaths.
Coming back to neutral in the center, inhale and exhale drop the right ear to the right shoulder. Inhale to center and exhale the left ear to the left shoulder. Continue this for a few breaths, making sure to focus the breath on expanding the space in the neck and tops of the shoulders.
Thread The Needle Pose – Parsva Balasana
Come into a table top position, perhaps taking a moment to move through a few cat/cows and when you’re ready, open the right hand up towards the sky allowing the gaze to follow and opening across the chest and through the back of the right shoulder. Exhale, return the right hand to the mat, palm spread wide. Inhale, repeat by opening on the left side. Exhale the left hand back to the mat. Inhale the right arm up, open through the chest.
Exhale, bring the right arm down and “thread” underneath the left arm as the hips sink back to heels. Let the right arm, shoulder and cheek rest against the mat. Breathe deeply here into the shoulder blades and neck, keeping the left arm active and palm wide. Breathe. On an inhale, unwind, exhale return to table top. Inhale the left arm up, exhale “thread” the left hand under the right arm and repeat on this side. After a few breaths, return to Table Top.
Rabbit Pose – Sasangasana
Come to a kneeling position with toes tucked under the glutes. Inhale and reach both hands behind the body to cup the heels with thumbs on the outside of the foot. Exhale the chin towards the chest and fold forward bringing the crown of the head to the floor with the forehead coming as close to the knees as comfortable. Inhale and lift the hips to the sky allowing the arms to extend. Breathe deeply into the back body, especially focusing on the thoracic spine. Be careful not to place too much weight on the head. Allow the legs to support the posture. Release the posture by lifting the head and rolling the torso up one vertebrae at a time.
Eagle Pose Variation – Garudasana
Return to sitting on the knees and heels. Inhale the arms wide into a T position, exhale and cross the arms in front of the chest, left arm over right. Bend the elbows and hook thumbs together allowing the forearms to connect. Lift the hands toward the sky, feeling the stretch in the back of the neck and shoulders. Breathe here. Uncross the arms, inhaling again to a T shape and exhale cross the arms again, this time bringing the right arm over the left. Hook the thumbs, raise the hands, and breathe again, creating space with each inhalation and finding release and ease with each exhalation. After a few breaths, release the posture.
Half Lord of the Fishes Pose – Ardha Matsyendrasana
Come into a seated position, sit bones on the floor and legs extended in front of the body. Flex the feet and acctivate through both legs. Make the spine tall. Bend the right knee bringing the right heel parallel with the left knee. Inhale the right arm over head and exhale bring it behind the body, pressing the palm into the ground and the arm against the back body for support. Inhale the left arm over head and exhale, bend the left elbow as it crosses over to the outside of the right knee. Tuck the navel into the spine and twist from the lower abdomen. Press the elbow and knee into each other and turn the gaze over the right shoulder.
With each inhale think about lifting the spine, with each exhale think about opening through the chest and right shoulder. On an exhale, unwind releasing the posture. Change the legs, extending the right and bending the left. Repeat the posture on the left side.
Camel Pose – Ustrasana
Come into Easy Pose. Inhale both arms above the head and exhale bring fingertips to tops of shoulders. Ground through sit bones, open through chest. Inhale and with the exhale quickly twist the whole torso and gaze to the right. Inhale quickly unwinding to center and carry the movement across on the exhale, twisting to the left. Continue this movement for twenty exhales, maintaining momentum and the same pace for each breath.
The focus of the breath should be on the exhale, the inhale will occur naturally as the body unwinds back to center. This breathing practice helps open the whole spine and move breath and prana throughout the entire torso.
Camel Pose – Ustrasana
Kundalini Pranayama – Side Twists
Come into Easy Pose. Inhale both arms above the head and exhale bring fingertips to tops of shoulders. Ground through sit bones, open through chest. Inhale and with the exhale quickly twist the whole torso and gaze to the right. Inhale quickly unwinding to center and carry the movement across on the exhale, twisting to the left. Continue this movement for twenty exhales, maintaining momentum and the same pace for each breath.
The focus of the breath should be on the exhale, the inhale will occur naturally as the body unwinds back to center. This breathing practice helps open the whole spine and move breath and prana throughout the entire torso.
Featured Video: 7 Neck and Shoulder Yoga Poses For Instant Pain Relief
Yoga for Neck and Shoulder Pain Relief
To begin reconditioning the body with better posture, start by finding more mobility in the neck and shoulders. This helps loosen up the muscles, thus relieving tension, and with consistency of practice, will lead to a greater range of motion. Having more range of motion and strength in the muscles are keys to creating good posture to support the body. Before jumping into any deep stretches in this area, start by working out a little tension and creating a little space with simple warm ups. An easy way to warm up the area is to take a minute or two doing some gentle neck and shoulder rolls. Take semi-circles with the neck, leading the motion from the tip of your nose in order to protect the neck from hyper-extension. Hunch the shoulders up and down and alternate rolling them forward and then backward. Keep in mind that you can always incorporate this into postures like Cat and Cow, Downward Facing Dog, Reverse Prayer, or any stabilized posture that allows you to safely find organic movement in your neck and shoulders. If you spend many hours at a desk, computer, in a vehicle, etc., try giving yourself some moments throughout the day to open this space a little. It will relieve tension and allow the body to release stress and pain.
Yoga for Upper Back and Neck Pain
For upper back and neck pain, especially pain coming from posture, finding that happy balance between flexibility and strength is key. There are many postures that give us the option to explore these benefits in a way that meets us wherever we are in our practice, whether we’ve just begun our first yoga classes, or we’re half-way to enlightenment. Cobra and Child’s Pose are two of my favorites that offer this range of depth.Cobra Pose, Bhujangasana, is practiced on the floor, so right from the get-go we have the benefit of the ground right below us supporting this posture. (Remember Newton’s third law and don’t forget to use the energy of the ground in your postures!) The movement of Cobra stretches from the lower abs and hip flexors to the chest, the upper back and into the neck. By pushing into the earth and keeping the elbows tucked close to the body, we build strength in the muscles of our arms, back and chest and shoulders. This “baby backbend” is so good for opening and strengthening the upper body.Counter your Cobra Pose with restorative Child’s Pose, Balasana. This is a very gentle, semi-inversion that lowers the heart rate and calms the nervous system, allowing the mind to become calm and the body to relax. Not a bad complement to relieving painful tension. For an active experience in this posture, keep the arms lifted away from the ground and breath deeply, extending from the tailbone to the crown of the head.
Healing Your Neck and Shoulders After Pain
Exploring modifications of poses is one of the best ways to bring more healing into your yoga practice. There is so much respect and wisdom that comes from honoring the body where it is, rather than forcing it to where it “should” be. Don’t be afraid to have props on standby when you go to a studio class. If you don’t have blocks, bolsters and straps at home, get creative with books, blankets and scarves! Matsyasana, Fish Pose, is a beautiful and highly beneficial posture for neck and shoulder pain. None of this is lost when practiced with the support of a block or two. Placing a block between the space of the shoulder blades allows the chest to lift and the shoulders to stretch and open. Support from the block alleviates stress in the neck if your muscles are not yet strong enough to hold the backward extension on their own. If you are practicing with a migraine or neck injury, definitely support the head with a block, rather than dropping it entirely to the floor.This supported Fish Pose opens the lumbar, thoracic and cervical spine, conditioning the body for better posture. It also opens the chest, the heart space, physically and energetically, which is so critical for the process of healing. This healing posture gets its name from the incarnation of Lord Vishnu as the fish, Matsya, who came to Earth during a time of extreme corruption. A flood was filling the planet, purging it from the excessive evil. In order to preserve goodness and balance, Matsya saved the sages of the earth, protecting their wisdom and knowledge for new generations.As you practice this pose and breathe space and healing into your body, connect to the innate wisdom of your body as a self-healing machine and the wisdom that has been carried through generations of yogic tradition.
How Yoga Can Help Shoulder Blade Pain
For relieving pain and tension in the upper body, Child’s Pose is an anytime, anywhere go-to pose. If you want to take it a little further to get deeper into your shoulder blades, thread the needle pose is a great variation to practice. The restorative nature of this posture is already great for relaxing the parasympathetic nervous system, allowing both the mind and body to find stillness. The twist of the torso and extension of the raised arm helps you to find a deeper stretch in the back of the shoulder blade, the chest and in the neck. From the rotation you can also feel the release of some tension in the lower back. Vinyasa teacher Jason Crandell writes, “Yoga is the perfect opportunity to be curious about who you are.” I love that and couldn’t agree more. I encourage you to see your practice as an opportunity to explore who you are and who you could be, and practice letting go of any “should bes”. Allow your healing process to unfold without force, to blossom. Be curious in your poses, in your mind and with your spirit. May you be well!
Conclusion
Finish the practice by coming into Savasana and allow the body to relax completely, letting go of control of the breath. Hopefully this flow has helped to release any excess tension of stress that’s been held in the neck and shoulders.
The chest and upper back should feel much more open and the posture of the torso overall should feel more lifted and straightened. Try practicing these postures every day to relieve stiffness and pain and to improve your posture.
About
Hillary
Hillary is a natural-born wanderer and wonderer. A digital nomad and pilgrim of the heart, she often feels herself a poster child of the Spiritual Millennial. As a writer, health coach and yoga instructor Read More..
Ready to take your healing further? Click here to access yoga courses for for abductor stretching and start your journey toward lasting wellness today.
The Six Best Hip Stretches For Tight Hips
Hip-hip-hooray! This hip-opening sequence has been created specifically for tight hips. It targets all the areas of the hips so you will definitely get the most bang for your stretching buck!

Often, what we feel in one area of our body will result in sensations elsewhere in the body. Obviously, this makes sense, since the body is a machine of many parts working together as one, but as we all know, figuring out which sensation is the source of another is not often so obvious. Frequent headaches, for example, can seem like an isolated problem of its own, but, in fact, almost never is. No smoke without fire, right? One of the most common causes of frequent headaches is simply poor posture. When the head is constantly pulled forward, it strains the neck and the jaw causing headache-inducing tension. As you can imagine, or perhaps already know, yoga can be truly magical for improving posture. Consequently, it stands to improve headaches and migraines as well. Researchers in this study concluded that in addition to conventional treatment, yoga therapy notably helped patients to reduce the frequency and intensity of migraines.Personally, I come from a military family, grew up taking dance classes and began my yoga practice early in college, so good posture has been reinforced throughout my entire life. I’m very lucky that it’s something my body has learned to do well, but for sure there are times when it forgets. This happens when something out of the ordinary is changing my regular habits, like spending lots of time reading on vacation, or too much time looking down at my phone/book/journal on a day of traveling from flight to flight. In these instances it’s extremely obvious for me that the pain and tension I begin to feel is coming from extended time in these hunched posturesThe American Council on Exercise praises yoga’s effectiveness for improving posture, explaining that the practice “massages the skeletal system, which supports bone mass and growth, while reducing tension in the supporting muscles and tendons.”If you find yourself suffering from frequent headaches, especially if you often have pain or tension in your neck and shoulders, see how your posture is looking these days. It could be time to bring a new intention to your yoga practice and get your posture into a proud and healthy position.
TRAINING TYPE: FLOW SEQUENCE
CATEGORY:YOGA
SUBCATEGORY:RECOVERY
PLANNED TIME:15 MIN
LEVEL:ALL LEVELS
PROPS:NONE
20 Minute Restorative Yoga Flow For Neck Pain and Headaches
This restorative flow for neck pain and headaches will cover a sequence of seven poses that will leave you feeling open and relieved in your neck and shoulders. These poses focus on opening through the upper back and neck in order to release tension and pain. These stretches can accommodate any level of practice from beginner to advanced yogi. This flow is perfect for relieving pain from poor posture, time spent over a desk or device, and residual soreness from other physical activities. For those suffering from chronic pain in the neck and shoulders, practicing this sequence daily will maximize the benefits of the postures. No props are needed for this sequence and it’s perfect for practicing anytime, anywhere!
Yoga For Neck and Shoulder Pain Infographic
Easy Pose – Sukhasana
Starting from an easy sitting posture, we’ll begin this practice by warming up the neck and shoulders with some gentle rolling movements. With the hands resting gently on the knees, raise the shoulders towards the ears and roll the shoulder blades down the back. Continue this movement while breathing into the space at the base of the neck and between the shoulders. After a few breaths, reverse the direction and continue the same movement in the forward direction.
From Easy Pose, make sure the spine is tall with heart over hips and head over heart. Breathe deeply from the base of the spine all the way to the crown of the head. Exhale and follow the nose down toward the chest. Inhale and follow the nose toward the sky. Exhale the nose back down toward the chest and continue the flow matching your breath with each movement allowing space to open in the back of the neck.Return the gaze to neutral, inhale. Exhale turn the gaze over the right shoulder. Inhale back to center, exhale look over the left shoulder. Continue inhaling back to center and exhaling over the shoulder for a few breaths.
Coming back to neutral in the center, inhale and exhale drop the right ear to the right shoulder. Inhale to center and exhale the left ear to the left shoulder. Continue this for a few breaths, making sure to focus the breath on expanding the space in the neck and tops of the shoulders.
Thread The Needle Pose – Parsva Balasana
Come into a table top position, perhaps taking a moment to move through a few cat/cows and when you’re ready, open the right hand up towards the sky allowing the gaze to follow and opening across the chest and through the back of the right shoulder. Exhale, return the right hand to the mat, palm spread wide. Inhale, repeat by opening on the left side. Exhale the left hand back to the mat. Inhale the right arm up, open through the chest.
Exhale, bring the right arm down and “thread” underneath the left arm as the hips sink back to heels. Let the right arm, shoulder and cheek rest against the mat. Breathe deeply here into the shoulder blades and neck, keeping the left arm active and palm wide. Breathe. On an inhale, unwind, exhale return to table top. Inhale the left arm up, exhale “thread” the left hand under the right arm and repeat on this side. After a few breaths, return to Table Top.
Rabbit Pose – Sasangasana
Come to a kneeling position with toes tucked under the glutes. Inhale and reach both hands behind the body to cup the heels with thumbs on the outside of the foot. Exhale the chin towards the chest and fold forward bringing the crown of the head to the floor with the forehead coming as close to the knees as comfortable. Inhale and lift the hips to the sky allowing the arms to extend. Breathe deeply into the back body, especially focusing on the thoracic spine. Be careful not to place too much weight on the head. Allow the legs to support the posture. Release the posture by lifting the head and rolling the torso up one vertebrae at a time.
Eagle Pose Variation – Garudasana
Return to sitting on the knees and heels. Inhale the arms wide into a T position, exhale and cross the arms in front of the chest, left arm over right. Bend the elbows and hook thumbs together allowing the forearms to connect. Lift the hands toward the sky, feeling the stretch in the back of the neck and shoulders. Breathe here. Uncross the arms, inhaling again to a T shape and exhale cross the arms again, this time bringing the right arm over the left. Hook the thumbs, raise the hands, and breathe again, creating space with each inhalation and finding release and ease with each exhalation. After a few breaths, release the posture.
Half Lord of the Fishes Pose – Ardha Matsyendrasana
Come into a seated position, sit bones on the floor and legs extended in front of the body. Flex the feet and acctivate through both legs. Make the spine tall. Bend the right knee bringing the right heel parallel with the left knee. Inhale the right arm over head and exhale bring it behind the body, pressing the palm into the ground and the arm against the back body for support. Inhale the left arm over head and exhale, bend the left elbow as it crosses over to the outside of the right knee. Tuck the navel into the spine and twist from the lower abdomen. Press the elbow and knee into each other and turn the gaze over the right shoulder.
With each inhale think about lifting the spine, with each exhale think about opening through the chest and right shoulder. On an exhale, unwind releasing the posture. Change the legs, extending the right and bending the left. Repeat the posture on the left side.
Camel Pose – Ustrasana
Come into Easy Pose. Inhale both arms above the head and exhale bring fingertips to tops of shoulders. Ground through sit bones, open through chest. Inhale and with the exhale quickly twist the whole torso and gaze to the right. Inhale quickly unwinding to center and carry the movement across on the exhale, twisting to the left. Continue this movement for twenty exhales, maintaining momentum and the same pace for each breath.
The focus of the breath should be on the exhale, the inhale will occur naturally as the body unwinds back to center. This breathing practice helps open the whole spine and move breath and prana throughout the entire torso.
Camel Pose – Ustrasana
Kundalini Pranayama – Side Twists
Come into Easy Pose. Inhale both arms above the head and exhale bring fingertips to tops of shoulders. Ground through sit bones, open through chest. Inhale and with the exhale quickly twist the whole torso and gaze to the right. Inhale quickly unwinding to center and carry the movement across on the exhale, twisting to the left. Continue this movement for twenty exhales, maintaining momentum and the same pace for each breath.
The focus of the breath should be on the exhale, the inhale will occur naturally as the body unwinds back to center. This breathing practice helps open the whole spine and move breath and prana throughout the entire torso.
Featured Video: 7 Neck and Shoulder Yoga Poses For Instant Pain Relief
Yoga for Neck and Shoulder Pain Relief
To begin reconditioning the body with better posture, start by finding more mobility in the neck and shoulders. This helps loosen up the muscles, thus relieving tension, and with consistency of practice, will lead to a greater range of motion. Having more range of motion and strength in the muscles are keys to creating good posture to support the body. Before jumping into any deep stretches in this area, start by working out a little tension and creating a little space with simple warm ups. An easy way to warm up the area is to take a minute or two doing some gentle neck and shoulder rolls. Take semi-circles with the neck, leading the motion from the tip of your nose in order to protect the neck from hyper-extension. Hunch the shoulders up and down and alternate rolling them forward and then backward. Keep in mind that you can always incorporate this into postures like Cat and Cow, Downward Facing Dog, Reverse Prayer, or any stabilized posture that allows you to safely find organic movement in your neck and shoulders. If you spend many hours at a desk, computer, in a vehicle, etc., try giving yourself some moments throughout the day to open this space a little. It will relieve tension and allow the body to release stress and pain.
Yoga for Upper Back and Neck Pain
For upper back and neck pain, especially pain coming from posture, finding that happy balance between flexibility and strength is key. There are many postures that give us the option to explore these benefits in a way that meets us wherever we are in our practice, whether we’ve just begun our first yoga classes, or we’re half-way to enlightenment. Cobra and Child’s Pose are two of my favorites that offer this range of depth.Cobra Pose, Bhujangasana, is practiced on the floor, so right from the get-go we have the benefit of the ground right below us supporting this posture. (Remember Newton’s third law and don’t forget to use the energy of the ground in your postures!) The movement of Cobra stretches from the lower abs and hip flexors to the chest, the upper back and into the neck. By pushing into the earth and keeping the elbows tucked close to the body, we build strength in the muscles of our arms, back and chest and shoulders. This “baby backbend” is so good for opening and strengthening the upper body.Counter your Cobra Pose with restorative Child’s Pose, Balasana. This is a very gentle, semi-inversion that lowers the heart rate and calms the nervous system, allowing the mind to become calm and the body to relax. Not a bad complement to relieving painful tension. For an active experience in this posture, keep the arms lifted away from the ground and breath deeply, extending from the tailbone to the crown of the head.
Healing Your Neck and Shoulders After Pain
Exploring modifications of poses is one of the best ways to bring more healing into your yoga practice. There is so much respect and wisdom that comes from honoring the body where it is, rather than forcing it to where it “should” be. Don’t be afraid to have props on standby when you go to a studio class. If you don’t have blocks, bolsters and straps at home, get creative with books, blankets and scarves! Matsyasana, Fish Pose, is a beautiful and highly beneficial posture for neck and shoulder pain. None of this is lost when practiced with the support of a block or two. Placing a block between the space of the shoulder blades allows the chest to lift and the shoulders to stretch and open. Support from the block alleviates stress in the neck if your muscles are not yet strong enough to hold the backward extension on their own. If you are practicing with a migraine or neck injury, definitely support the head with a block, rather than dropping it entirely to the floor.This supported Fish Pose opens the lumbar, thoracic and cervical spine, conditioning the body for better posture. It also opens the chest, the heart space, physically and energetically, which is so critical for the process of healing. This healing posture gets its name from the incarnation of Lord Vishnu as the fish, Matsya, who came to Earth during a time of extreme corruption. A flood was filling the planet, purging it from the excessive evil. In order to preserve goodness and balance, Matsya saved the sages of the earth, protecting their wisdom and knowledge for new generations.As you practice this pose and breathe space and healing into your body, connect to the innate wisdom of your body as a self-healing machine and the wisdom that has been carried through generations of yogic tradition.
How Yoga Can Help Shoulder Blade Pain
For relieving pain and tension in the upper body, Child’s Pose is an anytime, anywhere go-to pose. If you want to take it a little further to get deeper into your shoulder blades, thread the needle pose is a great variation to practice.The restorative nature of this posture is already great for relaxing the parasympathetic nervous system, allowing both the mind and body to find stillness. The twist of the torso and extension of the raised arm helps you to find a deeper stretch in the back of the shoulder blade, the chest and in the neck. From the rotation you can also feel the release of some tension in the lower back. Vinyasa teacher Jason Crandell writes, “Yoga is the perfect opportunity to be curious about who you are.” I love that and couldn’t agree more. I encourage you to see your practice as an opportunity to explore who you are and who you could be, and practice letting go of any “should bes”. Allow your healing process to unfold without force, to blossom. Be curious in your poses, in your mind and with your spirit. May you be well!
Conclusion
Finish the practice by coming into Savasana and allow the body to relax completely, letting go of control of the breath. Hopefully this flow has helped to release any excess tension of stress that’s been held in the neck and shoulders.
The chest and upper back should feel much more open and the posture of the torso overall should feel more lifted and straightened. Try practicing these postures every day to relieve stiffness and pain and to improve your posture.
About
Hillary
Hillary is a natural-born wanderer and wonderer. A digital nomad and pilgrim of the heart, she often feels herself a poster child of the Spiritual Millennial. As a writer, health coach and yoga instructor Read More..
Yoga For Tight Hip Flexors: 5 Stretches for Release and Recovery
When we push for immediate results and instant healing, we never inhabit the important in-between phase, which is where much of the learning and growth actually happen.” ― Bo Forbes, Yoga for Emotional Balance

The Power of Patience: Yoga for Tight Hip Flexors and Emotional Healing
Yoga for tight hip flexors is more than a physical remedy—it’s a lesson in patience and presence. As Bo Forbes says in Yoga for Emotional Balance, “When we push for immediate results and instant healing, we never inhabit the important in-between phase, which is where much of the learning and growth actually happen.” This truth especially resonates when dealing with physical discomfort like tight hip flexors. It’s tempting to rush recovery, overtrain, or force flexibility, but true healing requires us to slow down and embrace the process.
We’ve all been there: pushing ourselves to bounce back quickly, believing more intensity will speed up progress. But in yoga for tight hip flexors, that approach often backfires. Instead of progress, we risk setbacks. I remember a quote from high school that said, “If you don’t have time to do it right, you must have time to do it again.” This holds true in healing just as much as in academics or work.
Rethinking Recovery: Respecting the Process
When we rush through physical recovery, we often make mistakes that require more time and attention to fix. With yoga for tight hip flexors, forcing deep stretches or skipping warmups can lead to strain or re-injury. Like nature, we must embrace patience: “Nature’s wisdom is her patience; she doesn’t hurry and still everything is accomplished.”
The hip flexors, a group of muscles crucial for walking, posture, and stability, tend to hold a lot of tension and emotional stress. Practicing yoga for tight hip flexors helps us unlock not only physical tightness but also stored emotional energy. Healing happens when we slow down, breathe into discomfort, and respect our body’s timeline.
Mindful Practice: Gratitude and Growth in Every Pose
Every stretch and every breath is an opportunity to listen to your body. Yoga teaches us to be present, not perfect. When practicing yoga for tight hip flexors, remember that each pose is a step in your healing journey. Create space for the process. Allow yourself to feel the stretch, the release, and the subtle shifts happening within.
Honor your body. Thank it for showing you where attention is needed. Acknowledge the discomfort not as a setback, but as a signal. Practicing yoga for tight hip flexors with patience and presence transforms frustration into gratitude. The lessons we gain from our challenges are gifts in disguise—opportunities to know ourselves more deeply and prepare for future resilience.
TRAINING TYPE: FLOW SEQUENCE
CATEGORY:YOGA
SUBCATEGORY:RECOVERY
PLANNED TIME:10-15 MINUTES
LEVEL:ALL LEVELS
PROPS:NONE
5 Stretches For Sore Hips
Before we jump into our stretches for sore hips, please be sure that you’ve warmed up the body and have your blood circulating nicely. Often times soreness and inflammation are occurring because of a lack of oxygen flowing, so get it flowing by taking a few sun salutations or maybe doing a little dance before getting started. These postures are great for a restorative yin practice, so if you decide to hold these postures for an extended time, please be sure the muscles are quite warm and practice in a warm space. We’re here today to relieve soreness, not create more, so practice with loving awareness!
Stretches For Sore Hips Infographic

Instructional Stretches For Sore Hips
Low Lunge Pose – Anjaneyasana
The first posture I’ll recommend is a simple Low Lunge Pose, also called “Runner’s Lunge”. This posture is great for opening the front of the hips and finding more range of motion in the hip joints. It can be modified for any level of flexibility. By extending the back foot further away from the body you can deepen the stretch, or, bring the back knee closer to the body for a less intense stretch. However deep you decide to go, be sure to keep the front knee over the front ankle. Press into the foot and extended long through the arms, fingertips and tailbone reaching in opposite directions.

Garland Pose – Malasana
For opening the outside of the hips and groin, even the ankles, Garland Pose is a simple, yet effective pose. Garland is essentially a squat. You can come into it by standing with the feet a little wider than the hips, then squat down, bringing the tailbone and heels as close to the ground as possible. With hands in Anjali mudra, press the elbows and knees against each other while bringing the pelvis forward. Try to hold this for ten breaths, really pressing into the feet and pulling up energy from the earth.

Bound Angle Pose – Baddha Konasana
Come to a kneeling position with toes tucked under the glutes. Inhale and reach both hands behind the body to cup the heels with thumbs on the outside of the foot. Exhale the chin towards the chest and fold forward bringing the crown of the head to the floor with the forehead coming as close to the knees as comfortable. Inhale and lift the hips to the sky allowing the arms to extend. Breathe deeply into the back body, especially focusing on the thoracic spine. Be careful not to place too much weight on the head. Allow the legs to support the posture. Release the posture by lifting the head and rolling the torso up one vertebrae at a time.

Cow Face Pose – Gomukhasana
Cow Face Pose is our fourth posture and it’s one of the best for relieving soreness and opening the hips. We want to try to align the knees with the sternum while maintaining the sit bones against the mat. It may be enough of a stretch for you to simply stay seated with the spine erect, but if you want to get a deeper stretch in the hips, you have the option to fold the body forward and rest the belly on the knees.
Supine Pigeon Pose – Supta Kapotasana
Supine Pigeon Pose is a great hip opener. To get into the pose start in a seated position, lower the body down, leave the knees bend and the feet flat on the ground, lift the right leg and cross the ankle over the left knee. Here you are in figure four pose. Now raise the left foot off the ground, bringing the hands behind the left thigh and pull the left thigh gently into the chest. You feel a nice stretch on the outside of the right hip, on the outside of the right glute and even along the side of the right leg. To get deeper into the stretch you can lift the head and the chest towards the knee and bring the knee towards the chest. Always keep the back of the body flat on the mat. Repeat on the other side

Featured Video: 5 Amazing Yoga Stretches For Sore Hips
Yoga for Tight Hip Flexors – How to Release Tight Hips
In this study by Laurentian University in Ontario, researchers compared yoga to static stretching for increasing range of motion in the hip and shoulder and found yoga to be more effective overall. Well, it may seem a little obvious that these would be the results considering the very word static implies a lack of motion, which is the opposite of what this study aimed to accomplish with its participants.
So how can you use yoga to create more movement and release tight hips? Keep things flowing! Although going into deep stretches with tight areas of the body seems like the obvious solution for releasing tension, the fact is that this often adds fuel to the fire when done without proper preparation. Warming up is critical to deep, static stretching because it increases circulation, moving blood and thus carrying oxygen to the muscles. This is what allows muscles to relax and prepares the muscles for safe and effective stretching. I’m a sucker for deep, juicy stretching and most of the population would benefit to do a little more of it, but you better believe I’ll always be preaching about the power of a proper warm-up. Don’t leave OM without it!
So, what can you do to get warmed up before deep stretching? Personally, I like putting on a good jam and busting out some moves, no lie, but that’s just me. It’s truly a fantastic warm-up that only takes about three and a half minutes (my estimate of the length of the average song). But, if you want to stay a little more traditional in your practice, get into a good habit of starting each day and each practice with a few rounds of sun salutations. Take a Hatha variation of sun salutations, taking knee-down lunges for a crescent warrior that is a bit more stretching and stabilizing than strengthening. Move through the sun salutations with a continuous flow, combining your breath with each movement, avoiding any temptation to linger your stretching. Warm up the body well to get the most release in the hips for your practice!
Hip Stretches for Seniors
One study reviewed the prevalence of pain in adults between 60 and 90 years old and found that hip pain was reported among 23 percent, with women making up a greater portion of this percentage. Finding ways to stay mobile and reduce dependency on pain relievers alone can be a challenge for anyone, especially aging seniors. Chair yoga is a solution increasingly on the rise Florida Atlantic University researchers found chair yoga to be effective in reducing pain and its interference with daily activities for seniors. But it’s not just for seniors! Chair yoga still offers the range of challenge and restoration of any yoga practice and is perfect for any person who wants a supporting alternative to a conventional practice.For yogis looking for an effective stretch in the hips with extra support, taking a variation of pigeon pose is a great option. To practice this chair pose, place a pillow on the seat of the chair to cushion the knee. Stand facing the seat of the chair, move the foot of your extended leg back a little for a supportive stance, with hands on the chair back, bring one leg onto the seat of the chair for modified pigeon. Use your hands on the chair back and the stance of your extended leg to support the stretch. Try to hold this pose for five full breaths, breathing into the hip spaces, then repeat on the opposite side.
Tight Hip Abductors Stretches
For tight hip abductors, a figure four pose is a pretty intuitive stretch to release tension in that space between the hip and leg joint. Sometimes this is referred to as reclined pigeon pose, other yogis will name it a variation of thread the needle. For a more restorative posture, try supine spinal twist and adjust the height of your top knee accordingly to find the best stretch for your body. To open more through the shoulders and back of the body, keep the arms wide in a T shape.
For a deeper stretch in the hip, bring the opposite hand to the top leg and gently pull the leg closer toward the ground. For relief at your desk, or in any chair, cross one leg over the other in a figure four shape, bring the opposite hand to the outside of the crossed thigh and twist the torso and chest in the direction of the top leg. Try to keep the hip points forward and turn the gaze over the shoulder.
Conclusion on yoga for tight hip flexors
When the hips are tight, tension can show up in seemingly unrelated areas of the body; the back, the legs, even a headache can be attributed to what is going on in the hips, so keep them fluid and stretch them regularly!
Hopefully, if you’ve followed along through this instruction, you’re already feeling some relief from those sore hips. If you find yourself regularly suffering from pain in the hip area, try incorporating some of these stretches into your practice, or in any stolen moments of your day. Regularly practicing even just one of these poses will make a huge difference, helping you create more space and flexibility in the hips, consequently relieving any held pain and soreness.
Remember to have the body very warmed-up before getting into these deep poses, especially if you want to go through all of the poses at once. For today, start where you are, with what feels good, and keep showing up everyday to continue your journey discovering your body.
About
Hillary
Hillary is a natural-born wanderer and wonderer. A digital nomad and pilgrim of the heart, she often feels herself a poster child of the Spiritual Millennial. As a writer, health coach and yoga instructor Read More..