Beginner Yoga Sequence For Lower Back Pain

I remember a time when I was backpacking in Cambodia and somehow I had pulled a muscle in my back. I couldn’t even lie down straight in bed, let alone explore the exciting new world I was in, without there being excruciating pain.

I remember a time when I was backpacking in Cambodia and somehow I had pulled a muscle in my back. I couldn’t even lie down straight in bed, let alone explore the exciting new world I was in, without there being excruciating pain. Whenever my back is suffering, I get onto the floor and move through some of the most simple yoga poses out there. I move slowly and feel instant satisfaction and release when on the lucky occasion my back cracks and softly opens up.

Yoga is one of the most effective and natural tools that we have at our disposal for treating and preventing back issues and if you have experienced back pain, you know just how debilitating it can be. It can make even the most simple tasks impossible and will have you reaching for over the counter drugs quite quickly, just so you can manage your everyday life.

A regular yoga practice will allow the back and the spine to become strong and resilient over time, but it can also be used as a tool to provide pain relief in time of crisis if done mindfully. When I couldn’t even find relief in lying in bed, I was so grateful that I had a yoga background to support me.

childs pose vector

TRAINING TYPE: FLOW SEQUENCE

CATEGORY:YOGA

SUBCATEGORY:BEGINNER YOGA

 PLANNED TIME:10-15 MINUTES 

LEVEL:BEGINNER  

PROPS:BLOCK

What are the best beginner yoga poses for lower back pain?

​ 

  • Extended Child’s Pose – Balasana
  • Downward Facing Dog – Adho Mukha Svanasana
  • One-Legged King Pigeon Pose forward bend variation – Eka Pada Rajakapotasana
  • Sphinx Pose – Salamba Bhujangasana
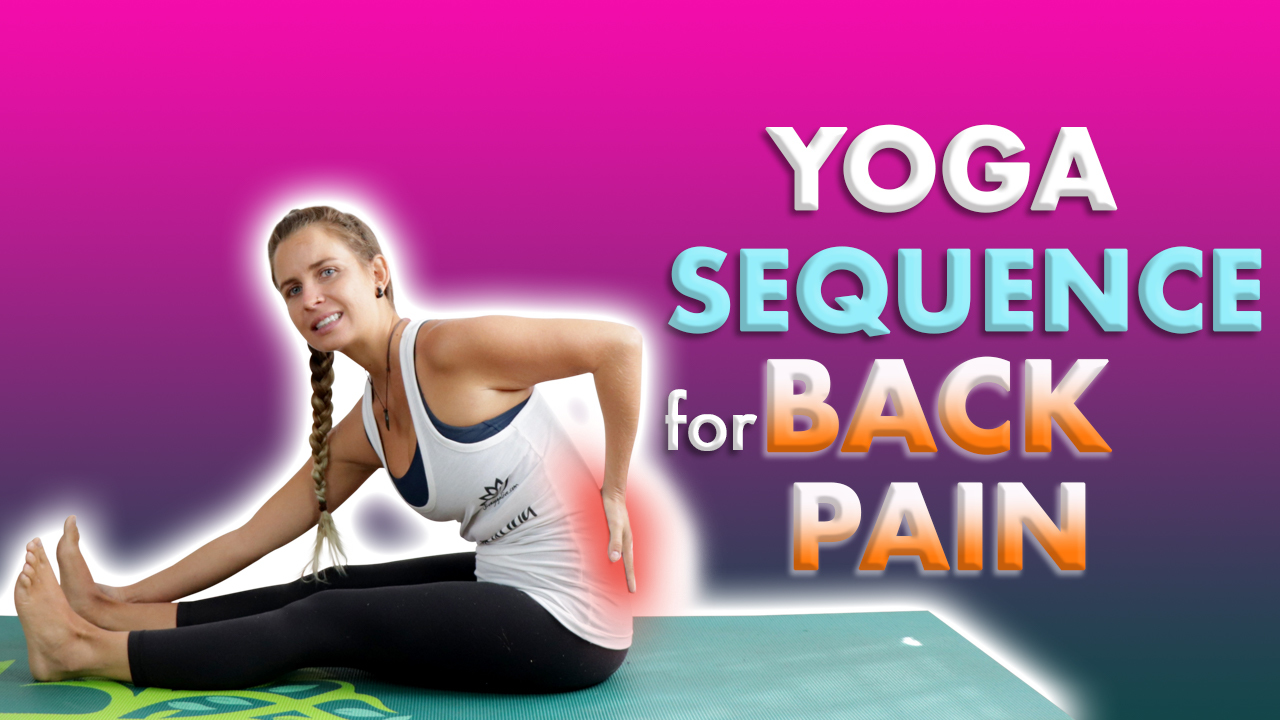
  • Easy Beginner Yoga Sequence For Lower Back Pain

    You will be introduced to a beginner yoga sequence for lower back pain. Grab a block or a book if you have one handy so there is the option to take modifications and for a little extra support. Back pain is often caused by tightness in other areas of the body such as the hips, which means it is essential that we work on the whole body, making sure to move with caution and care. Listening to the body when working with back pain is key! 

    Keep in mind this sequence is not about pushing the body, instead we are wanting to move with caution and respect in a way that is therapeutic and conducive to healing. So it’s important that we work to open up and release stagnant energies in the whole body.

    Beginner Yoga For Lower Back Pain Sequence Infographic

    beginner yoga for lower back pain infographic

    Extended Child’s Pose – Balasana

    Take the knees as wide as the mat and come down into an Extended Child’s Pose. A gentle way to elongate the spine, stretching it from tailbone right through to the crown of the head. Allow the forehead to come down to the mat and breathe into the pose, sending the breath into the back of the body, into the kidneys.

    This pose is the perfect place to take rest and is available at all times during your practice. Think of it as your home base. It’s is restorative and relaxing but also offers a gentle stretch to the whole spinal column.

    extended child pose

    Downward Facing Dog – Adho Mukha Svanasana

    Pushing back next into Downward Facing Dog, by tucking the toes and pushing into the palms, sending the hips and tailbone up. Take your time here to pedal out the legs, bending one knee and then the other.

     When you think about inversions, you typically think of the Headstand and Shoulder Stand, but Downward Facing Dog also brings the head below the hips, making it a gentle and more easily available inversion for the body. It strengthens the chest, arms, wrists and core, making it a great preparatory pose for those more advanced balances.  

    downward facing dog pose

    One-Legged King Pigeon Pose forward bend variation – Eka Pada Rajakapotasana

    Take the right knee and place it down behind the right wrist, and walk the back leg down along the mat, top of the foot resting down. Aim to have the right shin parallel with the top edge of the mat, or in towards the groin. Come onto the fingertips and lengthen the spine up. Exhale, bring the torso down, coming to rest on the forearms. To go deeper, bring the forehead down to the earth. There is the option here to slide the block underneath the hips to make the square.

    Use the hands and arms to walk the torso back up, lift the back knee and press into the palms and push back into Downward Facing Dog. Take One-Legged King Pigeon Pose forward bend variation to the other side, making sure the block is handy for support.

     We all hold a lot of tension in the hips, whether that be from other athletic activities, sitting at a desk or as a result of high stress, and this pose provides a powerful release to this area. It can feel extremely intense, but at the same time deeply satisfying. Use the breath to help drop you deeper into this pose over time.

    one legged king pigeon pose - forward bend variation

    Sphinx Pose – Salamba Bhujangasana

    Transitioning down onto the belly next so you can move into Sphinx Pose. Press the forearms and palms down into the mat, making sure that the elbows are in line with the shoulders. As we press down into the earth we can work to drag the heart forward, opening the chest and at the same time creating a healthy compression in the lower back.

    Sphinx Pose is one of the most therapeutic backbends you can move through when working with low back pain. It’s very gentle, but very rewarding, especially is practiced with consistency. It lengthens the abdominal muscles and stretches the spine, all whilst opening the shoulders and the chest.

    sphinx

    Featured Video: Beginner Yoga For Lower Back Pain

    Yoga for Lower Back Pain and Sciatica

    Sciatica is the experience of tenderness or pain anywhere along the Sciatic nerve, a nerve which runs from the spinal cord, down the leg and into the foot. We house two of these nerves, one in each leg. Studies show that lower back pain is one of the most common causes of limited activity in people under the age of 45 and the second biggest reason that people are making doctor’s appointments! One review on Trajectories of Low Back Pain (2013), indicates that between 25-80% of low back pain patients will experience some form of recurrent back problem in the following year.

    The Journal of Neurosurgery: Spine (2005), claims that there is a 40% probability that each of us will experience Sciatica over the course of a lifetime and often we will opt for treatment in the form of creams and injections. However, yoga can provide a more natural way to soothe, as opposed to these over the counter drugs or painful needles.

    Saucha, one of our founders here at Jivayogalive was recently bed bound with excruciating pain, unable to walk or to sit without immense suffering (from clocking way too many hours hunched over the computer, working too hard if you ask me!).

    He was quickly diagnosed with sciatica and what did the doctor order? Yoga. Of course. Lol. He was directed to perform a series of very simple and very accessible poses daily and in a matter of days he was up and walking again, and of course,  back at the computer working way too hard.

    3yoga poses that target the specific areas for Sciatic pain

    Cow Face Pose variation – Gomukhasana In this variation you want to extend the bottom leg straight. This is often a tricky pose for beginners, so having a blanket underneath the hips will help tilt the pelvis forward and make it a little more accessible.

    Cow Face Pose is a great way to internally rotate the thigh bones which stretches into the hips, which will provide relief along the sciatic nerve. There is the option to lean the torso down over the knees to deepen the stretch.

    One-Legged King Pigeon Pose forward bend variation – Eka Pada Rajakapotasana

    When the piriformis is tight there is often pressure being exerted onto the sciatic nerve and this pose can provide one of the deepest stretches to this muscle. There are a number of tell-tale signs to look for that can indicate that sciatic pain is linked to a tight piriformis; is there pain when walking on the heels and toes? Any burning sensation in the back of the calf extending down to the heel? Pain when sitting? All of these can indicate tightness in the piriformis.   

    Half Lord of the Fishes – Ardha Matsyendrasana This pose will help to restore the spines natural range of motion and relieve back ache and sciatic pain. Be sure to keep the spine straight and use a blanket underneath the hips so as to tilt the pelvis forward.

    Spinal twists are extremely therapeutic, but take care to move slowly and with awareness so as to not strain the back further. Make sure to perform each of these poses on both sides of the body, spending a few minutes in each, allowing the breath to guide you.

    3 Yoga Exercises For Instant Lower Back Pain Relief

    Yoga works to strengthen and stretch the muscles that support the back and spine and a regular practice is a great preventative measure to take that will help to avoid future injury. However, if you are reading this a little too late and there is already suffering in the lower back specifically, there are a number of great poses that will support your road to recovery and provide you with relief. Cat-Cow Pose – Marjaiasana-Bitilasana

    This pose is such a simple and accessible way to work with lower back pain. It stretches the back, the hips and the abdomen and when combined with Cat Pose, there is the opportunity to move back and forth, stretching and compressing the whole length of the spine.  Puppy Dog Pose – Uttana Shishosana

    The Sanskrit translation for the word Uttana is intense, and this means Puppy, so imagine a puppy taking an intense stretch forward with its whole upper body. Although it is considered an intense stretch, there is also an element of relaxation for the shoulders and back. The more you bend your knees and push into your extended finger tips the more you will feel the stretch and experience relief from pain. Wind Relieving Pose – Pavana Muktasana

    After compressing the spine, a nice therapeutic way to finish up can be to come into the Wind relieving Pose. There is the option to roll around on the lower spine and the sacrum just giving the low back a massage and really showing this area some love.

    3 Beginner Yoga Poses For Back Pain

    When back pain is at its worst and you are at the point of no return, often there is the inability to do even the most simple things such as walking and sitting. Some yoga poses will not be accessible, so below are three of the most beginner friendly poses to help ease your pain. Stretching and lengthening movements are often what are needed for the back to feel better, so give these simple poses a go.

    Standing Forward Fold

    Usually we come in to the Standing Forward Fold with the aim of stretching the back of the hamstrings, but in the instance of back pain, we want to take our awareness into the spine. This means we can take a bend to the knees and allow the belly to sandwich down onto the thighs. Now it’s time to really let the upper body hang forward and down. Here we are working to lengthen and mobilize the spine, so there is to be no tension in the torso at all. Just hang out, and let gravity stretch the spine from tailbone right through to the crown of the head.

    Supine Spinal Twist

    Twisting the spine can really aid recovery and relieve pain when done with care and when it comes to twists, the Supine Spinal Twist is the most beginner friendly one there is. This pose can relieve the entire back and the neck and requires no physical effort. The job is left to gravity and all you have to do is relax and breathe. Support yourself by putting blankets and cushions under the knees if they don’t reach the floor and just focus on your breath and settle in for five minutes either side. 

    Sphinx

    This pose if one of the most therapeutic when it comes to working with back pain! If we spend a lot of time sitting, the lower back tends to flatten and this can cause a great deal of pain over time. Sphinx Pose accentuates the natural curve of the lower spine, is very beginner friendly and is great at providing a means of preventative care for the future.

    Conclusion

    Lower back pain, and back pain in general can be triggered by a number of things. From injury, to poor posture and even tightness in other unrelated areas of the body. A regular yoga practice encourages mobility of the spine and back in order to prevent injury, but if you are already working with a current injury, these poses when done with caution and respect, will be extremely therapeutic. It is important to keep the body moving to prevent any stiffness settling in further, but make sure to listen to the body. Use props and take modifications to support yourself when necessary and always practice patience with yourself and your healing journey. So give it a go! Namaste

    About

    Charlie Hanna

    Charlie is a Yoga Alliance certified Hatha, Yin Yoga & Meditation teacher with a psychology degree in her back pocket. She is currently on a mission, chasing sun and Read More..

    The Ultimate 10 Minute Morning Yoga Routine

    When I first started out on my yoga journey, I would only ever roll out my mat to practice if I knew I had an uninterrupted hour or so on my hands. This often meant that it wouldn’t happen every day; and it was even less likely to happen in the morning when time was limited. I always had the best intentions though.

    Unlock the Power of 10 Minute Morning Yoga

    When I first started out on my yoga journey, I believed I needed at least an hour to practice for it to be worthwhile. It never occurred to me that a 10 Minute Morning yoga could be just as powerful. Because I waited until I had a full, uninterrupted hour, I rarely practiced daily. Mornings were especially difficult—time was always limited. I often had the best intentions of practicing in the afternoon or evening, but let’s face it: by the time I got home, my priorities shifted to food and catching up on shows. My yoga mat stayed rolled up and forgotten.

    Everything changed when I shifted my mindset and embraced the simplicity and accessibility of 10 Minute Morning yoga. Once I prioritized short but intentional movement first thing in the morning, I started seeing profound benefits. Those ten minutes brought more clarity, calm, and energy to my day than I ever imagined.

    Small Time Investment, Big Impact

    10 Minute Morning yoga doesn’t just stretch the body—it nurtures the mind and creates a calm stillness that sets the tone for the day ahead. These brief sessions stack up over time, delivering a compounding effect that enhances both physical and mental well-being.

    Yoga is not about the duration, but the consistency and presence you bring to each session. When practiced regularly, even in short bursts, it transforms your internal state. This form of morning yoga is especially valuable for people with busy schedules who still want to experience meaningful self-care.

    Scientific Support for Morning Yoga

    Studies continue to support the effectiveness of regular yoga. A 2016 study focused on cortisol levels in individuals dealing with chronic stress, anxiety, and depression found that consistent yoga practice significantly reduced cortisol—the primary stress hormone in the body. The results? Decreased anxiety, less fatigue, and improved emotional resilience.

    By adopting a 10 Minute Morning yoga routine, you align your day with intention. You start with movement and breath, which improves mood regulation and boosts your overall mental health.

    TRAINING TYPE: FLOW SEQUENCE

    CATEGORY:YOGA

    SUBCATEGORY:BEGINNER YOGA

    PLANNED TIME:10 MIN

    LEVEL:BEGINNER  

    PROPS:NONE

    10 minute quick morning yoga routine

    ​ 

    Today your going to learn the components of the Sun Salutation (Surya Namaska A), so that you will have a series of poses that are the perfect morning poses for beginners to practice at home. These poses are very beginner friendly and are a great way to start your day. As the name suggests, it represents a Salute to the Sun, the source of all life.

    Each pose will be broken down in depth and you will be cued with the proper alignment so as to avoid injury over time. There is the option to work through these poses in isolation or sequence them together into a flow.  

    This will give you twelve poses that you will be able to perform in isolation. Spending some time in each pose to allow the body to open, or you can string together into a flow. They are great poses to do upon waking up, as they stretch all parts of the body. Starting your day with a few rounds of the Sun Salutation invites stillness of mind and body and sets you up for the day ahead.

    10 Minute Morning Yoga Poses for Beginners Infographic

    morning yoga poses for beginners at home infographic

    How To Do 10 Minute Morning Yoga

    Mountain Pose with Hands in Prayer – Tadasana Namaskar

    Making sure the legs and feet are hip width apart. Rooting down into all four corners of the feet, feel the stability in the legs. Tailbone is slightly tucked. Spine is long, right through to the neck and the crown of the head. Chin is slightly back and parallel to the earth. Bring the palms together, centre of the chest.

    Mountain Pose is the most basic of all the standing poses and the foundation of all others. When the alignment is correct you are working to improve your posture, strengthen your legs and increase awareness in the body.

    mountain pose with hands in prayer

    Upward Salute Pose – Urdhva Hastasana

    Inhale and raise the arms up overhead. Taking the arms as apart, palms facing one another. Drop the shoulders down away from the ears and draw the shoulder blades back together.

    This is the perfect pose to start to create space in the body. In the spine, the shoulders and the chest. It is typically not very physically challenging, so there is the chance to really work on focusing on breath and body awareness and come out of the mind.  

    upward salute

    Standing Forward Bend -Uttanasana

    Hinging at the hips, slowly start to bring the torso down. Keeping the spine straight with the neck and head in line. As you come down, notice the stretch in the back of the legs and bring a slight bend to the knees if needed. Allow the upper body to hang down, letting go of any tension in the head. Arms will hang down and hands can come onto the shins, the floor or onto a block.

    The Standing Forward Bend encourages the back of the legs to open and at the same time creates space in the back as it elongates the the whole spine from the tailbone right through to the crown of the nead.

    Standing forward Bend

    Low Lunge – Anjaneyasana

    Step the right leg back, dropping the back knee down for support. Bringing the fingertips down either side of the front foot for support. Spine is straight, head and neck are in line.

    A common misalignment in Low Lunge is to have the front knee too far forward. The key is to keep it in line with the ankle. We all carry tension in our hips, and this is a great beginner friendly way to start to open up into this space.


    low lunge 2

    Downward Facing Dog – Adho Mukha Svanasana  

    Press down into the palms, lifting the back knee up off the earth and then pushing back into Downward Facing dog.

    Downward Facing Dog is often used as a transitionary pose when moving a sequence to the other side of the body. It’s an opportunity to find your center and balance and come back in to the present moment.

    downward facing dog pose

    Eight Limbed Salutation – Ashtanga Namaskara

    Exhaling all the air out of the lungs, take the knees down to the earth, drop the chest between the palms, keeping the hips and tailbone up. Hug the elbows in towards the body and have the weight in the hands. Chin is lightly resting on the floor.

    The Eight Limbed Salutation is another transitory pose that is used to take you from standing to lying on the belly or up into Cobra Pose. It improves the mobility of the back and increases the strength of the arms.

    Eight limbed salutation - ashtanga namaskara           10 Minute Morning yoga

    Cobra- Bhujangasana    

    With an inhale, slide forward onto the belly and press through the palms to straighten the arms and come up into Cobra Pose. Open the chest and drop the shoulders away from the ears. Draw the shoulder blades back and together.

    Cobra Pose is an asana you can play around with to see how deep you want to take the back. It can be as subtle or dramatic as you like, but at all levels it offers a healthy compression to the spine and opening for the chest.

    cobra pose           10 Minute Morning yoga

    Downward Facing Dog – Adho Mukha Svanasana      

    Exhale and push back into a Downward Facing Dog. Take a moment here to notice the difference in the left and right side of the body, to find the breath and to prepare yourself for the other side. Repeat the left side and then finish at the top of the mat, hands in Prayer at the centre of the chest. Take a moment to feel into the body and notice the heat and energy that’s been created. Allow this body sensation to be your anchor into the present moment.

    You can spend a few breaths pedaling out the legs, bending into the right knee and then the left. This will encourage the back of the legs to open and prepare you to move into the next side of the body.

    downward facing dog pose          10 Minute Morning yoga

    Low Lunge – Anjaneyasana     

    Step the right leg back, dropping the back knee down for support. Bringing the fingertips down either side of the front foot for support. Spine is straight, head and neck are in line.

    low lunge 2

    Standing Forward Bend -Uttanasana

    Hinging at the hips, slowly start to bring the torso down. Keeping the spine straight with the neck and head in line. As you come down, notice the stretch in the back of the legs and bring a slight bend to the knees if needed. Allow the upper body to hang down, letting go of any tension in the head. Arms will hang down and hands can come onto the shins, the floor or onto a block.

    Finish at the top of the mat, hands in Prayer at the centre of the chest. Take a moment to feel into the body and notice the heat and energy that’s been created. Allow this body sensation to be your anchor into the present moment.

    Standing forward Bend

    Featured Video: 10 Morning Yoga Poses For Beginners at Home

    7 Yoga Poses You Should Do First Thing In The Morning

    The Sun Salutation as broken down earlier in this article is one of the best way to start both your practice and your morning, but if you have a little more time on your hands, here are seven more poses to add into your routine.

    Chair Pose-Is going to get the body fired up, which makes it a great addition to your morning practice. It requires that you tap into the strength of the legs, the core and the upper body and it also stimulates the diaphragm and the heart. It’s a fierce posture that promotes inner power and is a great opportunity to check in with the quality of the mind. Is it quick to jump into stories of effort? Remember the body is often willing to do the hard yards even after the mind has called it quits, so get your head in check by focusing on breath.  

    Eagle PoseThere is a lot going on in this pose and it simultaneously requires strength, balance and coordination. As you bind and twist the body together you are compressing and constricting circulation, so when you release there is a fresh rush of blood to those areas. The binding of the arms encourages the shoulders and wrists to stretch which are typical areas of tension in the body. Bring the elbows higher for a deeper stretch to the back of the shoulders.

    Garland PoseIf you watch young children, you’ll notice that they can hang out in a deep squat for lengthy periods of time without any issue, yet this pose can be exceedingly difficult for many adults. When did we lose this ability? We are so reliant on chairs in Western culture that we have become unfamiliar with what was once the familiar, but this is a great pose to spend some time in the morning as you are challenging the structure of the entire body as it works into the ankles, knees, hips, pelvis and the spine.

    Bound Angle PoseThis pose finds itself in almost all of my practices. It actually follows me off of the mat and into any opportunity I have to sit on the floor AND it also makes for a great meditative seat. It is a great way to open the hips, strengthen the back and it works to instill a sense of stability and groundedness first thing in the morning.  

    Seated Forward BendThis is another pose I love to hang out in and just allow gravity to do all the work. At first the hamstrings might give you hell, but in this case it’s perfectly fine to take a bend to the knees or prop your hips onto the edge of a blanket or cushion. Allow the breath to take you deeper and over time work towards having the legs straight. Even with bent knees, you are still opening into the back of the legs, stretching the spine and compressing the digestive organs which helps to get them firing.

    Bridge PoseIs going to wake up the body and the mind, so it is a perfect addition to your morning practice. It rejuvenates the back after lying down all night and encourages more flexibility. It stretches into the chest, back of the neck and the hips, while simultaneously strengthening the back, bum and hamstrings.

    Wind Relieving PoseHere you have a pose that is renowned for its benefits to digestive functioning. The compression of the belly is an effective means of encouraging stagnant energies to move downwards and out. Practicing first thing in the morning is a great way to release any trapped gases in your digestive tract before you go about your day – BUT, it’s also an opportunity to give yourself a squeeze and show some love first thing in the morning. Why should we rely and wait on other people to give us a hug later in the day!

    10 Min Morning Yoga Poses In Bed

    Whether it is because there is no space to roll out the mat, or you are just too lazy to get out of bed, the good news is that you can even enjoy your yoga practice in the comfort of our own bed!

    How you spend the first hours of your morning is so important. It sets the tone of your quality of mind. What is the first thing you do once your eyes have popped open?Reach for your phone to connect back immediately to a world of impressions and distraction? Or do you continue to press snooze until the bitter end for only a few minutes extra sleep? Instead, why not try some simple yoga poses in bed? and the beauty is, you don’t even have to open your eyes!

    Reclined Bound Angle Pose – Supta Baddha Konasana This pose is great way to settle the mind before you jump into your day. It can ease any residual thoughts from the day before or any unsettling dreams you might have had. You can take one hand to your belly and one to your heart and just become aware of the sensation of breathing inside of the body.

    Supine Spinal Twist – Supta Matsyendrasana You rely heavily on your spine to support you throughout the day, so this is a perfect opportunity to send it some love. When you sleep deeply, sometimes the body becomes heavy and immobile, so twisting the spine opens up the back and brings back some mobility before you get moving.

    Happy Baby Pose – Ananda Balasana Another great pose that still hasn’t required you to get off of your back, so why not? I can say quite confidently that you probably won’t get many opportunities to open the hips and the groins during the day and roll around like a happy baby – so the privacy of your own bed really seems like the perfect place.

    Legs Up the Wall Pose  Here you are simply taking advantage of the fact that you are already lying down and very likely have a wall at your disposal. This pose is extremely soothing, especially for those who are going to be on their feet all day. If there is tightness in the hips, luckily you have a pillow handy to slide underneath the hips.

    Conclusion

    These poses are great to perform in isolation, so spending a few minutes in each finding stillness and allowing the breath to take you deeper. Take your time! The aim of yoga is to not only open the body, but to come into the beauty of the present moment and enjoy where you are at. Allowing everything to be, just as it is. This is the key to enjoying life both on and off the yoga mat!

    Ensure that you get the alignment correct from the start as the repetitive nature of this sequence, if done incorrectly, can lead to strain and injury over time. Once you have built up some confidence with the poses, try to find some meditation in the movement by allowing the breath to be your guide.

    About

    Charlie Hanna

    Charlie is a Yoga Alliance certified Hatha, Yin Yoga & Meditation teacher with a psychology degree in her back pocket. She is currently on a mission, chasing sun and Read More..

    Ready to take your healing further? Click here to access yoga courses and start your journey toward lasting wellness today.

    How Do You Start Yoga At Home: Easy Routines for Every Fitness Level

    I remember when I was a beginner and first started out on my yoga journey,”by myself” and this was before it began to dominate the online realm. I had heard great things, but had no clue what I was doing. I would spend an embarrassing few minutes trying and failing to get into the splits, feel defeated and call it quits

    How Do You Start Yoga

    How do you start yoga when you’re completely new and unsure where to begin? This question shaped my own early journey with yoga. I remember being a beginner, navigating it all by myself before yoga exploded into the online world. I had heard all the benefits, but honestly, I had no idea what I was doing. I’d attempt a few stretches (usually the splits), fail miserably, feel defeated, and call it a day. I resigned myself to thinking maybe I just wasn’t made for yoga.

    Eventually, I found a studio I liked, and that provided more structure and insight. I still couldn’t master advanced poses, but the guidance of a teacher kept me going. Most importantly, being part of a class kept me accountable. Practicing on my own often ended with me quitting halfway through, no matter how good my intentions were.

    Discovering the Power of Consistent Practice

    As time went on, I began to experience the benefits—my body grew more flexible, and my mind became noticeably calmer. This progress made me prioritize my practice. I didn’t want to feel good only when the studio schedule allowed. I wanted that peace and clarity every day. That’s when I decided to start practicing at home. If you’re wondering how do you start yoga by yourself, know this: consistency is the key. Once you commit, momentum builds and you naturally keep going—even if you take a break, you’ll always come back to it.

    Make It Work for You—Start Small

    When I committed to home practice, I discovered that it didn’t need to be long. Not even an hour. Just fifteen minutes a day created profound shifts in my life. If I couldn’t get to a class, I didn’t feel off-track because I could always squeeze in 10–15 minutes to move, breathe, and reconnect with the present moment. The impact? Incredible.

    This beginner’s guide on how to start yoga by yourself is here to help you take the first step from home with confidence, ease, and joy.


    What Is the Best Way to Start Yoga?

    The best way to start yoga is simple: just begin. All you need is yourself and an open mind. Don’t have a yoga mat? A towel or sarong works just fine. No props like blocks or straps? Use books, belts, or cushions for support. Search online for yoga videos that match your level and goals. Once you start, committing becomes easier over time.

    There’s no finish line in yoga—it’s a lifelong journey meant to be savored. Be patient and respect where your body is. With time and dedication, your physical and mental capacity will expand naturally.

    The true benefits of yoga often appear off the mat—in your relationships, mood, and inner peace. The quiet, mindful awareness you cultivate in practice begins to influence every part of your life. So if you’re asking yourself how do you start yoga, remember that the most important step is simply to start and keep showing up.


    What You’ll Need to Start a Home Yoga Practice

    Just You and an Open Mind

    To begin your yoga practice at home, all you need is yourself and a willingness to try. Ideally, a yoga mat helps, but it’s not essential. A towel or blanket can be a great substitute.

    DIY Props

    Yoga props are helpful but not required. Be resourceful—books can replace blocks, a belt can act as a strap, and a rolled-up blanket can be your bolster. It’s more important to get started than to have perfect equipment.

    Create a Dedicated Space

    Design a space that’s quiet, clean, and free of distractions. A tidy area reflects the mental clarity yoga cultivates. An inviting space makes it easier to commit to your practice regularly.

    Use Online Resources

    If you’re not confident leading your own session, turn to online yoga videos. There’s an abundance of free and paid content from instructors of all levels. Spend some time exploring different styles and teachers until you find one that resonates.

    Make It a Habit: Schedule Your Practice

    The real challenge in starting yoga is not finding a class or video—it’s following through. To ensure consistency, schedule your practice like any other important appointment. Look at your weekly calendar and block off a minimum of 15 minutes for yoga. This short amount of time is manageable and can lead to long-term commitment.

    The flexibility of home practice is a double-edged sword—it’s convenient, but easy to skip. Stay accountable by treating it as a non-negotiable part of your day. If you’re still asking how do you start yoga, the answer is: plan it, schedule it, and start small.


    TRAINING TYPE: FLOW SEQUENCE

    CATEGORY:YOGA

    SUBCATEGORY:BEGINNER YOGA

    PLANNED TIME:10-15 MIN

    LEVEL:BEGINNER  

    PROPS:NONE

    What Is The Best Way to Start Yoga?

    ​ 

    The best way to begin yoga, is to just start! All you really need is yourself and an open mind.  If you don’t have a mat, roll out a towel or sarong. If you don’t have props like blocks and straps, find things around the home like books and a belt. Use cushions for support and jump online to find yoga videos that you can connect with and suit the level you are at. Once the ball is rolling, it’s much easier to commit to practicing. Over time you can work on getting all the right equipment and creating a space that invites you in every day.

    There is no end goal with yoga, the journey is life long and every step should be enjoyed. It’s always important to listen to your body and respect where it’s at and trust in the process. Over time and with commitment the body and the mind will expand and grow.

    It doesn’t take long until you’ll start to notice the benefits across all aspects of your life. The best rewards from yoga are actually those you reap out in the world and in your relationships with others and with yourself. That quiet, calm mind that you cultivate on the mat, will start coming with you to other places. You’ll find yourself more content in the moment and less triggered or caught up in the stories of the mind. All of this and more is yours when you start practicing yoga regularly, so what are you waiting for?

    What will you need to start a good at home Yoga Practice?

    All you really need is yourself and an open mind. Also, preferably a yoga mat, but if you don’t have one right now, even just a sarong or towel will suffice! When it comes to props, they are not essential, but there are so many things lying around the house you’ll be surprised you can use. Instead of a block you can use books. Grab a belt in the place of a strap and instead of a bolster grab yourself a blanket and roll it up.

    Create the Space

    Creating a space that is inviting and conducive to stillness can really help motivate you onto your mat and into your practice. You know what they say about a clean room being the key to a clear mind, well it’s definitely true. We want to create a space that is a reflection of the state of mind we are trying to cultivate – quiet, clear and free from distraction! This will help set the tone and drop you into the zone a little easier.

    Jump Online

    If there isn’t the confidence there yet to lead yourself through a practice, there is still absolutely no reason to not practice at home! There are so many teachers and yoga videos online to offer you support and guidance, you might just have to flick through a few videos to find one that resonates.

    The great thing about the online yoga realm, is that there is an abundance of options out there. You can really get specific with what you are after, what parts of the body you want to target and how long you want to practice for.

    Schedule a Time

    If you’ve gone through all of these steps, then you’re pretty much ready to go. All that’s left is to get on your mat! However, we all know It’s one thing to plan and create the space to do yoga at home, but actually committing to your practice, that’s another thing entirely. In order to make sure you see it through, it’s recommended to schedule a time in advance.

    Yoga is only going to be effective if you are persistent and show up regularly! One of the benefits of a home practice is that you aren’t restricted to a specific class schedule or length of class. This can also be your downfall as there is no teacher or time frame to keep you accountable. So with that in mind, I recommend looking at your week ahead and scheduling a time in advance to practice and treat it like a non-negotiable appointment. Aim for a minimum of 15 minutes, it’s short enough that it’s not overwhelming, but still long enough that it will encourage a steady habit.

    Yoga Practice at Home Sequence

    We will break down the steps needed to be taken to set up a successful home yoga practice for beginners. It goes over what is needed, the type of space you want to create, the importance of scheduling a time and finding a videos online that can provide guidance until there is more confidence in practicing alone.

    When you are practicing at home without support it is important that you listen to your body and take modifications when needed. Never be afraid to simply rest in Child’s Pose and don’t push yourself past your limits, as the body takes time to open up. The real benefits of yoga are the transformations you start to see off of the mat, and they will come with consistent practice. Trust the process and enjoy the ride.

    Start Yoga at Home For Beginners ​Infographic 

    how to start yoga at home for beginners infographic         how do you start yoga

    Cat-Cow – Marjaryasana-Bitilasana 

    Coming into a Table Top position, making sure that the wrists are in line with the shoulders and that the knees are in line with the hips. Spine is neutral, head and neck in one line, and the gaze is slightly down and towards the top edge of the mat. Inhale, drop the belly down, take the heart forward, arching the back, coming into Cow.

    Exhale and move into Cat Pose by pushing into the palms, rounding the upper back, bringing the belly button back towards the spine and dropping the chin to the chest. Inhale, again coming forward, opening the chest. Exhale, pushing back, rounding the spine. It’s good to work through a few rounds of these Cat-Cow movements in order to warm up the spine and let it know we’re going to move into it.

    This pose mobilises the spine, shoulders and the neck and is the perfect warm up for all levels of yogi. It is a gentle way of preparing the body and the spine for deeper stretches and is a safe way of relieving tension from the back.

    cat-cow

    Downward Facing Dog – Adho Mukha Svanasana

    Tuck the toes and push into the palms and take the hips up into Downward Facing Dog. Start by pedalling out the legs and bending the knees. Pushing down into the palms, fingers are spread wide and allow the head and neck to drop.

    Downward Facing Dog is an opportunity to catch you breath and balance before moving onto the other side of the body during your flow.

    downward facing dog pose           how do you start yoga

    One Legged Downward Facing Dog – Eka Pada Adho Mukha Svanasana

    Rise the right leg back and up, coming into a One Legged Downward Facing Dog.

    It is very common to dump the weight of the body into the left shoulder here, but try to keep the shoulders square by pressing evenly into both hands.

    one legged downward facing dog             how do you start yoga

    Low Lunge – Anjaneyasana

    Bend the right knee and come forward, transferring the weight into the hands and step in between the palms, coming into Low Lunge. Hands will frame either side of the front foot and you can use the fingertips for support. There is the option to rise the back knee or you can take it down for more support. Make sure that the neck and head are in line with the spine.

    In Low Lunge you can start to work into the flexibility of the back hip flexor by squeezing the gluteus muscles. Try to keep the hips square, by sending the back hip forward.

    low lunge 2

    Revolved Side Angle – Parivrtta Parsvakonasana 

    Take the left palm and press it flat down into the earth and take the right arm. Spinning the chest open coming into an Revolved Side Angle. Gaze is up to the top hand. Really pressing down into the left palm and the ball of the back left foot. Take a breath, and open the chest more.

    This pose strengthens and stretches legs, groin, hamstrings and at the same time opens the chest, the shoulders and the spine.

    revolved side angle pose - twist

    Warrior 2 – Virabhadrasana II  

    Spin the back foot down and cartwheel the arms, coming into a Warrior Two. The front toes are facing forward, and the back foot is in on an angle. Press down firmly into the outer blade of the back foot. Arms are extending long to the sides and as you exhale, drop a little deeper, staying low in the legs.

    Warrior 2 is working deep into the strength of the legs and is particularly powerful if you energetically hug the legs together. This turns on the underside of the thighs and requires strength, determination and concentration. All of this is going on, while you are cultivating balance and groundedness.

    warrior 2

    Reverse Warrior – Viparita Virabhadrasana   

    Inhale and lean the torso forward and flip the front palm. Lean back, stretching the front hand up and back, coming into a Reverse Warrior. Stay low in the legs and find strength by hugging the feet to the midline, activating the underside of the thighs.

    The key in Reverse Warrior is to stay low in the legs. It might seem like a reprieve and a moment to take rest after a strong Warrior 2, but keep in mind that the mind will often bow out before the body is ready, so see if you can stay low for a couple more breaths!

    reverse warrior pose           how do you start yoga

    Eight Limbed Salutation – Ashtanga Namaskara    

    Cartwheel the arms down to the ground and push back into a Downward Facing Dog momentarily. Take a deep breath here and then move into Eight Limbed Salutation, also known as Knees-Chest-Chin Pose. Drop the knees directly down, take the chest down in between the palms and have the weight is in the hands. Hips and tailbone are staying up to the sky. Hugging the elbows in towards the body, with the chin slightly resting on the earth.

    Knees-Chest-Chin Pose pose can seem tricky at first, but the key is to have the weight in the hands and to be drawing the elbows in towards the body. Everything else is relatively light and the chin is only gently resting on the mat.

    Eight limbed salutation - ashtanga namaskara

    Upward Facing Dog – Urdhva Mukha Svanasana    

    Come down onto the belly and then slide forward into Upward Facing Dog. Make sure the shoulders are down away from the ears and draw the shoulder blades back and together. Exhale, and bend the elbows and lower the torso and forehead back down to the earth.

    Here you are stretching and strengthening the spine and shoulders, toning the abdomen and opening the chest and lungs. The key is to really lift the chest and squeeze the shoulder blades back and together. There should be ample room between the shoulders and ears.

    upward facing dog              how do you start yoga

    Downward Facing Dog – Adho Mukha Svanasana  

    Push back into a Downward Facing Dog and then preparing to move into the other side of the body. Notice the difference between your first Downward Facing Dog of your practice and your last. When the body is stiff this pose can feel like a full workout, but as the body warms and opens, it gets easier and easier to hang out here.

    downward facing dog pose

    Extended Child’s Pose – Balasana

    After finishing up the other side of the body, drop the knees down as wide as the mat and settle back into a Extended Child’s Pose. Dropping the forehead down to the earth, allow the belly to be soft in between the thighs and take rest.

    This is the perfect pose to take rest in, both during and after your practice. It’s an opportunity to bring everything back into balance, to find your breath and to elongate the spine.  

    Downward Facing Dog – Adho Mukha Svanasana   

    extended child pose             how do you start yoga

    Featured Video How to Start Yoga at Home for Beginners

    Yoga Poses for Beginners

    If you are still feeling a little lost on your mat, its ok, because Ive got your back :). I want to share with you some very beginner friendly poses that lay the foundations for most of the yoga flows you will be introduced to in a class. It also means if you don’t have access to the internet and an online tutorial. You can simply move through these simple poses two or three times, spend some time is Savasana (laying flat on your back) at the end and bam, you’ve got yourself a solid yoga practice. If you can get comfortable with these poses, and even better their Sanskrit names, you’ll be ahead of the game when you finally do make it into a class.

    Cat-Cow – Marjaryasana-Bitilasana

    Moving through a few rounds of Cat-Cow is extremely juicy and therapeutic for the whole back and neck. The opposing movements allow you to both stretch and compress the spine, inviting more space and increasing mobilisation. Really be dramatic with the postures by pulling the shoulder blades apart when you’re imitating an angry cat and sucking the belly button right back to the spine in Cow. Spend a few extra minutes working into some intuitive free movement, moving the spine back and forth, the hips from side to side and taking some body rolls – anything that feels good in YOUR body in order to warm up the spine.

     Downward Facing Dog – Adho Mukha Svanasan

    Downward Dog is one of those poses that in the beginning it simply sucks! Your heels refuse to reach the floor, the shoulders and arms are quick to tire and it feels like your instructor is making you hang out there for hours. You’d rather drop the knees and take a Child’s Pose. However, over time, and once you have the proper alignment down, Downward Dog starts to become your home base. It becomes a pose you can relax into and it provides a reset and full body stretch between flows and the more difficult poses. The key is getting the foundations of the pose down right from the get go. I encourage you to get an instructor to guide you into the pose in class or find a tutorial online!  

    Low Lunge – Anjaneyasana

    Get the alignment of the legs and feet right in a simple Low Lunge and you already have the the foundational base ready to jump into other standing poses, such as the Warriors! Here you have the option to work into both your strength and flexibility; and there is always the option to take a modification and drop the back knee down to the earth. This makes this pose very accessible and beginner friendly, yet you will still be working to stretch, strengthen and simultaneously improve balance and focus. Revolved Side Angle – Parivrtta ParsvakonasanaThe trick to finding some ease in the perceived effort of this pose, is to hug the feet towards the midline. This goes for all the standing poses in order to find strength and activate the underside of the legs. This will tap into your power reserves and you’ll be surprised at the strength you have. Remember, the mind will always want to quit before the body does, so when you feel like coming out of a pose, firm into the legs and see if you can find just two more breaths!

    Warrior 2 – Virabhadrasana

    I invite you to stand in your strength in this pose, as an incarnation of a fierce warrior, Shiva. When that front leg starts to tire, keep in mind that zen archers would practice holding a bow for two years in this position before they were allowed to shoot their first arrow. Find some ease in the effort by energetically drawing the feet towards the midline, as though you want to bunch up your mat at the middle. The aim is to stand firm and strong, yet at the same time relaxed and at ease.

    Cobra – Bhujangasana

    An energizing back bend to open the chest and heart. Bhujang means ‘serpent’, and this pose is an essential component of the Surya Namaska – the Sun Salutations. It is a powerful chest opener and at the same time, it is extremely therapeutic for the spine. It also works to stretch and tone the abdominal muscles and organs and stimulate the digestive fires.

    Is Doing Yoga at Home Effective?

    The more consistent you are with your yoga practice at home, the more effective it is going to become. The same with anything, consistency is the key, but this doesn’t mean that you have to practice for an hour, seven days a week! Spending twenty minutes each day on your mat, to stretch the mind and the body is going to have profound effects on your life across the board. If there are days you don’t feel up to yoga, give some meditation or Pranayama a go.

    Meditation

    If you are new to meditation, then the chances are that sitting in silence trying to quiet the mind is going to lead to a whole lot of frustration and very little stillness. Meditating in this way is actually very advanced, as you’ll find out quickly that it can be very challenging to quiet down the stories of the mind. A better option in the beginning is to find some guided meditations that resonate.

    Pranayama Breathing is something we do so naturally, that it requires no conscious effort. It is an involuntary action that is happening whether we are awake or sleeping. To breathe, is to live. Pranayama is the practice of controlling the breath, with Prana meaning ‘life force’ and yama meaning extending or stretching in Sanskrit. Controlled breathing can decreases the effects of stress, instil focus and mental clarity and can energize and detox the body.

    One simple Pranayama technique, is known as the Cooling Breath Pranayama / Sitali Pranayama. Find a comfortable easy seat. Curl the tongue into a U shape and project it out of the mouth slightly. If you can’t curl the tongue it is fine to make an O shape with the mouth. Take the chin to the chest and then begin to inhale through the mouth, taking the chin up and dropping the neck back as far as is comfortable. Close the mouth and exhale through the nose as you drop the chin back down to the chest.

    Repeat for eight to twelve breaths. Any time spent on your mat, is time well spent and over time there is an accumulative effect that takes place and the benefits start to ripple out and have a domino effect across so many aspects of your life.

    How do you Start Yoga When Overweight

    Going into a yoga studio can seem a little daunting if you don’t think you fit the typical yogi image, but yoga can (and should!!), be practiced by everyone. At all ages and stages of life, and by all shapes and sizes. We all start somewhere and there are so many styles of yoga and variations of the poses, that make them accessible to all. If there is some doubt and anxiety in the mind though, there is the perfect opportunity here to start practicing at home.

    Jessamyn Stanley is a great role model to check out! She is using yoga to promote positive body image and breaking down mental and emotional barriers to practicing. She emphasizes how you FEEL, as opposed to how you look and she celebrates her students bodies in all the shapes and sizes that they come in. She has a top selling book on Amazon called, Every Body Yoga: Let Go of Fear, Get on the Mat, Love Your Body, and I HIGHLY recommend checking that out!

    Yoga is a mindset that cultivates self love and body confidence. Love your body where it is at and show it some kindness by taking this time for self care. With consistency your body will open and start to change, so enjoy the journey and allow the transformation to unfold.

    Conclusion: How do you start yoga?

    A few things to keep in mind before you jump in! Firstly, always make sure to listen to your body. You know it best and are the only one that can hear its subtle cues. Never force your body into a pose and don’t be scared to take modifications or rest in Child’s Pose when needed. Trust that over time and with consistency your body will open up along with your flexibility. You have the necessary steps in mind now to really get your at home practice going. I promise that the hardest part is just making it onto your mat. Make the time, prioritise this self care and watch yourself blossom and grow.

    This article has provided the necessary steps to establishing an at home yoga practice. Grab the essentials, create the space, find some videos online that resonate and schedule the time like a non-negotiable appointment! Prioritise taking care of yourself and loving yourself just as much, if not MORE than you love others. This is not selfish, this is KEY to being the best version of who you already are, for yourself and for others. You have to fill your cup first and yoga is a great tool to do just that.

    About

    Charlie Hanna

    Charlie is a Yoga Alliance certified Hatha, Yin Yoga & Meditation teacher with a psychology degree in her back pocket. She is currently on a mission chasing sun and Read More..

    Ready to begin your own yoga journey from home? Click here to access our full beginner-friendly yoga course and start building a daily practice that transforms your body and mind from the inside out.

    Basic Beginners Yoga Poses: Top 10 Everyday Poses You Can Do at Home

    This article will provide a sequence of poses that are beginner friendly and are perfect for practicing first thing in the morning. Essentially it will be a break down of the Sun Salutation, going through each pose in depth, cuing proper alignment. Once each step has been broken down, the student will have the 12 poses of Surya Namaska A to practice in isolation, or in a Sun Salutation style of flow.

    Back to Basics: Why Basic Beginners Yoga Poses Matter More Than You Think

    When I first began my yoga journey, I had one goal: the splits. Front splits, side splits—any splits! I also dreamed of floating into handstands and bending into poses that seemed straight out of a circus. But I quickly learned that for many of us, especially those not coming from a gymnastics or strength-training background, these big goals don’t come overnight.

    The truth? What really moved me forward wasn’t pushing harder or chasing advanced poses—it was going back to the basics. Basic beginners yoga poses became my foundation. These seemingly simple postures activated muscles I didn’t even know I had and taught me how to build strength and flexibility from the ground up.

    If you’re just starting out or feel stuck in your practice, this is your reminder: progress begins with the basics. Don’t underestimate the power of foundational poses like Downward Dog, Mountain Pose, and Cat-Cow. These movements work the entire body and prepare you for more complex transitions later on.

    So instead of rushing to invert yourself, slow down. Enjoy the journey. Get comfortable with your beginner poses—and watch how your practice evolves in strength, grace, and confidence.

    basic beginners yoga poses

    TRAINING TYPE:  FLOW SEQUENCE

    CATEGORY:YOGA

    SUBCATEGORY: BASIC BEGINNERS YOGA POSESEGINNER YOGA

    PLANNED TIME:15-20 MIN

    LEVEL:BEGINNER  

    PROPS:BLOCKS

    INTRODUCTION: Basic Beginners Yoga Poses

    This article will introduce you to ten of the top beginner friendly yoga poses that are easily accessible by those even in the early stages of their practice. They are essential foundational poses that will lay the building blocks and build strength for greater flexibility for more advanced poses down the track. It is important that you learn to listen to the subtle cues of the body and not push it past its limits. Consistency is key when it comes to opening the body. There is the option to series these ten poses together to create a flow that you can work through two or three times and voila, you have yourself a solid practice!

    When starting out on our yoga journey it is essential that you move with respect to where you are at. It is easy to get over excited and ahead of yourself trying to jump into aesthetically pleasing advanced poses, but if you don’t nail the foundations in the beginning, you are likely to run into injury over time. Make sure that you are moving with correct alignment even in the more simple poses, as this is going to set you up for success and let your practice evolve in a way that is safe. 

    INFROGRAPHIC: Top 10 basic beginners yoga poses 

    Top 10 yoga poses for beginners     basic beginners yoga poses

    Upward Salute – Urdhva Hastasana 

    Inhale the arms up overhead, keeping the arms shoulder width apart, the palms facing one another. Drop the shoulders down away from the ears. Root down through all four corners of the feet, slight tuck of the tailbone. Spine is straight with the head and neck in line.  This pose is the perfect starting point to create space and length in the body. It stretches the sides, the spine, the shoulders and the abdomen and opens the chest and the lungs.

    1 upward salute        basic beginners yoga poses

    Standing Forward Bend – Uttanasana 

    Hinging at the hips start to come down, keeping the arms extending forward and the spine straight with the head and neck in line. Allow the torso to hang heavy. Hands can come down onto your block or can be resting on the floor. A slight bend to the knees is fine.

    As the legs open, the spine is lengthening, and the abdomen is being deeply compressed, so there is a lot going on in the body here, even though it feels as though you are just hanging out. Spending upto five minutes here will really let the hamstrings soften and release.

    2 Standing forward Bend

    Chair Pose – Utkatasana

    Bring the big toes to touch with the heels slightly apart. Bend into your knees and sit the hips down into an imaginary chair. Extend the arms forward and up. Squeeze the knees together. Tailbone is slightly tucked. There is the option to bring the hands into Prayer at the center of the chest.

    Chair Pose can get the body and mind heated very quickly! It is a strong workout for the thighs and the trick is to really squeeze the knees together to find strength. Just as the mind wants to give up, try and sit down a little deeper!

    3 chair pose        basic beginners yoga poses

    Tree Pose – Vrikshasana  

    Ground down into the right foot to find stability. Bring the sole of the right foot to the left ankle, toes can be down to the mat. Or bring the right foot to the left calf or thigh. Not on the knee. Hands are in Prayer at the center of the chest or there is the option to extend the arms up overhead opening them up like the branches of a tree. Gaze is up, and there is option to close the eyes to challenge your balance.

    Tree Pose looks fairly simple to the outside observer, but there actually a lot going on as you try to find that point of balance in both body and mind. When we practice these poses and start to find more balance on the mat, chances are we will start to find it easier to find that same balance off of the yoga mat.


    4 Tree pose       basic beginners yoga poses

    Downward Facing Dog – Adho Mukha Svanasana 

    From all fours, tuck the toes and press down into the palms, fingers spread wide and send the hips up to the sky. Pedal out the legs, bending the knees left and right. If there is tightness in the back of the legs, a slight bend to the knees if fine. This is a pose you are going to have to become familiar with and as a beginner I know that at first it can feel like an intense workout. Over time it will start to feel more like a home base and a place of rest and the perfect opportunity to come back into balance, while receiving a full body stretch.

    downward facing dog pose

    Warrior 2 – Virabhadrasana II 

    Turn the front foot to face forward, the back foot is off on an angle with the arch in line with the heel of the front foot. Bend into the front knee and drop the hips down. Firm down into the feet and hug them in towards the midline to activate the inner thighs. Extend the arms wide and turn the gaze out over the front middle finger. This strong posture helps to build stamina as you find the strength to stay low. Staying connected to the breath will help to find some ease in the perceived effort and develop concentration and focus.


    warrior 2          basic beginners yoga poses

    Extended Triangle Pose – Utthita Trikonasana  

    Straighten the front leg and walk that back foot in a step. Send the hips to the left and lean the torso forward. Start to tip from the hips and bring the right hand down. Option to take the right hand to a block. Extend the left arm up to the sky.

    In Sanskrit, “utthita” means extended and “trikona” means three angle or triangle  and as is suggested, you can see several triangles in this pose if the alignment is correct. Extended Triangle is going to increase the flexibility and strength in the legs, ankles, knees, and hips, all while opening the shoulders and chest.

    7 Triangle pose

    Reverse Triangle Pose – Viparita Trikonasana    

    Take the left hand down onto the back thigh and extend the right arm up, stretching the side body. Gaze is up to the top hand. Reverse Triangle Pose is the perfect counter stretch to Extended Triangle. It opens up the side of the body and creates space between the ribs. Firm down into the feet to keep the legs fired up and activated.

    8 Reverse Triangle pose

    Cobra – Bhujangasana  

    Bring the hands underneath the shoulders and push into the palms to straighten the arms. Come up, opening the chest and the collar bones. Draw the shoulders down away from the ears and squeeze the shoulder blades together. Cobra Pose stretches muscles in the shoulders, chest and abdominals, while relieving tension in the back.

    cobra pose          basic beginners yoga poses

    Extended Child’s Pose – Balasana  

    Come down to the knees, taking them as wide as the mat. Forehead rests into the earth, with the arms extended forward, palms pressing down. Allow the belly to be soft and relaxed in between the thighs, and as you breathe, send the breath into the back of the body. With the arms extending forward, the shoulders are being stretched and opened which can be deeply satisfying at the end of your practice. Allow the body to be heavy and take rest.

    extended child pose

    Top 10 Yoga Poses For Beginners Video

    This video is designed to set you up with some essential beginner poses that you can series together into a flow. Practice a few rounds and you have yourself a sequence that will open the body and start to build strength so you can advance into deeper poses over time.

    top 10 yoga poses for beginners_CH1030

    Yoga Poses Names

    Each yoga asana typically has an English name that has been translated from a language of ancient India known as Sanskrit, which dates back around 3,500 years. It is the language of the Vedas, India’s ancient religious texts, which gave birth to the practice of yoga. According to present knowledge, this is the first traces of yoga throughout history! Many words and mantras are still commonly used today and it is likely that you will hear a couple of Sanskrit terms thrown around your yoga class. This can be quite confusing initially, especially if you’re only just becoming familiar with the English names! Most teachers will provide the English translation with the Sanskrit, but learning some of the more commonly used names will deepen your understanding of the meaning behind this beautiful ancient language.

    Upward Salute – Urdhva Hastasana

    Urdhva, means “upward,” hasta, means “hands,” and asana, meaning “posture.” This pose is usually performed as part of the Sun Salutation and is traditionally performed outside and facing the East as the sun rises. Standing Forward Bend – UttanasanaUttana, means “intense stretch” and asana means “a seat” or “posture.”This pose is thought to be one of surrender, humility and acceptance.

    Chair Pose – Utkatasana

    Utkata, means “intense” or “powerful,” and asana, means “posture.”You might also hear it called fierce pose, powerful pose or awkward pose and is associated with creativity and determination.

    Tree Pose – Vrikshasana

    Vriksa, means “tree,” and asana, meaning “pose.” This pose integrates the body, mind and breath and invokes qualities like strength, endurance, grace and balance – the qualities of a tree.

    Downward Facing Dog – Adho Mukha Shvanasana

    Adho, means “down,” mukha, means “face,” svana, means “dog,” and asana, meaning “pose.”Over time this pose starts to become a home base, even though it might not feel like it at first. It is a great counter pose to many backbends and hip openers. Get familiar with these terms and be ahead of the game!

    Yoga Poses for Two

    It’s so refreshing to catch up with a friend over something other than food or a drink! Don’t get me wrong, food dates are the best, but sometimes it’s good to find something a little more active and connecting! Partner yoga can be a lot of fun, but it also has the added benefit of helping you to deepen and stabilise.

    Seated Cat-Cow

    Sit cross-legged facing one another and hold onto each others forearms. Both partners move through Cat and Cow simultaneously. So both arching the back opening the chest to come into Cow and then rounding back together, dropping the chin down to the chest Double Tree Pose Standing side by side, take your original tree stance with the legs, and then take your arms around each others waist. Bring your outer arms in to meet each others palm. Creating Prayer Pose together. A very simple way to practice balance with support. Double Boat Pose Come into Boat Pose facing one another and bring the soles of the feet to touch. Extend the arms and grab hands! This is a great way to provide a deep stretch to the hamstrings with some extra support to help keep the spine straight.

    Camel Pose

    Come to a knee-standing position facing the opposite way to your away to your partner. Place one of your feet in between your partners and have all four feet in line. your right heel halfway between hers, so all four heels are in a line. Support the lower back with the hands and slowly lean back to place your head on your partner’s right shoulder. Hands can release down to the feet.

    Advanced Yoga Poses

    It really is essential that we get some of the more simple poses down before we jump into some more serious asana. You want to make sure you are working with the correct alignment from the get-go, in order to prevent injury over time, BUT, if you have been practicing for a while and have those foundational poses in the bag, maybe it’s time to up your game and your practice!

    Bound Angle Pose in Headstand – Baddha Konasana in Sirsasana

    If you are feeling comfortable in the headstand pose, getting a little more fancy with the legs might be something you can try out! It isn’t a big stretch from the original, but it definitely makes an aesthetically pleasing pic for ye old social media!

    One Legged Wheel Pose – Eka Pada Urdvha Dhanurasana

    If you have Wheel Pose in the bag, maybe it’s time to give this one legged variation a try! As you extend one leg high to the sky, really press into the palms and shine the chest and heart open. There is the option to drop down onto the forearms. This is an extremely energising pose that works to improve balance and focus.Firefly Pose – TittibhasanaHere we have an advanced arm balance to try out if you’re looking to move on from the more intermediate arm balances like trusty old Crow Pose. Firefly is going to work the strength of your core and requires some solid flexibility in the hip flexors and hamstrings.

    TEACHERS INSIGHTS

    Take your time! The aim of yoga is to not only open the body, but to come into the beauty of the present moment and enjoy where you are at. Allowing everything to be, just as it is. This is the key to enjoying life both on and off the yoga mat!

    Conclusion: Basic Beginners Yoga Poses

    You now have ten of the top basic beginners yoga poses to explore. Whether you choose to hold each pose for a few minutes to gently open the body or flow through them with your breath, these foundational movements are the perfect starting point.

    Remember, props and modifications are your friends—use them to support your body as it grows stronger and more flexible. By honoring your current limits and practicing with patience, you’re setting yourself up for long-term success. Getting the alignment right from the start is key to avoiding injury and building a safe, sustainable yoga practice.

    PDF DOWNLOAD

    top 10 yoga poses for beginners pdf_CH1030

    By the time you are finished reading this article you will have a series of beginner friendly poses to add into your practice with confidence. They are accessible by those starting out on their yoga journey and are important foundational asanas which lay the groundwork for strength and flexibility.  Included in this Free Yoga PDF Download:

    • Yoga asanas names with pictures and benefits
    • Printable Sequence Infographic
    • Teacher Tips
    • Resource Links

    Ready to start building your foundation? Check out our courses for basic beginners yoga poses to explore the essential postures that will support and strengthen your practice from the ground up.