Types of Pranayama & 7 Different Benefits

It was a few years of practicing yoga before I stumbled across one of it’s biggest benefits – Pranayama.

I was already meditating regularly, but I would often be in a battle with my mind trying to shut off thoughts and getting frustrated when they would persist! Guided meditations were my jam for years. I didn’t really have a method of bringing the kind of focus that is required to go deep into stillness. 

Then I was introduced to different types of Pranayama. My internal world changed. I was able to use these techniques to drop out of my head and connect me to a peace that lies behind the thoughts, and this is available to us all! On the physical side of things, I have also struggled with lifelong chronic asthma. Pranayama was a game changer for my lung capacity.

After practicing the Three Part Yogic breath for as little as ten rounds,  I could feel the space in my chest open up and my breaths were much deeper! I hadn’t been aware of just how shallow my breathing was before. I realised I had been breathing through a straw my whole life!

Pranayama Benefits

  • Relieves the symptoms of asthma 
  • Lower blood pressure and boosts circulation
  • Good for migraines and digestive disorders
  • Calms the central nervous system
  • Improves lung capacity

The list of physical benefits goes on and on. However, my number one reason for practicing Pranayama diligently, is because of its ability to to create a bridge to connect me to that inherent stillness that is inside of us all!

All we ever have to in life is breathe. If we want to be at peace, all we have to do is breathe with awareness!

When the Breath wanders, the mind is unsteady, but when the Breath is still, so is the mind still.” – Hatha Yoga Pradipika

7 Types Of Pranayama Infographic

7 types of pranayama Infographic CH1029

 1. Alternate Nostril Breathing – Nadi Shodhana Pranayama  

  1. Take your right hand and curl the pointer and middle finger into the palm.
  2. Take the thumb over your right nostril and your ring finger over your left nostril.
  3. Block your right nostril with your thumb and inhale up your left for a count of four.
  4. Hold the breath for four.
  5. Now repeat on left side

In Ayurvedic medicine this technique is used to harmonise the two hemispheres of the brain, which balances the physical, mental and emotional aspects of your being. Nadi means “channel” or “flow”, and shodana translates as “purifying” or “cleansing”

1 Nadi Shodhana 2

2. Three-Part Yogic Breath – Dirga Pranayama 

Your inhale wll be broken into three parts.

  1. First, inhale into the belly
  2. Then into the chest
  3. Lastly, into the collarbones

Hold the breath and relax, dropping the shoulder down away from the ears. Hold for as long as is comfortable.

Exhale completely, bringing the torso down, resting the hands on the floor, head can hang.

Hold the void (no breath), for as long as is comfortable and then repeat.

One of the more simple Pranayama techniques, making it a great place to start when exploring the world of Pranayama.

You are actively working to fill the body in three distinct parts, which invites more awareness of the sensation of breathing inside each part of the body.

After ten rounds or so, I always feel as though my lungs have doubled in size!

Dirga Pranayama

3. Breath of Fire – Kapalabhati Pranayama

Take your right hand to the belly inhale through the nose. As you exhale, suck the belly button back towards the spine. You focus on the exhales and pump the stomach in each time. The inhales will come naturally.

I recommend getting comfortable with the Three Part Yogic Breath before moving onto this slightly more advanced technique.

This Pranayama is effective at cleansing even the most remote parts of the body and the vigorous exhalations are great as dispelling toxins and waste.

3 Kapalabhati

4. Cooling Breath – Sitali Pranayama 

Take the tongue and make the shape of a ‘U’, so like this. If that is not accessible, we can just make an ‘O’ shape with the mouth. Inhale through the mouth, then close the mouth. Exhale through the nose.

This Pranayama, invites moisture into the system which cools down the body and the mind. It’s great to bring in at the end of a particularly heated practice to counter internal heat and bring the body back into balance.

4 Sitali Pranayama

5. Equal Fluctuations – Sama Vritti Pranayama 

  1. Breathing through the nose, inhale for a count for four and Hold for a count of four.
  2. Exhale for four and hold, for four. Over time you can work up to six, eight and so on.

This Pranayama can be practiced by anywhere in a way that is low key! It’s  an effective way to focus the mind and cultivate stillness.


5 Sama Vritti

6. Humming Bee Breath – Bhramari Pranayama 

  • Close the lips but have the teeth slightly parted. The tongue is just resting on the back side of the top teeth.
  • Take your thumbs to block the ears. Your pointer finger comes just above the brow and to the midpoint of the forehead.
  • The remaining three fingers  on either side of the bridge of the nose, resting and covering the eyes.
  • Inhale through the nose and as you breathe out, drop your chin to your chest and exhale through the mouth (lips still closed), creating a ‘hmmmm’ sound.

This pranayama technique derives its name from the black Indian bee called Bhramari. The humming vibrations creates calming effect and soothes tension.


6 Brahmari

7. External Breath – Bahya Pranayama  

  • Inhale deeply and fill up the belly.
  • As you exhale, lean forward and suck the belly back towards the spine. Hold that for as long as is comfortable and then release the belly before you take your next breath in.

Use this pranayama to combat stomach disorders, as the action of drawing the belly button to the the spine pumps the organs of the belly. Ensure to practice on an empty stomach or at least four hours away from your last meal.

7 Bahya 2

Featured Video: 7 Types Of Pranayama and Their Benefits

Pranayama Meditation

Pranayama is best performed early in the day, when your stomach is empty and when your mind is a little more free from daily distractions. Just ensure it is a few hours away from your last big meal and warm up the mind with a small meditation.

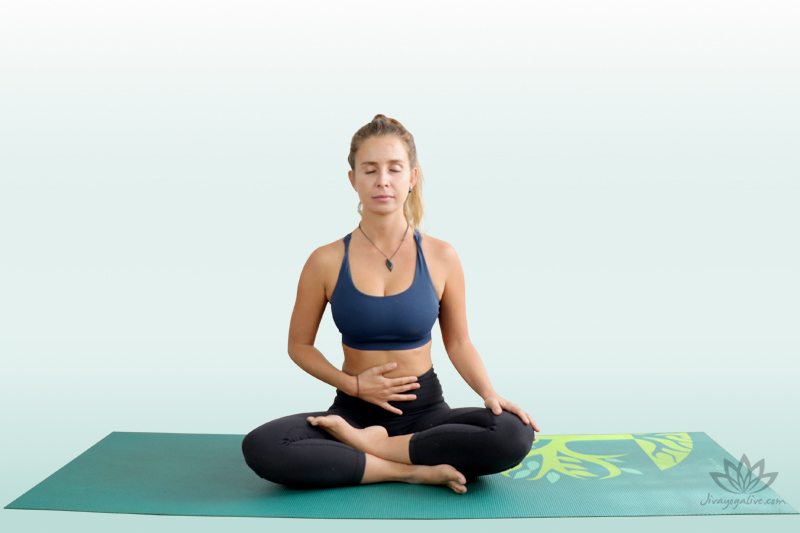
Sit comfortably and close the eyes.Become aware of your breath and the sensation of breathing in the chest, the lungs, and the belly.

Continue with this simple breath awareness for a few rounds of breathing, feeling the joy of stretching the lungs.

Take you awareness fully to the breath as it enters and exits the nose.Once the mind is calm, you can start to move into more conscious breathing.

  • Start to inhale for a slow and steady count of four.
  • Hold the breath for four.
  • Exhale for a count of four.
  • Hold for four. Continue this for at least ten rounds, longer if it feels good and natural.

Cleansing Pranayama

Pranayama is a cleansing practice for the body and the mind. The aim is to bring the mental and physical worlds into union. They work to purify you from stress, toxins, negative emotions and low energy. When you exhale forcefully, there is the opportunity to pump out stagnant energies and waste matter that is not serving you. Here is a bonus technique that you can add to your now full kit of Pranayama practices! Hissing Breath – Sit Cari PranayamaThis technique works to cool and cleanse the mind and the body by releasing any excess heat. How to – Curl the tongue back, so that the underside touches the roof of your mouth. Reaching it as far back as is comfortable. Inhale and slightly retract the lips to create a hissing “s” sound. Notice the cool breath as it contacts the heated, moisturized air in the mouth. As you exhale, close the mouth and release the air through the nostrils.

Secret Pranayama Techniques

Pranayama is one of yogas little secrets! Most people are in the dark about the profound and powerful effects that conscious breathing can have on the body and the mind. In many yoga classes, even though the breath is encouraged, it is often the secondary focus of asana practice  Pranayama has many effects on the physical body: it can ease high blood pressure, the symptoms of asthma, dispel toxins and get stagnant energies moving. It also is a powerful tool that works to calm the mind. The concentration that is required forces you out of the head and into the present moment. The breath and mind are very closely linked and you have the power to quickly and effectively moderate your mood and mental state. All this, just by tuning into breath awareness!Once you have brought the mind into a state of focused stillness, through Pranayama, you have an opportunity to pass through a doorway and into the nature of your true self. It is here that you can uncover and connect with your enlightened essence and release any emotional dysfunction. This will be of immense benefit to yourself and others. One Tibetan Pranayama technique, that I find particularly powerful, that clears the mind and awakens a vibrant awareness, is called Nine Round Breathing. It is shared by former Buddhist monk Chad Foreman.Nine Round BreathingBreathe in through the right nostril and out through the left – three times.Breathe in through the left nostril and out through the right – three times.Breathe in through both nostrils and out through both – three times.

CONCLUSION

Pranayama is a great tool to have in your mindfulness tool kit. however is should be done with care and ideally under the guidance of an experienced teacher. Try to spend even a few minutes settling the mind before engaging with these techniques; just taking a few clearing breaths will suffice. If you can, practice before meals, or aim for four hours after, to ensure an empty stomach.  Make sure you are in a comfortable seat. The effects of Pranayama should not be underestimated. The effects it can have on the wellbeing of both the body and the mind can be profound. It is an important part of spiritual practice and connecting you to the supreme reality, universal consciousness or God (whichever term resonates for you!).

This article has covered seven Pranayama techniques, including: Alternate Nostril Breathing,Three Part Yogic Breath, Breath of Fire, Cooling Breath, Equal Fluctuations, Humming Bee Breath and External Breath. Each technique has been demonstrated so that you can now confidently add them to your own practice. When you are first getting familiar with these techniques, its recommended to spend five to ten minutes practicing one. Over time there will be a natural inclination towards lengthening this time; so listen to your body and let that be you guide. Don’t underestimate the power of these intense practices!

About

Charlie Hanna

Charlie is a Yoga Alliance certified Hatha, Yin Yoga & Meditation teacher with a psychology degree in her back pocket. She is currently on a mission, chasing sun and Read More..

Yoga For Headache Sufferers: Ease Tension and Find Calm in Just 10 Minutes

Yoga for Headache: A Natural Remedy for Tension and Stress Relief

Yoga for headache relief became a profound discovery for me only after a string of persistent, daily tension headaches threatened to derail my first backpacking adventure. At that time, I wasn’t practicing yoga—I wasn’t even aware that my anxiety and nerves were physically manifesting through pain. As I scrambled to plan every detail of the trip—booking accommodations, researching cheap travel options, and mentally projecting into an unknown future—my body absorbed the stress, resulting in relentless head pain.

I repeatedly turned to pills to mask the pain. They worked temporarily, but once their effects faded, the headaches returned. It wasn’t until I finally boarded the plane, fully surrendered to the moment, that the headaches subsided entirely—and they never came back. Looking back, I realized how powerfully my mind had influenced my body. Yoga for headache would have offered the kind of grounding and presence I desperately needed.

How to alleviate tension; Yoga for Headache

Yoga, meditation, and pranayama form a powerful trifecta of tools designed to pull us out of mental overdrive and anchor us into the now. Had I been engaging in any of these practices, I could have eased my head pain long before departure day. Yoga is not merely a treatment for symptoms; it addresses the root cause of tension headaches—mental stress and physical tightness.

Yoga works for headaches by gently releasing the areas of the body that unknowingly hold stress: the shoulders, neck, jaw, and hips. As breath and movement align, mental clutter dissipates, creating space for clarity and calm. Unlike over-the-counter medications, yoga promotes lasting relief by restoring balance between the body and mind.

Which Yoga Is Best for Tension Headaches?

Tension headaches often go beyond the scope of a mild ache—they can be debilitating, pushing us toward quick pharmaceutical fixes. However, there’s a gentler, more sustainable alternative. This section introduces restorative yoga for headache relief, focusing on accessible, powerful poses that target physical and mental stress without overwhelming the nervous system.

Yoga for Headache & Migraine Infographic

yoga for headache migraines infographic_CM108-10

Extended Child’s Pose – Balasana Variation

Begin on the hands and knees and then open the legs wide. (taking the knees as wide as the mat.) Bring the big toes to connect behind and then start to reach the arms towards the front of the mat, really lengthening through the spine and the side bodies. Reaching as far as you can with the hands and then gently press them down into the mat and send the hips down towards the heels. Relax the head down to the floor. With the knees wide here, you are allowing the belly an unrestricted space to expand into as you breathe. For the aim of reducing migraine pain, really focus on surrendering into this posture, actively releasing tension and stress.

With the forehead to mat connection there is an opportunity to massage into this area by taking the head left and right, whilst grounding yourself and coming out of the mind.

extended Chil's pose - balasana - yoga for headache

Downward Facing Dog – Adho Mukha Svanasana

Walk the hands forward and spread all ten fingers wide. Walk the feet back and then come into an inverted V shape with the body, sending the hips high. Press firmly into the mat to strengthen the shoulders and to send the tailbone high naturally. Melt the heels down towards the ground. Use this posture to take deep breaths and open the chest and the back of the hamstrings. Drop the shoulders away from the ears and activate into the strength by firming down into the hands.

In this inverted position you are inviting blood flow into the head.

Downward Facing Dog - Adho Mukha Shvanasana - yoga for headache

Standing Forward Bend Variation – Uttanasana

Start to walk the feet towards the hands to come into Standing Forward Bend. The knees can be bent slightly and keep the legs hip width distance apart. Release the hands down to the mat along with the head and the neck. Work to straighten the legs to open the hamstrings. Continue to send the tailbone up towards the sky, with the weight in the toes. There is the option to move into a shoulder and chest opener by interlacing the hands behind the low back and then send the arms and hands up towards the front of our mat. Continue to release your head and your neck down towards the mat, sending the weight of the body forward, finding balance.As you continue to drop the head down, enjoy the new oxygen that is flowing down into your brain. Inverting the body helps to reduce stress and anxiety, while calming the mind. 

Standing forward Bend with arms bound behind head - Uttanasna - yoga for headache

Seated Forward Bend – Paschimottanasana

Come down to find a seat and send the legs out long in front, removing extra flesh from underneath the sitting bones. Before moving into the full expression of this pose, take one hand to the heart and one to the belly and connect to the sensation of breathing inside of the body.

Release the hands and send them up towards the sky, flex the feet towards the face, engage the core by drawing the belly button back and then lengthen the spine and the side bodies. Inhale and extend the arms up and then exhale and reach forward, lengthening the spine, bringing the torso down leading with the the heart, releasing the head and neck down. Use this pose to find compression in the body. Continue to lengthen the spine as you breathe in and then exhale fold deeper. If there is tension in the head, try to acknowledge it and surrender to it. Dropping the mental stories of suffering.

The more you are able to connect to the breath, the easier it is to let go, so try to stay calm, yet engaged and working with deep, conscious breaths. 

Seated Forward Bend - Paschimottanasana

Half Lord of the Fishes Pose Variation – Ardha Matsyendrasana

Keep the legs out long and bend the left knee up and step the left foot over the right. Reach both hands up towards the sky, lengthening through the spine and then drop the left hand towards the back of the mat, wrapping the right arm around the left leg. Press into the left hand to lengthen the spine and then with an exhale, twist deeper, turning the head, neck and gaze.

Come back through center, reaching both arms up and then switch out the legs. Send the left leg long and then step the right foot over the left. Inhale and reach up to lengthen and then drop the right hand towards the back of the mat, left arm wraps around the right knee, coming into a twist. Press the right hand into the mat to lengthen up and then exhale to twist deeper.

Half lord of the fishes 2 - ardha matsyendrasana

Supported Bridge Pose – Supported Setu Bandhasana

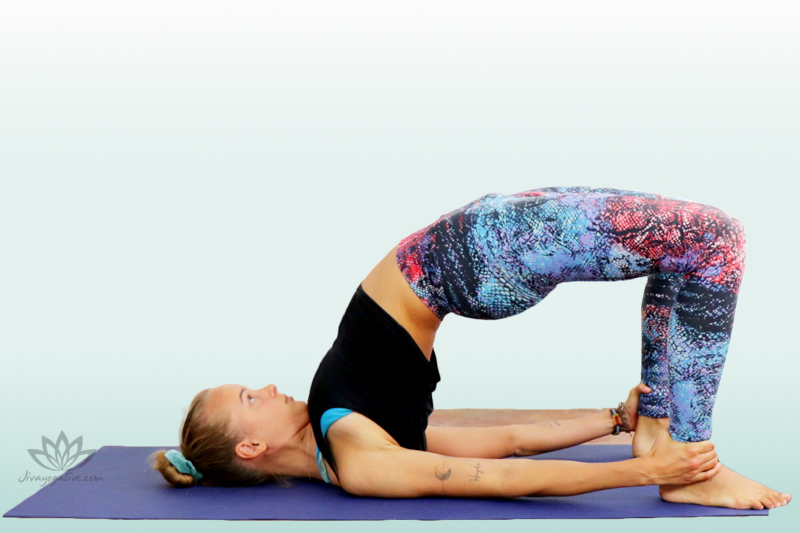
Lower down onto the back and have the arms extending down towards the feet. Bend both knees and walk the heels towards the glutes so that the fingertips can touch the back of the heels. Draw the lower belly down towards the spine and then press into the heels to lift the hips up.

Walk the shoulder blades underneath and then slide a block underneath the sacrum for Supported Bridge Pose. Ensure that the block is not too or too low, but directly in contact with the sacrum. The legs are parallel with one another and the arms are slightly away from the body, palms facing up. Use this supported variation of Bridge Pose to surrender the body into the earth. With the hips lifted, fresh blood is circulating down towards the head and brain, which will relieve migraine pain. To come out of the pose, press into the feet to lift the hips up and then slide the block to the side.

Unwind the spine down to the mat vertebrae by vertebrae and the bring the knees in towards the chest here and give yourself a hug, massaging the lower spine and releasing tension.

Supported Bridge Pose - Setu Bandhasana

Supported Reclined Bound Angle Pose – Supta Baddha Konasana

Make sure both blocks are available and close by for this supported variation. Lie down on the back and bring the soles of the feet together. Allow the knees to fall open, creating a diamond shape with the legs, opening the hips and use the blocks underneath the keens for support. Bring one hand to the heart and one to the belly then relax the gaze or close the eyes. This supported Reclined Bound Angle Pose is extremely calming for the mind. Use this posture to really connect to the breath. Stay in this pose for as long as you have or as is comfortable and let gravity do the work of opening the hips. 

Supported reclined bound angle pose - supta baddha konasana

Featured Video:7 Yoga Poses For Tension Headaches & Migraines

Yoga for Headaches and Neck Pain

Headaches are often caused by tension in the neck and you can use yoga to effectively release this area. Make sure to really listen to the body and it’s subtle cues, as the neck can be overly sensitive.The research out is also backing my claims! A study on The Effects of Yoga on Migraine, concluded that headache frequency and intensity were reduced when yoga was incorporated as part of a pain management protocol. The following three poses are very simple, gentle ways to relieve stored tension and pain and this is going to help ease the pain in your head. Eagle Arms Seated Variation is a posture is going to relieves tension in the upper body, all whilst in a restorative seat. Focus on pulling the shoulder blades apart and stretching the Rhomboid muscles. Bind the arms at the elbows and interlace them at the hands or the wrists, and then there is the option to drop the elbows down to the belly button and to drop the chin down to the chest to work deeper into the neck. Also see how it feels to take the elbows higher, arching the low back and taking the chin slightly up. Only work to your depth and current range of neck mobility. 

Conclusion: Breathe, Move, and Heal with Yoga for Headache

Many headaches stem from tension in areas that may seem unrelated to the pain itself. By embracing a restorative yoga practice, you open the entire body—especially the areas where stress hides. Inversions such as Legs-Up-The-Wall also enhance circulation, encouraging blood flow to the brain and aiding in pain relief.

Unlike painkillers, which offer temporary solutions, yoga for headache empowers you to address the underlying causes and reconnect with your body’s natural healing process. So, roll out your mat. Let your breath guide you. And move gently into stillness to reclaim your clarity and comfort.

Ready to take your healing further? Click here to access yoga courses for headache relief course and start your journey toward lasting wellness today.

About

Charlie Hanna

Charlie is a Yoga Alliance certified Hatha, Yin Yoga & Meditation teacher with a psychology degree in her back pocket. She is currently on a mission, chasing sun and Read More..

Yoga For Kidney And Liver 9 Strengthening Poses

Yoga for Kidney and Liver Health: Simple Practices to Support Your Detox Organs

Your liver and kidneys are vital players in the body’s detoxification process, and when they’re not functioning optimally, symptoms like fatigue, high blood pressure, acne, and even weight gain can emerge. This article will introduce you to gentle yoga for kidney and liver health and lifestyle habits that can help support these essential organs, bringing your body closer to balance and vitality.

Why Focus on the Liver and Kidneys?

The liver is responsible for processing everything from hormones to environmental toxins. When overloaded, it can struggle to detoxify efficiently—leading to a buildup of waste in the body. Issues like weight gain, hormonal imbalances, and even emotional irritability may be linked to liver stagnation.

The kidneys, often overlooked, are your body’s filtration system. They remove waste and excess water from the blood, expelling it as urine. When your kidneys aren’t filtering well, toxins can circulate through your system, affecting your skin, mood, energy levels, and immune function. Yoga for kidney and liver health can provide much-needed support to restore balance.

My Personal Healing Journey

When I first faced health challenges, I focused solely on gut health—eliminating foods, experimenting with diets, and using colon-cleansing herbs. While that helped, it wasn’t enough. The real shift happened when I started addressing kidney filtration and liver support through yoga and naturopathic practices. Healing isn’t about treating one part of the body in isolation. True wellness means supporting the whole system—and that includes your detox organs.

The Importance of Kidney Filtration

Functional medicine experts like Dr. Robert Morse and Dr. Mark Mattson emphasize the kidneys’ vital role in chronic health conditions. As Dr. Mattson puts it, “If you have a dirty pool, what do you start with first?… the filters.”

If you’re dealing with ongoing health issues, it’s worth considering whether your kidneys are doing their job efficiently. Without proper filtration, the body’s waste system becomes clogged—no matter what healing path you follow. Incorporating yoga for kidney and liver health into your routine is a gentle and effective step toward deeper detox.


Yoga Poses For Kidney and Liver Infographic

These poses form a gentle and supportive practice of yoga for kidney and liver health. They are designed to stimulate circulation, massage internal organs, and help your detox systems function more effectively.


Featured Video: Yoga Postures For Kidney & Liver Health

Yoga for kidney and liver health isn’t just about movement—it’s about supporting your body’s natural detox processes through mindful breath, intentional poses, and stress reduction. Whether you’re healing from an infection, dealing with fatigue, or simply wanting to maintain wellness, these postures can help.


Yoga for Kidney Infection

A healthy kidney is a filtering kidney, and by this I mean that it is doing its job of excreting waste and toxicity from the body. When the kidneys are down we can run into all kinds of health crises, one of them being infection. Practicing yoga for kidney and liver health regularly can aid in preventing these issues by encouraging circulation and function in your detox organs.


Restorative Yoga for Kidneys

Gentle, restorative poses are going to be more conducive to healing than any kind of intense workout, but you definitely want to keep the body moving to help activate the organs. That’s why restorative yoga for kidney and liver health is such a powerful tool. You want to ensure that all of the body’s elimination channels are kept open and free from blockages, and the kidneys are no exception.

Yoga Poses For Kidney and Liver Infographic

yoga for kidney and liver infographic

Bound Angle Pose – Baddha Konasana

Bring the soles of the feet together and remove the extra flesh from underneath the sitting bones to remove arching of the spine. Sit up tall and extend the hands and arms up towards the sky to begin. Inhale to lengthen the spine, and then exhale start to reach the arms forward, bringing them down, eventually coming down to rest them on the mat. Focus on lengthening the spine and then drop your heart forward. Use the breath to go deeper into the fold of this pose and focus on lengthening all the way through the back of the head and neck. Let the head by heavy and surrender as the hips open simultaneously. This folding of the body stimulates the kidneys, as well as the lower abdomen area.

bound angle pose - baddha konasana

Seated Forward Bend – Paschimottanasana

Come down to sitting and remove extra flesh from underneath the sitting bones. Send the legs out long and flex the feet back. Reach the arms up towards the sky, lengthening the spine and side bodies. Start to hinge at the hips and bring the torso down, continuing to reach the arms forward, eventually bringing them down. Surrender into this fold, with the heart towards the knees and release the head and neck. Allow the hands to rest down on the mat or grab for the feet, legs or wherever is comfortable. Use the breath to lengthen the spine and with every exhale fold deeper. This forward fold, compresses the abdomen which actively stimulates the internal organs promoting their efficiency and supporting detoxification.

Seated Forward Bend - Paschimottanasana yoga for kidney and liver

Boat Pose – Paripurna Navasana

Come to sitting in the center of the mat and bend the knees up. Take the hands to the back of the thighs, lengthen up through the spine up to sit up tall. Start to activate that core by lifting the legs up parallel to the mat, open the chest and focus on opening the collarbones. Take the gaze forward and start to straighten the legs. There is the option to release the legs and extend the arms straight out, otherwise continue to hold on to the back of the legs. This pose is going to strengthen the core and work deeply into the abdominal area and get the kidneys and the liver fired up. Work with the breath and find some ease in the perceived effort of this posture.

Boat pose - Paripurna navasana

Cat-Cow Pose – Marjaryasana-Bitilasana​​​​

Start in a neutral table top position and have the shoulders over the wrists and hips in line with the knees. Engage the core by drawing the belly button back towards the spine. Inhale and drop the belly down towards the ground, send the hips up, shine the chest and heart forward, to come into Cow Pose. Press into the palms to create space between the ears and the shoulders to lengthen the neck. Start to round the back, curling the spine to come back into Cat Pose.Alternate through these Cat and Cow poses, working to lengthen and then stretch the abdomen. Be as dramatic as you can be in each pose, pressing firmly into the hands, pulling the shoulder blades apart in Cat and really arching the spine in Cow Pose. This alternating movement is going to massage the internal organs.

cat-cow - marjaryasana - bitilasana yoga for kidney and liver

Downward Facing Dog – Adho Mukha Svanasana

Press down into the hands and the feet and send the hips and tailbone high for Downward Facing Dog. imagine your body to be an inverted V shape and start to peddle out the feet, bending one knee and then the other. Release any tension in the neck and head and draw the shoulders down away from the ears. Use this Downward Facing Dog as a momentary transitionary pose to create space in the body.  Find the breath and let the belly be soft.

Downward Facing Dog - Adho Mukha Shvanasana  yoga for kidney and liver

Standing Forward Bend – Uttanasana

From Downward Facing Dog, walk the feet towards the wrists and come into a Standing Forward Bend, with the feet hip width distance apart. Place a soft bend in the knees, release the hands to the mat and send the tailbone up towards the sky. Actively press into the toes and root down through the heels and release the head down. This pose stretches the entire back side of the body from the heels through to the crown of their head. To deepen into the hamstrings try straightening the legs a little more and continue to drop the torso down. This compression is going to stimulate the liver and kidneys by creating some gentle movement inside of the body to help detox and purify. 

standing forward bend - uttanasana

Chair Pose – Utkatasana

Come back to standing and connect the big toes, keeping the heels slightly apart. Bend the knees and come down into an imaginary seat. Squeeze the thighs and send the arms up towards the sky, palms facing inward. Relax the shoulders down away from the ears and continue to lengthen through the spine as the hips melt down towards the ground. Chair Pose is a great strength building pose, working deeply into the legs but also toning through the core and the internal organs. The posture provides gentle pressure to the liver and kidneys and will get them stimulated which will help to aid the digestive processes.

chair pose - utkatasana

Revolved Chair Pose – Parivritta Utkatasana

Staying low in Chair Pose, bring the hands to heart center and hinge the torso forward and then bring the left elbow to the outside edge of the right knee to come into Revolved Chair Pose. Point the fingertips towards the face, press the palms together and lengthen the spine.

Use the breath to take the twist deeper and continue to drop the hips down. Inhale and come back through center and then twist to the other side, bringing the left elbow to the outside edge of the left knee. Continue to send the hips down, press into the palms. Bring the hands back to center and forward down, straightening the legs and allowing the torso to hang heavy. Use the breath to keep lengthening the spine up in Revolved Chair Pose and use the exhales to twist deeper. Connect to the gentle movement inside of the abdomen at the core and use this twist to massage into the internal organs.

revolved chair pose - Parivrtta Utkatasana

Extended Hand to Big Toe Pose – Utthita Hasta Padangusthasana

Start to ground the left foot into the mat and lift the right knee up towards the sky, bringing it parallel with the ground. Extend the right arm towards the right foot, and use the first two fingers to hook the right big toe. Bring the left hand to the hip and then start to straighten the right leg towards the front of the mat and then gently open it out towards the side. Release the hip and send the left arm out long to come into Extended Big Toe Pose. Find the balance and the breath and then gently re-bend the knee, come back through center and then relax the foot down. Change sides. This pose actively tones the abdominal muscles which stimulates the digestive system, liver and the kidneys.  All this is going on in the body, whilst the balance is being challenged and strengthened. 

extended hand to big toe pose - utthita hasta padangusthasana

Featured Video:Yoga Postures For Kidney & Liver Health

Yoga for Kidney Infection

A healthy kidney, is a filtering kidney, and by this I mean that it is doing its job of excreting waste and toxicity from the body. When the kidneys are down we can run into all kinds of health crises, one of them being infection.

To really get the kidneys back to full functioning, some radical shifts to diet and lifestyle may be necessary and yoga can help to support your detox protocol and get them back online. Give these gentle postures a try and move with care and awareness. Half Lord of the Fishes – Ardha Matsyendrasana Twisting at the core like this is great for stimulating the kidneys, as it works to move out stagnant blood and waste. At the same time, this posture stimulates the liver so it is a great pose to support your detoxification protocol. Cobra Pose – Bhujangasana. As you send the chest forward and up and compress the low back, you are stretching the kidneys and encouraging obstruction to clear. Add this pose into your daily practice to continue to invite space and help to keep kidney stones and waste build up at bay.

Restorative Yoga for Kidneys

Gentle, restorative poses are going to be more conducive to healing than any kind of intense workout, but you definitely want to keep the body moving to help activate the organs. You want to ensure that all of the body’s elimination channels are kept open and free from blockages and the kidneys are no exception. Try these gentle poses and focus on sending the breath down into the problem area.  Child’s Pose Such a simple pose, it’s hard to believe that anything is happening in the body at all, but this restorative Child’s Pose is going to gently stretch the kidneys while calming the mind, which is essential for the organs to function effectively. As the body relaxes and releases stress, the internal organs are invited to do the same and their energy can be exerted towards doing their job more effectively. Wind Relieving Pose Spend time rocking left, right, back and forth here, on the low back to massage into the kidneys to stretch and stimulate them. This pose is great for gastrointestinal complaints in general as the thighs compress down into the digestive tract and usually when the kidneys are down, there will likely be issues with the gut. Spend as long as you can here, sending the breath down into the belly, and squeezing the thighs down with each exhale. Sphinx Pose – This gentle backbend is not only therapeutic for the spine, but it is a great way to strengthen and stretch the abdominal organs, including the kidneys. The more you practice this pose, the deeper its effects on the kidneys will be so add it into your regular practice.

Kidney Filtering

The kidneys act as a filter and remove toxic build up from the body, as well as excess water which is excreted as urine. They work along with the body’s other means of elimination and are a crucial part of our wellbeing. If the kidneys aren’t filtering, we can run into trouble and the body can enter into a state of dis-ease, from anything from mild acne to cancer. Yoga for kidney and liver health helps keep these filters operating at their best.

When I ran into my own health crises, I remember that it took me a good few years before I even acknowledged the importance of the kidneys and their role in my overall health and healing. It was just my gut that was suffering – or so I thought – so my main focus was on eliminating foods, trying different diets and adding in cleansing herbs, all to try and clean the colon.

Focusing on the gut alone did not allow me to heal and one of the best things I have come to understand through my own experience, is how everything is connected. You can’t heal parts of the body in isolation, you have to work on the whole system and even if you go about this systematically, which I recommend you do, you are going to have to look at each of your essential organs in turn. The body has several channels of elimination and the kidneys are one of the most important in removing waste from the body. If the kidneys are not filtering out toxicity, then there is the risk of the body going into a state of dis-ease.

If you are suffering from any kind of chronic health complaint, there is a high chance that the kidneys are not functioning at 100% and it doesn’t matter what path you choose to heal yourself, if the kidneys are not filtering, then you are not healing.

Natural doctors such as Dr Robert Morse have been working with patients with chronic health conditions that have bewildered allopathic medicine and what they have found is that kidney filtration is one of the keys to wellbeing. Dr. Mark Mattson, Chief of the Laboratory of Neurosciences at the National Institute on Aging, also stresses the importance of kidney filtration; “If you have a dirty pool, what do you start with first?….the filters”Dr Mark Mattson

Conclusion

Lifestyle Tips for Healthy Detox Organs

  • For the Liver:
    Keep your diet low in unhealthy fats and processed foods. Incorporate liver-loving foods like dandelion greens, turmeric, and beets.

  • For the Kidneys:
    Instead of flooding your system with water, focus on hydrating through high water content fruits (like watermelon and cucumber) and leafy greens. These nourish the kidneys gently and efficiently.

Adapt these two lifestyle habits and then support yourself further with the yoga poses that have been shared with you in this article and you will be doing amazing things for your health. 

A liver burdened by toxins and kidneys that aren’t filtering properly can compromise your whole system. The key to radiant health lies in supporting your body’s natural elimination processes. By incorporating yoga for liver and kidney health, along with simple dietary adjustments, you’re setting a strong foundation for healing and longevity.

About

Charlie Hanna

Charlie is a Yoga Alliance certified Hatha, Yin Yoga & Meditation teacher with a psychology degree in her back pocket. She is currently on a mission, chasing sun and Read More..

Blocked Nose Yoga: Clear Sinuses with Targeted Pranayama and Poses

Blocked Nose Yoga Infographic

yoga for blocked nose infographic Blocked Nose Yoga

Easy Pose – Sukhasana

Come into a cross legged seated position, removing any extra flesh from underneath the sitting bones to promote length through the spine. Hands can rest down in the lap or on the knees. Spend a few moments grounding the body and the mind and close the eyes. With each breath in, lengthen the spine up nice and tall and with each exhale relax the shoulders down away from the ears. This simple seated pose combined with conscious breathing is going to help ground the body and bring awareness away from the mind. As you sit and rest in this simple pose, actively release tension from the shoulders, chest and face in order to help with any congestion that has built up in these areas.

easy pose - sukhasana sara

Breath of Fire – Kapalabhati

Continue to breathe in and out through the nose, but focus on the exhales by vigorously pushing the breath out through the nose while pulling the belly in. Trust that the inhales will come naturally. Perform this breath for 20 seconds and then rest, bringing the hands down to the lap. Close the eyes and focus on the third eye or take the gaze to the nose.Breath of Fire is going help to release any congestion in the nose, while building an internal heat in the body to help loosen and release any mucus that has become congested. Sometimes this Pranayama technique can cause mild dizziness, so in order to counter this brings one hand to the heart and one to the belly to help ground and establish equilibrium.

Breath of Fire - Kapalabhati Pranayama blocked nose yoga

Face Yoga

Using two fingers from each hand, gently tap around the nose to increase the blood circulation to this area. Do this for about 20 seconds, and then using the same two fingers start to tap along the inside of the eyebrows. Next, start to gently push into the skin; pulling down underneath the eyes and at the sides of the nose. Press in and pull out the skin all around the nose, cheeks and the brow.Gently pulling and tapping is going to help stimulate the areas and relieve congestion from the face and throat and encourage the lymphatic system to drain out through the nose. These micro movements invite fresh oxygen which helps to wake up the system and create some extra room for that mucus to move through.

Face Yoga blocked nose yoga

Easy Pose Variation – Sukhasana

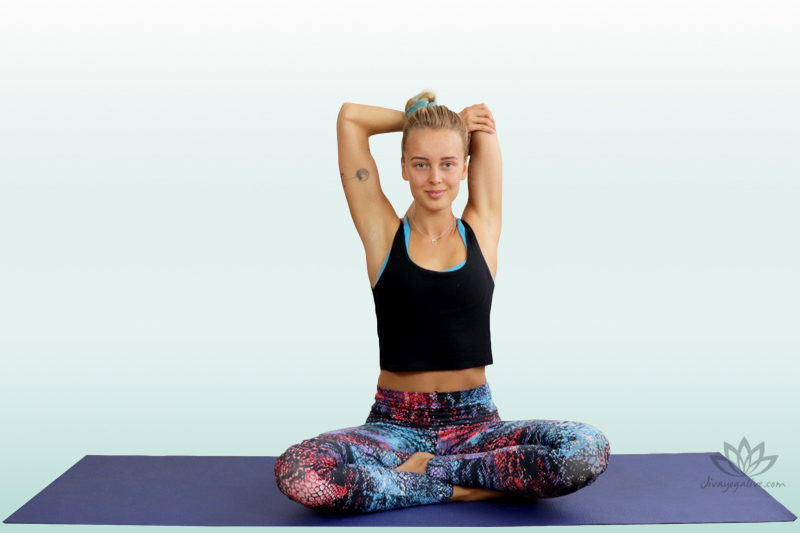
Staying seated in a comfortable Easy Pose, reach both hands up to the sky. Bend the right elbow and drop the hand down the back in between the shoulder blades. With the left hand, grab the right elbow inviting a stretch into the tricep. Focus on opening up the chest and take deep breaths to stretch into the lungs. Reach both hands up and then switch sides. Ground down into the sitting bones the entire time, lengthening up through the spine and opening the chest. Have the gaze relaxed, focused at one point or the eyes closed. This Easy Pose variation is going to strengthen and stretch the lungs and open up the respiratory system. 

Easy Pose Tricep Stretch - sukhasana

Downward Facing Dog – Adho Mukha Svanasana

Rock forward onto the hands and knees and send the hips high to come into Downward Facing Dog. Press into all ten fingers and stretch the legs, melting the heels down towards the mat. With a big breath in, lengthen through the side bodies stretching the rib cage, lungs and abdominal organs. Downward Facing Dog is stretching the whole body from the heels, up the legs and down the spine, while simultaneously boosting circulation and helping to clear mucus from the respiratory system.

Downward Facing Dog - Adho Mukha Shvanasana

Upward Facing Dog – Urdhva Mukha Svanasana

Move through a High Plank and then flip onto the tops of the toes and press down into the palms. Lift the knees and thighs up off the mat and come into Upward Facing Dog. Check that the shoulders are in line with the wrists and the gaze can go slightly up to lengthen the back of the neck. Actively draw the shoulders down away from the ears and shine the heart forward to continue stretching the front of the chest. Big breaths in here to open into the full capacity of the respiratory system. 

Upward facing dog - urdhva mukha svanasana

Camel Pose – Ustrasana

Come to kneeling and if there is sensitivity in the knees there is the option of rolling the mat up to act as a cushion. Start to bring the gaze up and send the arms high as you open the chest, bringing an arch into the low back. Focus on lengthening the spine and send the hips forward, gently squeezing the glutes. Bring the hands now to the sacrum for more support, fingers pointing down and move slowly to find your depth. Continue to push the hands down, to increase the space at the low back. Take a big breath in and as you exhale, stick out the tongue and create a hissing sound. To come out of the pose safely, bend the knees and fold down, bringing the hips down towards the feet, coming into a kneeling posture. Bring one hand to the heart and one to the belly. Camel Pose is deep heart opening posture that increases circulation in the chest while stretching the lungs. This will help to remove the mucus that has become stuck and is causing blockages.

camel pose - ushtrasana

Featured Video:Yoga For Nose Blockage

Yoga for sinus allergies

Allergic responses are triggered by a variety of different environmental allergens; foods, dust, pollen and mold, to name a few and can wreak havoc on our respiratory system, makes our eyes and nose run. They can make heading to yoga class a little too hard basket, but luckily there are some simple postures you can practice at home. If you have access to a bed or a floor, you can invert the body. No excuses. Inverting the body is an effective means of opening up the nasal passage and combating against these sinus allergies. This doesn’t mean you have to throw yourself into a handstand, unless you can, then for sure, go get yourself upside down. BUT, if that is not in your practice, there are many more simple poses that are going to get the body above the head and get that congested mucus draining out. 

Fish Pose – Matsyasana

Fish Pose is going to open the respiratory system as you stretch the lungs, chest and throat, while stimulating the lymphatic system where all this congestion is backed up. Postures like this one are going to help strengthen the respiratory system so that the body is better able to defend against allergens which are causing your allergic response.

Supported Shoulder Stand – Salamba Sarvangasana

This posture is going to open the nasal canal and encourage the sinuses to drain which will relieve pressure from the head and face. Fresh oxygenated blood is being directed down into the chest which will assist in clearing the respiratory tract.

Plow Pose – Halasana

This posture stretches into the back of the neck and the head and releases tension from these areas that can be inhibiting effective drainage of congestion in the head and sinuses.

Pranayama for blocked nose

Depending on blocked the nose is, certain Pranayama techniques might be able to provide some relief. If the blockage is severe then forceful breathing in and out of the nose is not advised, as it will likely just be too difficult and uncomfortable. However for mild congestion the technique Anulom Vilom can help to encourage a free flow of air in and out of the nasal passage.

Alternate Nostril Breathing Preparation – Anulom Vilom

Relax the body in a comfortable seat and bring the first two fingers of the right hand to rest in between the brows, in the space of the third eye. Block the right nostril with the thumb and then inhale up the left nostril completely. Cover the left nostril with the ring finger and exhale down the right. Inhale up the right nostril completely and then cover with the thumb. Exhale down the left nostril. Inhale up the left nostril completely, then cover with the ring finger. Exhale down the right nostril. Continue this practice for ten round and then rest with the hands in the lap. Perform a total of three rounds and then allow the breath to return to its natural rhythm of breathing.

Yoga for sinus headache relief

Headaches can range from mild to severe, but regardless of their level of intensity, we are so quick to reach for pain meds to dull the ache. These unfortunately only act as a temporary band aid solution and offer nothing in the way of healing or prevention.

Research has shown that yoga can effectively manage headaches, in regards to the intensity of the pain experienced during an attack and the frequency of their overall occurrence. So try some yoga instead, and see if you can actually get to the root cause of your suffering, by releasing tension in the muscles, draining the sinuses and dissolving congestion.

Blocked Nose Yoga therapy for sinusitis

Sinusitis is a condition where there is inflammation present in the membrane lining the sinuses and the suffering can be much more severe than that caused by seasonal allergies or other environmental allergens. There can be facial pressure, nasal congestion and discharge, pain in the face, jaw and teeth and even a diminished sense of smell. The most typical form of intervention is a course of antibiotics, which the body can develop resistances to over time and can wreak havoc on gut health. Research was conducted in order to find out whether or not there is a scientific basis for yoga therapy in the treatment of sinusitis and found that some Yogic Pranayama techniques are highly effective in ventilating the sinuses.

Bhramari, also known as the Humming Bee Breath is thought to help prevent infection and reduce inflammation.

Humming Bee Breath – Bhramari Pranayama. Bring the thumbs to rest gently in the opening of the ear canal. Bring the index fingers to meet at the brow, the space of the third eye. Bring the remaining three fingers to rest gently on either side of the bridge of the nose, covering the eyes. Inhale through the nose and as you exhale out the nose, create a humming sound as you drop the chin down towards the chest. At the end of the exhalation, take a breath in as you bring the head back up. Complete six rounds of Humming Bee Breath creating an audible humming sound, and then complete six more in silence, imaging the humming vibration. Notice if you can still sense the vibrations in the sinuses.

Conclusion

Sinus congestion and a blocked nose can make going to yoga class a little unappealing, but there is no reason to not roll out the mat at home or even practice some face yoga or some conscious breathing at your desk, in your car or in the comfort of your own bed. Clear the sinuses while at the same time clearing the mind and rest, rest, rest!

You are now armed with a more holistic means of unblocking the nose and fighting congestion in the body, as opposed to taking pharmaceutical interventions which only mask symptoms for a couple of hours and offer nothing of substance to the mind.

Take your time with this practice and be gentle. Trust that blockages will dissolve as you move and stretch the body, inviting in fresh oxygen and space so that excessive mucus can move through and out.

Ready to take your healing further? Click here to access yoga courses and start your journey toward lasting wellness today.

About

Charlie Hanna

Charlie is a Yoga Alliance certified Hatha, Yin Yoga & Meditation teacher with a psychology degree in her back pocket. She is currently on a mission, chasing sun and Read More..

Yoga for Flu and Cough: 8 Poses to Soothe a Dry Cough and Open Your Airways

Practicing yoga for flu and cough can be a powerful way to support your body’s natural healing process. I’ve always claimed to be the best at being sick—odd as that sounds. But here’s my secret: when a cold or flu strikes, I listen to my body and rest completely.

Some people try to power through, hoping to outlast the illness. Not me. I’m no hero. I go straight to bed. Rest is what your body demands, and honoring that is the first step in any healing process. Animals do it instinctively. They sleep, fast, and recover—why should we be any different?

Start with Rest, Then Gently Reintroduce Movement

When your energy begins to return, it’s time to reintroduce gentle movement. That’s when yoga for flu and cough becomes a vital tool. Simple asanas can:

  • Open up blocked areas like the chest, lungs, and sinuses
  • Stimulate circulation to help break up congestion
  • Calm the nervous system and reduce head tension

A quick tip: If you’re battling a sinus headache, try this! Add a drop of peppermint essential oil to your palm, rub your hands together, cup your nose, and take three deep inhales. Then gently massage your temples and the back of your neck. It’s intense, but it works wonders—often faster than over-the-counter meds.

A Restorative Sequence: Yoga for Flu and Cough Recovery

This article introduces a restorative yoga sequence specifically designed for those dealing with flu or cough symptoms. The goal of this yoga for flu and cough practice is to:

  • Gently expand the lungs and chest
  • Release pressure and tension
  • Encourage drainage of mucus and improve respiratory function

Infographic: 8 Yoga Poses For Cold & Dry Cough

yoga for cold and dry cough    yoga for flu and cough

Mountain Pose – Tadasana

Start standing with the feet parallel to one another. Ground down through all four corners of the feet and open up the chest and close the eyes. Activate the thighs by lifting up through the kneecaps, draw the lower belly in and drop the tailbone down. Gently draw the chin back towards the centreline of the body to lengthen the back of the neck and relax the shoulders down. Use this simple standing pose to become aware of the body. Take full breaths in and ground down into the feet. To an outside observer, it doesn’t look like there is much going on in this standing posture, but there are so many micro movements that you can engage to turn on the strength of the body.

Actively hug the legs towards the midline of the body, spread the fingertips wide, lengthen the spine, open the chest and continue to create space between the shoulders and ears. 

Mountain Pose - Tadasana        yoga for flu and cough

Standing Forward Bend Variation – Uttanasana

Start to reach the arms up to the sky and then begin to hinge at the hips bringing the torso down. Hands are going to extend forward as you make your way down into a Standing Forward Bend. Continue to lengthen the spine to deepen the bend and allow the hands to fall down towards the mat.

Release the head and neck, along with any tension you are holding on to. Bring the hands around the back of the body and interlace the fingers at the lower spine. Start to bend the knees softly and reach the hands up and over towards the front of the mat. This is going to open the chest, while compressing the belly. This posture helps to ease stress and anxiety in the mind, while increasing circulation and blood flow to the head, the nose and chest. This is going to assist with cough and cold symptoms, by creating space for congestion to move through.

standing forward bend - uttanasana         yoga for flu and cough

Downward Facing Dog – Adho Mukha Svanasana

Start to walk the hands towards the front of the mat and ground down through all ten fingers and the heels of the palm. Stretch the heels down towards the earth and send the hips up to come into Downward Facing Dog. Melt your heels down towards the ground. Use this pose to stretch the entire body from the heels through to the crown of the head. Press firmly into the palms, lengthening the spine and drawing the shoulders back and away from the ears, creating space at the side bodies, and into the armpits.

Downward Facing Dog - Adho Mukha Shvanasana

Sphinx Pose – Salamba Bhujangasana 

From Downward facing Dog, come forward onto the toes and move through a High Plank to come down to lying on the belly. To prepare for Sphinx Pose bring the forearms out in front, bringing the elbows in line and underneath the shoulders, palms pressing firmly down, fingers spread wide.

Press into the forearms and drop the shoulders down away from the ears to create space between the ears. Energetically pull the elbows back towards the body, opening the chest. Take the gaze forward, lengthening the back of the neck.This pose provides a mild and therapeutic backbend while opening the chest and the lungs. continue to press into the arms and open up the chest and heart, taking full breaths in. Stretching the chest in this way is helping to create more space in the respiratory system.

Sphinx Pose - Salamba Bhujangasana

Seated Forward Bend – Paschimottanasana

Come down to sitting and send the legs out long in front. Remove the flesh from underneath the sitting bones to lengthen the spine and reach the hands up towards the sky, lengthening the side bodies. Start to extend the arms forward, stretching from the tailbone up the spine, eventually releasing the hands to the ground, to the legs or to the feet. The posture lengthens the entire underside of the body from the heels, up the back of the legs and the spine, through to the crown of the head, while also compressing the abdominal organs and stimulating the digestive system.

Seated Forward Bend - Paschimottanasana

Bridge Pose – Setu Bandhasana

Slowly lower down to lying on the back bringing the hands down by the sides of the body. Bend the knees and walk the feet back towards the glutes here, making sure legs will be parallel with one another. Pull the spine down and ensure that the sacrum is connecting down to the mat.

Press into the heels and lift the hips to come into Bridge Pose. Walk the shoulders underneath one another and if there is room, interlace the hands underneath the lower spine, pressing the forearms into the mat.

Bridge Pose is going to open the chest and send the chest towards the chin in order to compress. Continue to press into the heels to work the hips higher and take deep breaths to open and stretch the lungs. This is going to help remove any obstruction that is causing a cough.

bridge pose - setu bandhasana

Headstand Pose – Shirshasana     

Come onto all fours and bring the elbows down to the mat, keeping them shoulder width apart. Grab for opposite elbows to find the correct alignment for the base and then keeping the elbows where they are, release the elbows and interlace the hands in front, creating a triangle shape with the arms.

The crown of the head is going to come down to mat and rest in the cupped, interlaced hands. Start to lift the hips up and walk the feet in towards the body.

Come up on to the toes, sending the hips a little higher. Start to press into the forearms and shoulders and continue to walk the feet in until the hips are as close to the head as is comfortable. Start to bend one knee, bringing it in towards the chest and taking the toes up off the mat.

Repeat with the other leg, making sure to keep the hips over the head. Find the balance and then start to straighten the knees, sending the legs up, coming into a Headstand Pose. Continue to press into the forearms to take some of the weight off of the head.

Pick one point to focus on for balance and then focus on even, steady breaths.

The compression to the crown of the head in this posture is inviting fresh oxygen and blood flow down into the area, boosting circulation and helping to fight against coughs and colds.

Headstand Pose - Shirshasana

Child’s Pose – Balasana     

Come out of Headstand Pose by bending the knees and slowly lowering back down, pulling the knees in towards the chest, dropping one foot down and then the other. Take the knees down to the mat and release the hands down by the sides of the body. Bring the forehead down to the mat for Child’s Pose. Allow the forehead to connect down to the mat and bring awareness to the breath. Surrender completely, letting the full weight of the body rest down and allow the body to come back into balance.

Child's Pose - balasana          yoga for flu and cough

Featured Video: Yoga For Cold & Dry Cough

Does yoga for flu and cough relieve headaches?  

When you have a cold or your head is pounding, yoga might not be the most appealing, but what if I told you, you could stretch the body and ease your suffering without even leaving your bed? Try this video on yoga for flu and cough. Even if it is a migraine you are currently trying to navigate, studies have shown that yoga can reduce the severity of the episode and the need for medication.

Legs-up-the-Wall Pose – Viparita Karani

Lying on your back, bring you hips as close to the wall as you can and then send them up high. If the hamstrings are tight, you can slide a cushion under the hips and bring them slightly away from the wall and rotate them slightly in. Hold this pose for five minutes or as long as is comfortable.

Supported Reclined Bound Angle Pose – Supta Baddha Konasana

Grab a pillow and align it to the vertical length of your spine. Grab two more and have them under the knees to take some of the intensity out of the hips and groins and use this supported variation to surrender the body. Have the head resting back and the chest opening. This is going to create space in the lungs and make room for any cough induced congestion.

Supported Bridge Pose – Setu Bandhasana

This is one pose I have used multiple times in bed, usually when I’ve been travelling and have had nowhere to roll out my mat, but it also great to practice when suffering from sickness and getting out of bed is a hard no.

It helps if your mattress is a little more on the firm side, but the aim is to open the chest and send fresh blood to the head.

This will help to clear the sinuses and at the same time, boost the immune system through activation of the thymus gland. For this supported variation, slide a pillow underneath the sacrum and melt the hips down, focusing more on the opening of the chest. 

Can yoga help with a cold?

There are many variables that can trigger a cold and although they usually aren’t so life threatening they can leave you feeling exhausted and depleted.

Yoga can offer a holistic means of intervention as it works to balance the nervous systems and by drawing fresh blood, specifically the white blood cells, to the head and throat, the sinuses are able to decongest. Standing Forward Bend – Uttanasana

A simple forward bend is going to directly send a oxygenated blood straight into the head and relieve pressure, clear the sinuses, while recharging the nervous system.

Camel Pose – Ushtrasana

This posture is a dramatic heart opener that stretches the lungs and the chest and creates more room in the respiratory system. Take deep, full breaths in order to get the most benefits in regards to clearing blockages that are contributing to your cold. Fish Pose – Matsyasana Another posture to open the chest, lungs and throat. As the body stretches, mucus that is causing obstruction is dislodged so it can be expelled from the body.

Restorative yoga for illness

Yoga is an alternative means of fighting many types of (dis-ease) in the body. It can help to boost immunity, help with respiratory ailments and manage headaches. When combined with conscious breathing, you have a gentle way of navigating actual healing, as opposed to treating symptoms with band aid pharmaceuticals. 

Sometimes the body just needs to rest and when that is the message the body is relaying, then rest away dear friend.

However, if you do feel as though you have a little energy to scrape off the bottom of the barrel, a little restorative yoga might be all that you need to boost your healing and immune system so you can get back to business as usual. Child’s Pose – BalasanaYou can never go wrong with a gentle Child’s Pose, even if you are at deaths door! Ensure that forehead to ground connection and apply a little more pressure than usual, especially if you are suffering from any kind of congestion in the head.

Continue to apply this pressure for a few rounds of breath and then take the forehead left and right, massaging into the scalp. This is going to help relieve tension and while calming the mind.Reclining Hero Pose – Supta Virasana This pose can be done with the support of props to make it as restorative as possible. Have a cushion or rolled up blanket vertically along the spine, and then bring additional support for underneath the head. This posture will open the chest but without the intensity of the full variation.

Supine Spinal Twist – Supta Matsyendrasana

This posture gently opens across the chest and the shoulders, creating space in the lungs, while also releasing stress and tension that you are harbouring around being unwell.

For the body to heal, dropping stress and anxiety is essential, so we work with poses like simple spinal twists as they have the power ease both the physical and mental bodies.

Honor Your Body’s Messages

Even light yoga may feel like too much if you’re really run down—and that’s okay. If your body is still pleading for full rest, listen. Bookmark this article and return when you’re ready.

But once you feel your energy stir again, yoga for flu and cough can help shake off the heaviness, reduce symptoms, and lift your spirit.

Conclusion

Coughs and colds trigger congestion that we already have backed up in the system. They actually provide an opportunity to expel as much of this obstruction from the body as we can, so taking pharmaceuticals is only going to suppress and bury this lymphatic stagnation further.

Ideally you want to encourage this mucus to come out of the body and yoga is one way we can do exactly that.

This article on yoga for cold and cough therapy has encouraged gentle movement in the body that is going to create space and open up the respiratory system to help tackle the illness. The sequence is simple, making it suitable for all levels of yogi practitioner, and manageable if sickness is hitting hard.

Combining conscious breathing is going to help further de-stress the immune system, making the body more resilient and able to fight back. Move with ease and use this opportunity to show yourself some love. Thank the body for its resilience and it will thank you with a speedy recovery.

About

Charlie Hanna

Charlie is a Yoga Alliance certified Hatha, Yin Yoga & Meditation teacher with a psychology degree in her back pocket. She is currently on a mission chasing sun and Read More..

Is Yoga Evil or Demonica

Is yoga evil or demonica? This question, though provocative, is one that has been circulating for decades. For many people, yoga is simply a way to move the body, reduce stress, and foster well-being. For others, it serves as a pathway to open the body and mind for deeper meditation. Historically, the original yogic practitioners intended to still the body entirely to reach higher states of consciousness. These purposes are far from being influenced by evil or demonic forces. In fact, pushing the body too far too soon—like forcing into the splits—might be better described as ego-driven, rather than demonically inspired.

Understanding the Symbolism Misinterpreted as Demonica

The idea that yoga is demonic may stem from its connection to ancient texts and symbolic imagery, such as depictions of the goddess Kali holding a severed head. These images, though striking, are symbolic representations, often misunderstood outside of their cultural and spiritual contexts. For example, Kali’s image represents the destruction of ego and ignorance, not malevolence.

Even commonly practiced gestures like Anjali Mudra (hands in prayer position) and chanting mantras can be misread by those unfamiliar with spiritual traditions. To someone opposing religion or mysticism, these practices might appear threatening. However, they are meant to center the mind and heart, not to invoke fear or darkness.

What Yoga Truly Is: A Path of Connection

Yoga means “union” or “connection.” This union can be seen as the integration of body and mind, breath and movement, or the self with higher consciousness. By creating this union, yoga helps sever the grip of the ego, even if only briefly, allowing for calm and relaxation.

Yoga also enhances alignment, boosts flexibility, and stimulates internal organs. When practiced with attention to breath, yoga becomes a moving meditation that quiets the mind and invites stillness and peace.

Clarifying What Yoga Is Not

It is a misconception to think of yoga as a religion. While yoga may complement someone’s spiritual or religious life, it does not require religious belief to be practiced. Many approach yoga purely for its physical benefits or as a tool for psychological healing.

Historically, yoga was developed to prepare the body for deeper inner work—understanding the ego, letting go of what no longer serves us, and becoming fully present. These practices are grounded in self-awareness and healing, not in anything demonic or evil.

Yoga Is Universal: For All People

Yoga and meditation are practices that transcend religious or cultural boundaries. Whether you are religious, spiritual, agnostic, or atheist, yoga offers tools for balance and well-being. People of all ages and backgrounds practice yoga worldwide, benefiting physically, mentally, and emotionally.

Although ancient yogic texts hold great wisdom, studying them is not a prerequisite. Yoga is a complete system designed to promote well-being on all levels, and countless individuals use it to enhance their quality of life.

Conclusion: Yoga Awakens, Not Corrupts

At its core, yoga is about love, presence, and unity. It encourages awakening from the illusion of the ego—ironically, the very thing more deserving of the labels “evil” or “demonic.” Yoga can be as simple as a physical exercise or as profound as a transformative psychological journey.

By detaching from unhelpful thoughts and focusing on breath, body, and the present moment, yoga helps reduce stress, anxiety, and depression. Far from being evil or demonic, yoga is a deeply empowering practice for inner peace and clarity.

Want to understand how yoga can transform your life from the inside out? Click here to access our full course and explore the deeper truths of this ancient, universal practice.

Featured Video: Yoga Evil or Demonic

About

Charlie Hanna

Charlie is a Yoga Alliance certified Hatha, Yin Yoga & Meditation teacher with a psychology degree in her back pocket. She is currently on a mission, chasing sun and Read More..

Ready to learn more about yoga? Click here to access courses for and start your journey toward lasting wellness today.

9 Yoga Poses for Cough and Phlegm

When you’re looking for yoga poses for cough and phlegm, it’s important to understand that yoga is not only for flexibility and peace of mind—it can also help relieve respiratory discomfort. I remember when I was a beginner starting my yoga journey on my own, long before yoga dominated the online world. I had heard … Continue reading “9 Yoga Poses for Cough and Phlegm”

When you’re looking for yoga poses for cough and phlegm, it’s important to understand that yoga is not only for flexibility and peace of mind—it can also help relieve respiratory discomfort. I remember when I was a beginner starting my yoga journey on my own, long before yoga dominated the online world. I had heard of its many benefits but didn’t know how to begin. Trying (and failing) to get into the splits quickly became my daily frustration, and I would give up, thinking my body wasn’t built for this.

Finding Structure and Breath: My Turning Point

Eventually, I discovered a local yoga studio. While I still couldn’t master the splits, I found the guidance I needed to understand yoga’s deeper value—including how certain yoga poses for cough and phlegm relief could support my overall health. The structure of a class helped me stay consistent, something I struggled with on my own. Even on my most distracted days, the class held space for me to reconnect with my body and breath.

Realizing the Power of Home Practice

As I began experiencing the benefits—like better flexibility and a clearer, calmer mind—I started wanting that feeling more regularly. That led me to commit to practicing at home. Here’s the thing: yoga doesn’t require a 90-minute session every day. I learned that even fifteen minutes of focused breath and movement could significantly ease my chest and throat congestion. Certain postures open the lungs, stimulate lymphatic flow, and reduce inflammation, making them ideal yoga poses for cough and phlegm.

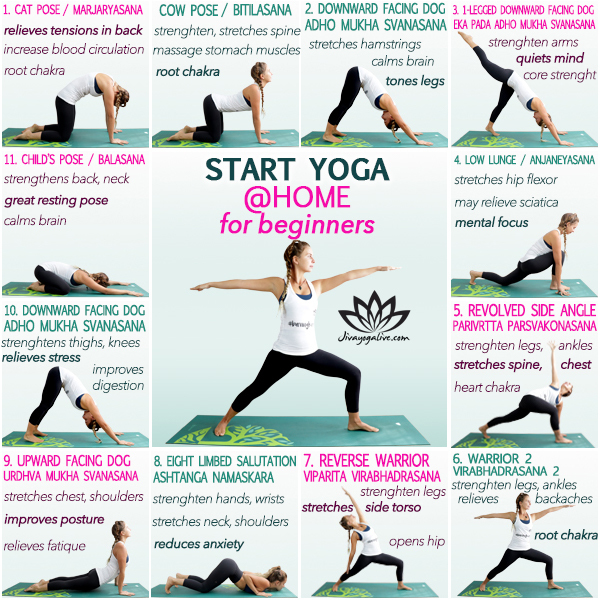
Start Yoga at Home For Beginners ​Infographic – Yoga Poses for Cough and Phlegm

how to start yoga at home for beginners infographic

Cat-Cow – Marjaryasana-Bitilasana 

Coming into a Table Top position, making sure that the wrists are in line with the shoulders and that the knees are in line with the hips. Spine is neutral, head and neck in one line, and the gaze is slightly down and towards the top edge of the mat. Inhale, drop the belly down, take the heart forward, arching the back, coming into Cow.

Exhale and move into Cat Pose by pushing into the palms, rounding the upper back, bringing the belly button back towards the spine and dropping the chin to the chest. Inhale, again coming forward, opening the chest. Exhale, pushing back, rounding the spine. It’s good to work through a few rounds of these Cat-Cow movements in order to warm up the spine and let it know we’re going to move into it.

This pose mobilises the spine, shoulders and the neck and is the perfect warm up for all levels of yogi. It is a gentle way of preparing the body and the spine for deeper stretches and is a safe way of relieving tension from the back.

cat-cow

Downward Facing Dog – Adho Mukha Svanasana

Tuck the toes and push into the palms and take the hips up into Downward Facing Dog. Start by pedalling out the legs and bending the knees. Pushing down into the palms, fingers are spread wide and allow the head and neck to drop.

Downward Facing Dog is an opportunity to catch you breath and balance before moving onto the other side of the body during your flow.

downward facing dog pose

One Legged Downward Facing Dog – Eka Pada Adho Mukha Svanasana

Rise the right leg back and up, coming into a One Legged Downward Facing Dog.

It is very common to dump the weight of the body into the left shoulder here, but try to keep the shoulders square by pressing evenly into both hands.

one legged downward facing dog

Low Lunge – Anjaneyasana

Bend the right knee and come forward, transferring the weight into the hands and step in between the palms, coming into Low Lunge. Hands will frame either side of the front foot and you can use the fingertips for support. There is the option to rise the back knee or you can take it down for more support. Make sure that the neck and head are in line with the spine.

In Low Lunge you can start to work into the flexibility of the back hip flexor by squeezing the gluteus muscles. Try to keep the hips square, by sending the back hip forward.

low lunge 2

Revolved Side Angle – Parivrtta Parsvakonasana 

Take the left palm and press it flat down into the earth and take the right arm. Spinning the chest open coming into an Revolved Side Angle. Gaze is up to the top hand. Really pressing down into the left palm and the ball of the back left foot. Take a breath, and open the chest more.

This pose strengthens and stretches legs, groin, hamstrings and at the same time opens the chest, the shoulders and the spine.

revolved side angle pose - twist

Warrior 2 – Virabhadrasana II  

Spin the back foot down and cartwheel the arms, coming into a Warrior Two. The front toes are facing forward, and the back foot is in on an angle. Press down firmly into the outer blade of the back foot. Arms are extending long to the sides and as you exhale, drop a little deeper, staying low in the legs.

Warrior 2 is working deep into the strength of the legs and is particularly powerful if you energetically hug the legs together. This turns on the underside of the thighs and requires strength, determination and concentration. All of this is going on, while you are cultivating balance and groundedness.

warrior 2

Reverse Warrior – Viparita Virabhadrasana   

Inhale and lean the torso forward and flip the front palm. Lean back, stretching the front hand up and back, coming into a Reverse Warrior. Stay low in the legs and find strength by hugging the feet to the midline, activating the underside of the thighs.

The key in Reverse Warrior is to stay low in the legs. It might seem like a reprieve and a moment to take rest after a strong Warrior 2, but keep in mind that the mind will often bow out before the body is ready, so see if you can stay low for a couple more breaths!

reverse warrior pose

Eight Limbed Salutation – Ashtanga Namaskara    

Cartwheel the arms down to the ground and push back into a Downward Facing Dog momentarily. Take a deep breath here and then move into Eight Limbed Salutation, also known as Knees-Chest-Chin Pose. Drop the knees directly down, take the chest down in between the palms and have the weight is in the hands. Hips and tailbone are staying up to the sky. Hugging the elbows in towards the body, with the chin slightly resting on the earth.

Knees-Chest-Chin Pose pose can seem tricky at first, but the key is to have the weight in the hands and to be drawing the elbows in towards the body. Everything else is relatively light and the chin is only gently resting on the mat.

Eight limbed salutation - ashtanga namaskara          yoga poses for cough and phlegm

Upward Facing Dog – Urdhva Mukha Svanasana    

Come down onto the belly and then slide forward into Upward Facing Dog. Make sure the shoulders are down away from the ears and draw the shoulder blades back and together. Exhale, and bend the elbows and lower the torso and forehead back down to the earth.

Here you are stretching and strengthening the spine and shoulders, toning the abdomen and opening the chest and lungs. The key is to really lift the chest and squeeze the shoulder blades back and together. There should be ample room between the shoulders and ears.

upward facing dog           yoga poses for cough and phlegm

Downward Facing Dog – Adho Mukha Svanasana  

Push back into a Downward Facing Dog and then preparing to move into the other side of the body. Notice the difference between your first Downward Facing Dog of your practice and your last. When the body is stiff this pose can feel like a full workout, but as the body warms and opens, it gets easier and easier to hang out here.

downward facing dog pose

Extended Child’s Pose – Balasana

After finishing up the other side of the body, drop the knees down as wide as the mat and settle back into a Extended Child’s Pose. Dropping the forehead down to the earth, allow the belly to be soft in between the thighs and take rest.

This is the perfect pose to take rest in, both during and after your practice. It’s an opportunity to bring everything back into balance, to find your breath and to elongate the spine.  

Downward Facing Dog – Adho Mukha Svanasana   

extended child pose       yoga poses for cough and phlegm

Featured Video How to Start Yoga at Home for Beginners

Yoga Poses for Beginners

If you are still feeling a little lost on your mat, its ok, because I’ve got your back 🙂

I want to share with you some very beginner friendly poses that lay the foundations for most of the yoga flows you will be introduced to in a class. It also means if you don’t have access to the internet and an online tutorial. You can simply move through these simple poses two or three times, spend some time is Savasana (laying flat on your back) at the end and bam, you’ve got yourself a solid yoga practice. If you can get comfortable with these poses, and even better their Sanskrit names, you’ll be ahead of the game when you finally do make it into a class.

Cat-Cow – Marjaryasana-Bitilasana Moving through a few rounds of Cat-Cow is extremely juicy and therapeutic for the whole back and neck. The opposing movements allow you to both stretch and compress the spine, inviting more space and increasing mobilisation. Really be dramatic with the postures by pulling the shoulder blades apart when you’re imitating an angry cat and sucking the belly button right back to the spine in Cow. Spend a few extra minutes working into some intuitive free movement, moving the spine back and forth, the hips from side to side and taking some body rolls – anything that feels good in YOUR body in order to warm up the spine.  

Downward Facing Dog – Adho Mukha Svanasana

Downward Dog is one of those poses that in the beginning it simply sucks! Your heels refuse to reach the floor, the shoulders and arms are quick to tire and it feels like your instructor is making you hang out there for hours. You’d rather drop the knees and take a Child’s Pose. However, over time, and once you have the proper alignment down, Downward Dog starts to become your home base. It becomes a pose you can relax into and it provides a reset and full body stretch between flows and the more difficult poses. The key is getting the foundations of the pose down right from the get go. I encourage you to get an instructor to guide you into the pose in class or find a tutorial online!  

Low Lunge – Anjaneyasana

Get the alignment of the legs and feet right in a simple Low Lunge and you already have the the foundational base ready to jump into other standing poses, such as the Warriors! Here you have the option to work into both your strength and flexibility; and there is always the option to take a modification and drop the back knee down to the earth. This makes this pose very accessible and beginner friendly, yet you will still be working to stretch, strengthen and simultaneously improve balance and focus.

Revolved Side Angle – Parivrtta Parsvakonasana

The trick to finding some ease in the perceived effort of this pose, is to hug the feet towards the midline. This goes for all the standing poses in order to find strength and activate the underside of the legs. This will tap into your power reserves and you’ll be surprised at the strength you have. Remember, the mind will always want to quit before the body does, so when you feel like coming out of a pose, firm into the legs and see if you can find just two more breaths!

Warrior 2 – VirabhadrasanaI invite you to stand in your strength in this pose, as an incarnation of a fierce warrior, Shiva. When that front leg starts to tire, keep in mind that zen archers would practice holding a bow for two years in this position before they were allowed to shoot their first arrow. Find some ease in the effort by energetically drawing the feet towards the midline, as though you want to bunch up your mat at the middle. The aim is to stand firm and strong, yet at the same time relaxed and at ease.

Cobra – Bhujangasana

An energizing back bend to open the chest and heart. Bhujang means ‘serpent’, and this pose is an essential component of the Surya Namaska – the Sun Salutations. It is a powerful chest opener and at the same time, it is extremely therapeutic for the spine. It also works to stretch and tone the abdominal muscles and organs and stimulate the digestive fires.

These yoga poses for cough and phlegm can be used in your regular practice for all benefits not just limited to cold and flu recovery.

Is Doing Yoga at Home Effective?

The more consistent you are with your yoga practice at home, the more effective it is going to become. The same with anything, consistency is the key, but this doesn’t mean that you have to practice for an hour, seven days a week! Spending twenty minutes each day on your mat, to stretch the mind and the body is going to have profound effects on your life across the board. If there are days you don’t feel up to yoga, give some meditation or Pranayama a go.

Meditation

If you are new to meditation, then the chances are that sitting in silence trying to quiet the mind is going to lead to a whole lot of frustration and very little stillness. Meditating in this way is actually very advanced, as you’ll find out quickly that it can be very challenging to quiet down the stories of the mind. A better option in the beginning is to find some guided meditations that resonate.

Pranayama

Breathing is something we do so naturally, that it requires no conscious effort. It is an involuntary action that is happening whether we are awake or sleeping. To breathe, is to live. Pranayama is the practice of controlling the breath, with Prana meaning ‘life force’ and yama meaning extending or stretching in Sanskrit. Controlled breathing can decreases the effects of stress, instil focus and mental clarity and can energize and detox the body.

One simple Pranayama technique, is known as the Cooling Breath Pranayama / Sitali Pranayama. Find a comfortable easy seat. Curl the tongue into a U shape and project it out of the mouth slightly. If you can’t curl the tongue it is fine to make an O shape with the mouth. Take the chin to the chest and then begin to inhale through the mouth, taking the chin up and dropping the neck back as far as is comfortable. Close the mouth and exhale through the nose as you drop the chin back down to the chest.

Repeat for eight to twelve breaths. Any time spent on your mat, is time well spent and over time there is an accumulative effect that takes place and the benefits start to ripple out and have a domino effect across so many aspects of your life.

How to Start Yoga When Overweight

Going into a yoga studio can seem a little daunting if you don’t think you fit the typical yogi image, but yoga can (and should!!), be practiced by everyone. At all ages and stages of life, and by all shapes and sizes. We all start somewhere and there are so many styles of yoga and variations of the poses, that make them accessible to all. If there is some doubt and anxiety in the mind though, there is the perfect opportunity here to start practicing at home.

Jessamyn Stanley is a great role model to check out! She is using yoga to promote positive body image and breaking down mental and emotional barriers to practicing. She emphasizes how you FEEL, as opposed to how you look and she celebrates her students bodies in all the shapes and sizes that they come in. She has a top selling book on Amazon called, Every Body Yoga: Let Go of Fear, Get on the Mat, Love Your Body, and I HIGHLY recommend checking that out!

Yoga is a mindset that cultivates self love and body confidence. Love your body where it is at and show it some kindness by taking this time for self care. With consistency your body will open and start to change, so enjoy the journey and allow the transformation to unfold.

Consistency Beats Intensity

You don’t have to go all in with a full yoga class every day. The beauty of yoga is that it adapts to your needs. Whether you’re using yoga poses for cough and phlegm, improving flexibility, or simply clearing your mind, the key is to be consistent. Once your body and mind begin to feel the shift, you’ll always return to your mat. Even if life gets in the way, the practice stays within you.

Conclusion: Yoga Poses for Cough and Phlegm to Breathe Better & Feel Better.

Yoga isn’t just about contorting into complex poses. It’s a tool for self-care, and certain poses can directly aid your respiratory system. When practiced mindfully, yoga poses for cough and phlegm can relieve discomfort, calm the mind, and restore energy. You don’t need to be an expert—just start with a few minutes each day.

Ready to breathe deeper and feel more clear-headed? Click here to explore our complete guide to yoga courses and start your journey toward better breathing today.

About

Charlie Hanna

Charlie is a Yoga Alliance certified Hatha, Yin Yoga & Meditation teacher with a psychology degree in her back pocket. She is currently on a mission chasing sun and Read More..

GERD and Yoga: Reduce Reflux Symptoms with Mindful Breathing and Movement

To breathe, is to live, and by learning breath control exercise we reduce anxiety, stress and invite better sleep, energy and focus into our practice and into our daily life.

GERD and Yoga: A Natural Path to Relief

We are currently facing a widespread issue of digestive disorders, and GERD and yoga is a combination more people are turning to for relief. With modern lifestyles pulling us away from natural habits—due to poor diet, exposure to toxins, and constant stress—conditions like GERD are becoming all too common. GERD, or Gastroesophageal Reflux Disease, can be extremely uncomfortable and often leads people to seek pharmaceutical solutions.

However, yoga offers a natural, supportive approach. This article introduces a yoga for GERD flow sequence designed to reduce symptoms while calming the mind and restoring digestive balance.

What is GERD?

GERD stands for Gastroesophageal Reflux Disease. It occurs when stomach acid flows back into the esophagus, causing a burning sensation in the chest or throat, often referred to as acid reflux or heartburn. Instead of jumping straight to medication, incorporating yoga for GERD into your routine can help treat this condition holistically.

How Yoga Supports Digestive Health

Practicing yoga and conscious breathing stimulates the parasympathetic nervous system, also known as the “rest and digest” mode. This encourages better digestion, reduces inflammation, and helps move food efficiently through the digestive tract. Consistent practice can reduce the frequency and severity of GERD symptoms.

Gerd and Yoga Poses to Help – Infographic

yoga for gerd infographic       gerd and yoga

(Top 5 Yoga Poses For Gerd)

Cat Pose – Marjariasana 

Push down into the palms and round the upper back to settle into Cat Pose. Be as dramatic as you can be, puffing up through the shoulder blades with the chin down to the chest. Draw the navel to spine and send your awareness and breath to the core.

Cat Pose increases flexibility of the neck, shoulders, and spine and is a great pump for the digestive system as it massages the internal organs.

cat pose           gerd and yoga

Downward Facing Dog – Adho Mukha Svanasana 

Tuck the toes, send the hips high and push back into Downward Facing Dog.

Downward Facing Dog as a follow up to Cat Pose is an opportunity to release any tension in the belly, while stretching the body from feet to hands.

downward facing dog pose        gerd and yoga

Extended Child’s Pose – Balasana

Drop the knees as wide as your mat, bring the big toes together to touch and sit the hips back on the feet. Allow the belly to fall in between the space of the thighs. Forehead comes down to the mat and extend the arms pressing down into the palms.

When working with digestive disorders, you want to take the knees wide in your Extended Child’s Pose, so that the belly can really hang down. Send the breath down into this space and let it be soft and relaxed.

extended child pose

Half Lord of the Fishes – Ardha Matsyendrasana 

Extend the right leg along the mat, bend the left knee up and bring the left sole of the foot across. There is option to bend the bottom knee to stack the knees or you can leave this leg extended. Take the left hand behind to the base of the spine and the wrap the right elbow around the left knee. Twist to the left, opening the chest, the neck, the head. You can even turn the gaze to stretch the eyes. Repeat on the other side.

Twisting the abdomen is great for digestive discomfort, as when you release the pose you are sending a fresh rush of blood into the area and boosting circulation and purification.


4 half lord of the fishes pose 2

Wind Relieving Pose – Pavana Muktasana

Come down onto your back and bring the knees into the chest. Lift the shoulders up off the earth, wrap the arms around the knees and squeeze the knees together. Draw the thighs down into the belly. Rest the shoulders and the head back down on the mat, slightly tucking that chin.

Another great opportunity to compress the digestive organs and work with the breath. With each exhale  pull the thighs down to massage the belly.

wind relieving pose

Featured Video: Gerd and Yoga Poses

Pranayama for Acid Reflux

The more commonly known benefits of Breath of Fire Pranayama are the cleansing effects it can have and the increase in energy and heat in the body. What is not such common knowledge however, is the power of this Pranayama against severe symptoms of GERD and acid reflux. A 2013 study on the effects of yoga and conscious breathing, reported that regular practice can control and/or alleviate symptoms related to digestive diseases! Breath of Fire – Kapalabhati PranayamaAlso known as the Skull Shining Breath as it is thought to purify and rejuvenate the mind and body. This Pranayama can be practiced ten times, in rounds of three or four. Directions Find a comfortable seat either cross legged on the floor or on a chair with the soles of the feet connecting to the earth. Brings the hands to the belly.

Inhale through the nose and fill the belly with your breath. Vigorously through the nose and draw the naval back to the spine.  Continue to breathe like this, focusing on the exhales and sucking the belly back. The inhales will come naturally.

Can Yoga  Help Bile Reflux?

Bile reflux is a disorder where the bile from the small intestine flows up and into the stomach and esophagus. There are a number of reasons why you could be suffering, including having a diet that is too high in fat! One of the functions of the liver, is to release bile when fat is detected, even in small amounts. So an excess amount in your food choices could be the culprit.

Stress has also been identified as being a major contributor and so this is where yoga can come in. Whatever the cause of your distress; when symptoms are severe they can include heartburn, nausea, and vomiting bile. Yoga can offer you a more natural way to soothe the body. Try these three poses to find some relief.Seated Forward Bend – Paschimottanasna Any pose that compresses the belly, is great for working into the abdomen, as it encourages the movement of stagnant energies. For treating bile reflux I recommend to close the eyes and really drop into the belly. It is important that you only come as far into this fold as is comfortable and allow the breath to guide you deeper.Camel Pose – UshtrasanaCamel Pose is very stimulating for the abdominal organs and encourages blood flow to this region. Work slowly towards the full expression, moving cautiously and listening to the body. Diamond Pose – VajrasanaThis pose is a common asana for tackling digestive woes; it’s thought to be effective means of boosting digestion after a meal. It is very easy on the body and has a calming effect on the mind. You can spend as long as you have here, taking steady, even, natural breaths. Come out of the mind and away from worries about your reflux and let the breath be your anchor into the body.

Yoga For Strong Oesophagus

The throat and the esophagus is often overlooked. However, its role in the body is critical, as it is the beginning of the GI tract. It is also an integral part of the throat chakra and an area that is subject to both physical and emotional strain. This Chakra is our communication center and influences how we express ourselves, as well as how we able to listen and make decisions. These three poses work to activate and stimulate this area!Plow Pose – HalasanaSend you awareness into the compression of the throat and allow this area to be soft and relaxed. As the neck compresses, the back of the neck is being opened and you are working to squeeze out any negativity. Shoulderstand – SarvangasanaHere you have an opportunity to reverse circulation and send fresh blood to the throat! It is a powerful pose for igniting your throat Chakra, but it also stimulates the thyroid gland. As you hang out here you are not only strengthening the legs, core and bum, but you are also opening the shoulders and neck. Half Lord of the Fishes – Ardha MatsyendrasanaAlthough there is a lot of focus on the twisting going on at the core here, there is also the opportunity to really open the throat in your Half Lord of the Fishes Pose. You’re also stretching the side body, upper back and neck.

CONCLUSION

GERD and other gastrointestinal disorders are extremely common today as a result of years of poor food choices, an accumulation of toxins, excessive alcohol consumption and high stress levels.  It is therefore important that we have access to natural healing protocols so as to avoid having to take over the counter drugs.

Yoga is a great tool to help relieve digestive discomfort during times of distress. At the same time is can strengthen abdominal functioning in order to prevent further flare ups. The key is to practice with consistency, so including these yoga for gerd asanas into your daily practice will have profound effects over time on overall digestion.

About

Charlie Hanna

Charlie is a Yoga Alliance certified Hatha, Yin Yoga & Meditation teacher with a psychology degree in her back pocket. She is currently on a mission, chasing sun and Read More..

Ready to take your healing further? Click here to access yoga courses for GERD relief and and start your journey toward lasting wellness today.

Nine Yoga Poses for Reflux Acidity

This article is going to set you up with the tools needed to combat against digestive disturbances like reflux acidity and indigestion so that you have an alternative to over the counter drugs and a means of keeping stress and discomfort at bay. 

I remember when I was a beginner and first started out on my yoga journey,”by myself” and this was before it began to dominate the online realm. I had heard great things, but had no clue what I was doing. I would spend an embarrassing few minutes trying and failing to get into the splits, feel defeated and call it quits for the day.

Resigning to the idea that I was just not born into a body that could stretch that way. (Too hard basket) Eventually I found a studio that I liked and this gave me a little more insight into what it was all about (I still couldn’t do anything that resembled the splits), but I still felt that as I needed the structure of a class and the guidance of a teacher in order to practice. This also kept me accountable, as even though my intentions were great, rarely did I follow through with a full hour when left to my own devices.

Over time as I started to reap  yogic rewards here and there; a slightly more flexible body and a hugely more stable state of mind. I really started to prioritise my practice. I didn’t just want to float around on my yoga high on the days when the studio timetable fitted, I wanted that buzz everyday. So it was time to start practicing at home. This is the great thing about yoga! When you are consistent, the ball starts rolling and then there really is no stopping it. Even if you don’t practice for sometime, you will ALWAYS come back to it. Once you know, you know.

Once I made a commitment to practicing at home, I realised it didn’t have to be an hour and a half every time. It didn’t have to be an hour. Even just fifteen minutes a day, and my world around me began to shift profoundly. It no longer mattered if I could make it to class or not. I could always find at least ten minutes to stretch the body and the mind, connect to the breath and the beauty of the present moment. The effects were phenomenal. How to start yoga by yourself is a beginner guide which will dive deep into all the things needed to start a good yoga practice from home.

childs pose vector

TRAINING TYPE: FLOW SEQUENCE

CATEGORY:YOGA

SUBCATEGORY:BEGINNER YOGA

PLANNED TIME:10-15 MIN 

LEVEL:BEGINNER  

PROPS:NONE

What Is The Best Way to Start Yoga?

​ 

The best way to begin yoga, is to just start! All you really need is yourself and an open mind.  If you don’t have a mat, roll out a towel or sarong. If you don’t have props like blocks and straps, find things around the home like books and a belt. Use cushions for support and jump online to find yoga videos that you can connect with and suit the level you are at. Once the ball is rolling, it’s much easier to commit to practicing. Over time you can work on getting all the right equipment and creating a space that invites you in every day.

There is no end goal with yoga, the journey is life long and every step should be enjoyed. It’s always important to listen to your body and respect where it’s at and trust in the process. Over time and with commitment the body and the mind will expand and grow.

It doesn’t take long until you’ll start to notice the benefits across all aspects of your life. The best rewards from yoga are actually those you reap out in the world and in your relationships with others and with yourself. That quiet, calm mind that you cultivate on the mat, will start coming with you to other places. You’ll find yourself more content in the moment and less triggered or caught up in the stories of the mind. All of this and more is yours when you start practicing yoga regularly, so what are you waiting for?

What will you need to start a good at home Yoga Practice?


All you really need is yourself and an open mind. Also, preferably a yoga mat, but if you don’t have one right now, even just a sarong or towel will suffice! When it comes to props, they are not essential, but there are so many things lying around the house you’ll be surprised you can use. Instead of a block you can use books. Grab a belt in the place of a strap and instead of a bolster grab yourself a blanket and roll it up.Create the SpaceCreating a space that is inviting and conducive to stillness can really help motivate you onto your mat and into your practice. You know what they say about a clean room being the key to a clear mind, well it’s definitely true. We want to create a space that is a reflection of the state of mind we are trying to cultivate – quiet, clear and free from distraction! This will help set the tone and drop you into the zone a little easier. Jump OnlineIf there isn’t the confidence there yet to lead yourself through a practice, there is still absolutely no reason to not practice at home! There are so many teachers and yoga videos online to offer you support and guidance, you might just have to flick through a few videos to find one that resonates.

The great thing about the online yoga realm, is that there is an abundance of options out there. You can really get specific with what you are after, what parts of the body you want to target and how long you want to practice for. Schedule a TimeIf you’ve gone through all of these steps, then you’re pretty much ready to go. All that’s left is to get on your mat! However, we all know It’s one thing to plan and create the space to do yoga at home, but actually committing to your practice, that’s another thing entirely. In order to make sure you see it through, it’s recommended to schedule a time in advance.

Yoga is only going to be effective if you are persistent and show up regularly! One of the benefits of a home practice is that you aren’t restricted to a specific class schedule or length of class. This can also be your downfall as there is no teacher or time frame to keep you accountable. So with that in mind, I recommend looking at your week ahead and scheduling a time in advance to practice and treat it like a non-negotiable appointment. Aim for a minimum of 15 minutes, it’s short enough that it’s not overwhelming, but still long enough that it will encourage a steady habit.

Yoga Practice at Home Sequence

We will break down the steps needed to be taken to set up a successful home yoga practice for beginners. It goes over what is needed, the type of space you want to create, the importance of scheduling a time and finding a videos online that can provide guidance until there is more confidence in practicing alone.

When you are practicing at home without support it is important that you listen to your body and take modifications when needed. Never be afraid to simply rest in Child’s Pose and don’t push yourself past your limits, as the body takes time to open up. The real benefits of yoga are the transformations you start to see off of the mat, and they will come with consistent practice. Trust the process and enjoy the ride.

Start Yoga at Home For Beginners ​Infographic 

how to start yoga at home for beginners infographic

Cat-Cow – Marjaryasana-Bitilasana 

Coming into a Table Top position, making sure that the wrists are in line with the shoulders and that the knees are in line with the hips. Spine is neutral, head and neck in one line, and the gaze is slightly down and towards the top edge of the mat. Inhale, drop the belly down, take the heart forward, arching the back, coming into Cow.

Exhale and move into Cat Pose by pushing into the palms, rounding the upper back, bringing the belly button back towards the spine and dropping the chin to the chest. Inhale, again coming forward, opening the chest. Exhale, pushing back, rounding the spine. It’s good to work through a few rounds of these Cat-Cow movements in order to warm up the spine and let it know we’re going to move into it.

This pose mobilises the spine, shoulders and the neck and is the perfect warm up for all levels of yogi. It is a gentle way of preparing the body and the spine for deeper stretches and is a safe way of relieving tension from the back.

cat-cow

Downward Facing Dog – Adho Mukha Svanasana

Tuck the toes and push into the palms and take the hips up into Downward Facing Dog. Start by pedalling out the legs and bending the knees. Pushing down into the palms, fingers are spread wide and allow the head and neck to drop.

Downward Facing Dog is an opportunity to catch you breath and balance before moving onto the other side of the body during your flow.

downward facing dog pose

One Legged Downward Facing Dog – Eka Pada Adho Mukha Svanasana

Rise the right leg back and up, coming into a One Legged Downward Facing Dog.

It is very common to dump the weight of the body into the left shoulder here, but try to keep the shoulders square by pressing evenly into both hands.

one legged downward facing dog

Low Lunge – Anjaneyasana

Bend the right knee and come forward, transferring the weight into the hands and step in between the palms, coming into Low Lunge. Hands will frame either side of the front foot and you can use the fingertips for support. There is the option to rise the back knee or you can take it down for more support. Make sure that the neck and head are in line with the spine.

In Low Lunge you can start to work into the flexibility of the back hip flexor by squeezing the gluteus muscles. Try to keep the hips square, by sending the back hip forward.
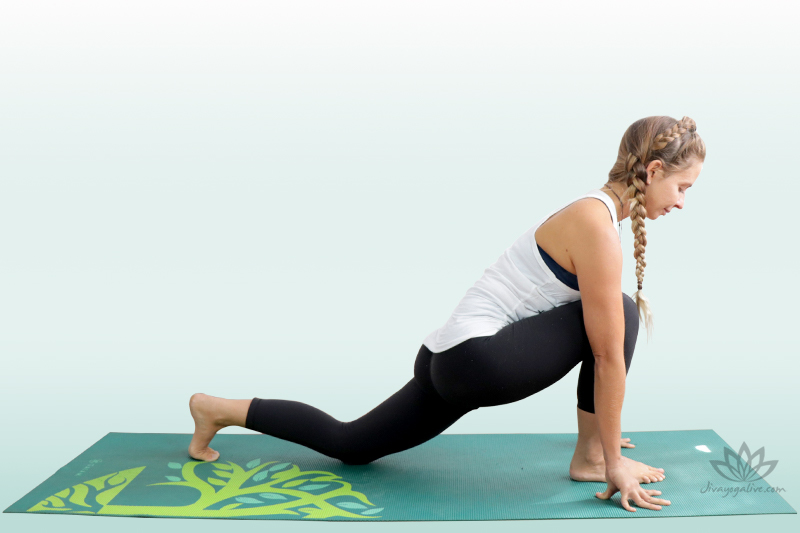
low lunge 2

Revolved Side Angle – Parivrtta Parsvakonasana 

Take the left palm and press it flat down into the earth and take the right arm. Spinning the chest open coming into an Revolved Side Angle. Gaze is up to the top hand. Really pressing down into the left palm and the ball of the back left foot. Take a breath, and open the chest more.

This pose strengthens and stretches legs, groin, hamstrings and at the same time opens the chest, the shoulders and the spine.

revolved side angle pose - twist

Warrior 2 – Virabhadrasana II  

Spin the back foot down and cartwheel the arms, coming into a Warrior Two. The front toes are facing forward, and the back foot is in on an angle. Press down firmly into the outer blade of the back foot. Arms are extending long to the sides and as you exhale, drop a little deeper, staying low in the legs.

Warrior 2 is working deep into the strength of the legs and is particularly powerful if you energetically hug the legs together. This turns on the underside of the thighs and requires strength, determination and concentration. All of this is going on, while you are cultivating balance and groundedness.

warrior 2

Reverse Warrior – Viparita Virabhadrasana   

Inhale and lean the torso forward and flip the front palm. Lean back, stretching the front hand up and back, coming into a Reverse Warrior. Stay low in the legs and find strength by hugging the feet to the midline, activating the underside of the thighs.

The key in Reverse Warrior is to stay low in the legs. It might seem like a reprieve and a moment to take rest after a strong Warrior 2, but keep in mind that the mind will often bow out before the body is ready, so see if you can stay low for a couple more breaths!

reverse warrior pose

Eight Limbed Salutation – Ashtanga Namaskara    

Cartwheel the arms down to the ground and push back into a Downward Facing Dog momentarily. Take a deep breath here and then move into Eight Limbed Salutation, also known as Knees-Chest-Chin Pose. Drop the knees directly down, take the chest down in between the palms and have the weight is in the hands. Hips and tailbone are staying up to the sky. Hugging the elbows in towards the body, with the chin slightly resting on the earth.

Knees-Chest-Chin Pose pose can seem tricky at first, but the key is to have the weight in the hands and to be drawing the elbows in towards the body. Everything else is relatively light and the chin is only gently resting on the mat.

Eight limbed salutation - ashtanga namaskara

Upward Facing Dog – Urdhva Mukha Svanasana    

Come down onto the belly and then slide forward into Upward Facing Dog. Make sure the shoulders are down away from the ears and draw the shoulder blades back and together. Exhale, and bend the elbows and lower the torso and forehead back down to the earth.

Here you are stretching and strengthening the spine and shoulders, toning the abdomen and opening the chest and lungs. The key is to really lift the chest and squeeze the shoulder blades back and together. There should be ample room between the shoulders and ears.

upward facing dog

Downward Facing Dog – Adho Mukha Svanasana  

Push back into a Downward Facing Dog and then preparing to move into the other side of the body. Notice the difference between your first Downward Facing Dog of your practice and your last. When the body is stiff this pose can feel like a full workout, but as the body warms and opens, it gets easier and easier to hang out here.

downward facing dog pose

Extended Child’s Pose – Balasana   

After finishing up the other side of the body, drop the knees down as wide as the mat and settle back into a Extended Child’s Pose. Dropping the forehead down to the earth, allow the belly to be soft in between the thighs and take rest.

This is the perfect pose to take rest in, both during and after your practice. It’s an opportunity to bring everything back into balance, to find your breath and to elongate the spine.  

Downward Facing Dog – Adho Mukha Svanasana   

extended child pose

Featured Video How to Start Yoga at Home for Beginners

Yoga Poses for Beginners

If you are still feeling a little lost on your mat, its ok, because Ive got your back :). I want to share with you some very beginner friendly poses that lay the foundations for most of the yoga flows you will be introduced to in a class. It also means if you don’t have access to the internet and an online tutorial. You can simply move through these simple poses two or three times, spend some time is Savasana (laying flat on your back) at the end and bam, you’ve got yourself a solid yoga practice. If you can get comfortable with these poses, and even better their Sanskrit names, you’ll be ahead of the game when you finally do make it into a class.

Cat-Cow – Marjaryasana-Bitilasana Moving through a few rounds of Cat-Cow is extremely juicy and therapeutic for the whole back and neck. The opposing movements allow you to both stretch and compress the spine, inviting more space and increasing mobilisation. Really be dramatic with the postures by pulling the shoulder blades apart when you’re imitating an angry cat and sucking the belly button right back to the spine in Cow. Spend a few extra minutes working into some intuitive free movement, moving the spine back and forth, the hips from side to side and taking some body rolls – anything that feels good in YOUR body in order to warm up the spine.  Downward Facing Dog – Adho Mukha SvanasanaDownward Dog is one of those poses that in the beginning it simply sucks! Your heels refuse to reach the floor, the shoulders and arms are quick to tire and it feels like your instructor is making you hang out there for hours. You’d rather drop the knees and take a Child’s Pose. However, over time, and once you have the proper alignment down, Downward Dog starts to become your home base. It becomes a pose you can relax into and it provides a reset and full body stretch between flows and the more difficult poses. The key is getting the foundations of the pose down right from the get go. I encourage you to get an instructor to guide you into the pose in class or find a tutorial online!  Low Lunge – AnjaneyasanaGet the alignment of the legs and feet right in a simple Low Lunge and you already have the the foundational base ready to jump into other standing poses, such as the Warriors! Here you have the option to work into both your strength and flexibility; and there is always the option to take a modification and drop the back knee down to the earth. This makes this pose very accessible and beginner friendly, yet you will still be working to stretch, strengthen and simultaneously improve balance and focus. Revolved Side Angle – Parivrtta ParsvakonasanaThe trick to finding some ease in the perceived effort of this pose, is to hug the feet towards the midline. This goes for all the standing poses in order to find strength and activate the underside of the legs. This will tap into your power reserves and you’ll be surprised at the strength you have. Remember, the mind will always want to quit before the body does, so when you feel like coming out of a pose, firm into the legs and see if you can find just two more breaths!

Warrior 2 – VirabhadrasanaI invite you to stand in your strength in this pose, as an incarnation of a fierce warrior, Shiva. When that front leg starts to tire, keep in mind that zen archers would practice holding a bow for two years in this position before they were allowed to shoot their first arrow. Find some ease in the effort by energetically drawing the feet towards the midline, as though you want to bunch up your mat at the middle. The aim is to stand firm and strong, yet at the same time relaxed and at ease.Cobra – Bhujangasana An energizing back bend to open the chest and heart. Bhujang means ‘serpent’, and this pose is an essential component of the Surya Namaska – the Sun Salutations. It is a powerful chest opener and at the same time, it is extremely therapeutic for the spine. It also works to stretch and tone the abdominal muscles and organs and stimulate the digestive fires.

Is Doing Yoga at Home Effective?

The more consistent you are with your yoga practice at home, the more effective it is going to become. The same with anything, consistency is the key, but this doesn’t mean that you have to practice for an hour, seven days a week! Spending twenty minutes each day on your mat, to stretch the mind and the body is going to have profound effects on your life across the board. If there are days you don’t feel up to yoga, give some meditation or Pranayama a go.

MeditationIf you are new to meditation, then the chances are that sitting in silence trying to quiet the mind is going to lead to a whole lot of frustration and very little stillness. Meditating in this way is actually very advanced, as you’ll find out quickly that it can be very challenging to quiet down the stories of the mind. A better option in the beginning is to find some guided meditations that resonate. 

Pranayama Breathing is something we do so naturally, that it requires no conscious effort. It is an involuntary action that is happening whether we are awake or sleeping. To breathe, is to live. Pranayama is the practice of controlling the breath, with Prana meaning ‘life force’ and yama meaning extending or stretching in Sanskrit. Controlled breathing can decreases the effects of stress, instil focus and mental clarity and can energize and detox the body.

One simple Pranayama technique, is known as the Cooling Breath Pranayama / Sitali Pranayama. Find a comfortable easy seat. Curl the tongue into a U shape and project it out of the mouth slightly. If you can’t curl the tongue it is fine to make an O shape with the mouth. Take the chin to the chest and then begin to inhale through the mouth, taking the chin up and dropping the neck back as far as is comfortable. Close the mouth and exhale through the nose as you drop the chin back down to the chest.

Repeat for eight to twelve breaths. Any time spent on your mat, is time well spent and over time there is an accumulative effect that takes place and the benefits start to ripple out and have a domino effect across so many aspects of your life.

How to Start Yoga When Overweight

Going into a yoga studio can seem a little daunting if you don’t think you fit the typical yogi image, but yoga can (and should!!), be practiced by everyone. At all ages and stages of life, and by all shapes and sizes. We all start somewhere and there are so many styles of yoga and variations of the poses, that make them accessible to all. If there is some doubt and anxiety in the mind though, there is the perfect opportunity here to start practicing at home.

Jessamyn Stanley is a great role model to check out! She is using yoga to promote positive body image and breaking down mental and emotional barriers to practicing. She emphasizes how you FEEL, as opposed to how you look and she celebrates her students bodies in all the shapes and sizes that they come in. She has a top selling book on Amazon called, Every Body Yoga: Let Go of Fear, Get on the Mat, Love Your Body, and I HIGHLY recommend checking that out!

Yoga is a mindset that cultivates self love and body confidence. Love your body where it is at and show it some kindness by taking this time for self care. With consistency your body will open and start to change, so enjoy the journey and allow the transformation to unfold.

Conclusion

A few things to keep in mind before you jump in! Firstly, always make sure to listen to your body. You know it best and are the only one that can hear its subtle cues. Never force your body into a pose and don’t be scared to take modifications or rest in Child’s Pose when needed. Trust that over time and with consistency your body will open up along with your flexibility. You have the necessary steps in mind now to really get your at home practice going. I promise that the hardest part is just making it onto your mat. Make the time, prioritise this self care and watch yourself blossom and grow.

This article has provided the necessary steps to establishing an at home yoga practice. Grab the essentials, create the space, find some videos online that resonate and schedule the time like a non-negotiable appointment! Prioritise taking care of yourself and loving yourself just as much, if not MORE than you love others. This is not selfish, this is KEY to being the best version of who you already are, for yourself and for others. You have to fill your cup first and yoga is a great tool to do just that.

About

Charlie Hanna

Charlie is a Yoga Alliance certified Hatha, Yin Yoga & Meditation teacher with a psychology degree in her back pocket. She is currently on a mission chasing sun and Read More..

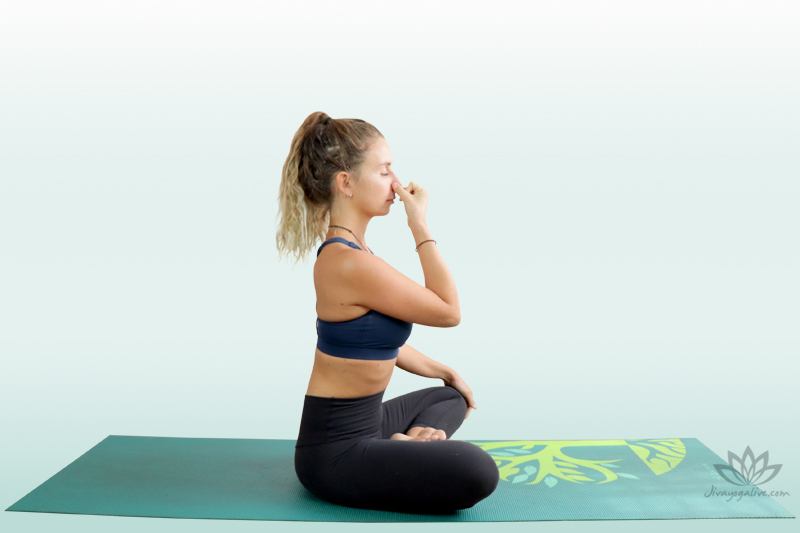
Top 10 Post Run Yoga Poses

Today will be going through a beginner yoga sequence for runners which can be used for post and pre running.
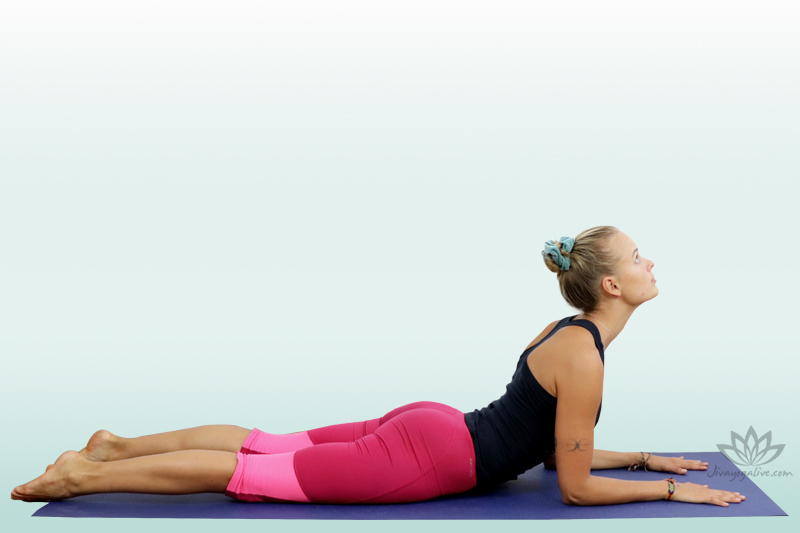
I remember when I was a beginner and first started out on my yoga journey,”by myself” and this was before it began to dominate the online realm. I had heard great things, but had no clue what I was doing. I would spend an embarrassing few minutes trying and failing to get into the splits, feel defeated and call it quits for the day.

Resigning to the idea that I was just not born into a body that could stretch that way. (Too hard basket) Eventually I found a studio that I liked and this gave me a little more insight into what it was all about (I still couldn’t do anything that resembled the splits), but I still felt that as I needed the structure of a class and the guidance of a teacher in order to practice. This also kept me accountable, as even though my intentions were great, rarely did I follow through with a full hour when left to my own devices.

Over time as I started to reap  yogic rewards here and there; a slightly more flexible body and a hugely more stable state of mind. I really started to prioritise my practice. I didn’t just want to float around on my yoga high on the days when the studio timetable fitted, I wanted that buzz everyday. So it was time to start practicing at home. This is the great thing about yoga! When you are consistent, the ball starts rolling and then there really is no stopping it. Even if you don’t practice for sometime, you will ALWAYS come back to it. Once you know, you know.

Once I made a commitment to practicing at home, I realised it didn’t have to be an hour and a half every time. It didn’t have to be an hour. Even just fifteen minutes a day, and my world around me began to shift profoundly. It no longer mattered if I could make it to class or not. I could always find at least ten minutes to stretch the body and the mind, connect to the breath and the beauty of the present moment. The effects were phenomenal. How to start yoga by yourself is a beginner guide which will dive deep into all the things needed to start a good yoga practice from home.

childs pose vector

TRAINING TYPE: FLOW SEQUENCE

CATEGORY:YOGA

SUBCATEGORY:BEGINNER YOGA

PLANNED TIME:10-15 MIN 

LEVEL:BEGINNER  

PROPS:NONE

What Is The Best Way to Start Yoga?

​ 

The best way to begin yoga, is to just start! All you really need is yourself and an open mind.  If you don’t have a mat, roll out a towel or sarong. If you don’t have props like blocks and straps, find things around the home like books and a belt. Use cushions for support and jump online to find yoga videos that you can connect with and suit the level you are at. Once the ball is rolling, it’s much easier to commit to practicing. Over time you can work on getting all the right equipment and creating a space that invites you in every day.

There is no end goal with yoga, the journey is life long and every step should be enjoyed. It’s always important to listen to your body and respect where it’s at and trust in the process. Over time and with commitment the body and the mind will expand and grow.

It doesn’t take long until you’ll start to notice the benefits across all aspects of your life. The best rewards from yoga are actually those you reap out in the world and in your relationships with others and with yourself. That quiet, calm mind that you cultivate on the mat, will start coming with you to other places. You’ll find yourself more content in the moment and less triggered or caught up in the stories of the mind. All of this and more is yours when you start practicing yoga regularly, so what are you waiting for?

What will you need to start a good at home Yoga Practice?


All you really need is yourself and an open mind. Also, preferably a yoga mat, but if you don’t have one right now, even just a sarong or towel will suffice! When it comes to props, they are not essential, but there are so many things lying around the house you’ll be surprised you can use. Instead of a block you can use books. Grab a belt in the place of a strap and instead of a bolster grab yourself a blanket and roll it up.Create the SpaceCreating a space that is inviting and conducive to stillness can really help motivate you onto your mat and into your practice. You know what they say about a clean room being the key to a clear mind, well it’s definitely true. We want to create a space that is a reflection of the state of mind we are trying to cultivate – quiet, clear and free from distraction! This will help set the tone and drop you into the zone a little easier. Jump OnlineIf there isn’t the confidence there yet to lead yourself through a practice, there is still absolutely no reason to not practice at home! There are so many teachers and yoga videos online to offer you support and guidance, you might just have to flick through a few videos to find one that resonates.

The great thing about the online yoga realm, is that there is an abundance of options out there. You can really get specific with what you are after, what parts of the body you want to target and how long you want to practice for. Schedule a TimeIf you’ve gone through all of these steps, then you’re pretty much ready to go. All that’s left is to get on your mat! However, we all know It’s one thing to plan and create the space to do yoga at home, but actually committing to your practice, that’s another thing entirely. In order to make sure you see it through, it’s recommended to schedule a time in advance.

Yoga is only going to be effective if you are persistent and show up regularly! One of the benefits of a home practice is that you aren’t restricted to a specific class schedule or length of class. This can also be your downfall as there is no teacher or time frame to keep you accountable. So with that in mind, I recommend looking at your week ahead and scheduling a time in advance to practice and treat it like a non-negotiable appointment. Aim for a minimum of 15 minutes, it’s short enough that it’s not overwhelming, but still long enough that it will encourage a steady habit.

Yoga Practice at Home Sequence

We will break down the steps needed to be taken to set up a successful home yoga practice for beginners. It goes over what is needed, the type of space you want to create, the importance of scheduling a time and finding a videos online that can provide guidance until there is more confidence in practicing alone.

When you are practicing at home without support it is important that you listen to your body and take modifications when needed. Never be afraid to simply rest in Child’s Pose and don’t push yourself past your limits, as the body takes time to open up. The real benefits of yoga are the transformations you start to see off of the mat, and they will come with consistent practice. Trust the process and enjoy the ride.

Start Yoga at Home For Beginners ​Infographic 

how to start yoga at home for beginners infographic

Cat-Cow – Marjaryasana-Bitilasana 

Coming into a Table Top position, making sure that the wrists are in line with the shoulders and that the knees are in line with the hips. Spine is neutral, head and neck in one line, and the gaze is slightly down and towards the top edge of the mat. Inhale, drop the belly down, take the heart forward, arching the back, coming into Cow.

Exhale and move into Cat Pose by pushing into the palms, rounding the upper back, bringing the belly button back towards the spine and dropping the chin to the chest. Inhale, again coming forward, opening the chest. Exhale, pushing back, rounding the spine. It’s good to work through a few rounds of these Cat-Cow movements in order to warm up the spine and let it know we’re going to move into it.

This pose mobilises the spine, shoulders and the neck and is the perfect warm up for all levels of yogi. It is a gentle way of preparing the body and the spine for deeper stretches and is a safe way of relieving tension from the back.

cat-cow

Downward Facing Dog – Adho Mukha Svanasana

Tuck the toes and push into the palms and take the hips up into Downward Facing Dog. Start by pedalling out the legs and bending the knees. Pushing down into the palms, fingers are spread wide and allow the head and neck to drop.

Downward Facing Dog is an opportunity to catch you breath and balance before moving onto the other side of the body during your flow.

downward facing dog pose

One Legged Downward Facing Dog – Eka Pada Adho Mukha Svanasana

Rise the right leg back and up, coming into a One Legged Downward Facing Dog.

It is very common to dump the weight of the body into the left shoulder here, but try to keep the shoulders square by pressing evenly into both hands.

one legged downward facing dog

Low Lunge – Anjaneyasana

Bend the right knee and come forward, transferring the weight into the hands and step in between the palms, coming into Low Lunge. Hands will frame either side of the front foot and you can use the fingertips for support. There is the option to rise the back knee or you can take it down for more support. Make sure that the neck and head are in line with the spine.

In Low Lunge you can start to work into the flexibility of the back hip flexor by squeezing the gluteus muscles. Try to keep the hips square, by sending the back hip forward.

low lunge 2

Revolved Side Angle – Parivrtta Parsvakonasana 

Take the left palm and press it flat down into the earth and take the right arm. Spinning the chest open coming into an Revolved Side Angle. Gaze is up to the top hand. Really pressing down into the left palm and the ball of the back left foot. Take a breath, and open the chest more.

This pose strengthens and stretches legs, groin, hamstrings and at the same time opens the chest, the shoulders and the spine.

revolved side angle pose - twist

Warrior 2 – Virabhadrasana II  

Spin the back foot down and cartwheel the arms, coming into a Warrior Two. The front toes are facing forward, and the back foot is in on an angle. Press down firmly into the outer blade of the back foot. Arms are extending long to the sides and as you exhale, drop a little deeper, staying low in the legs.

Warrior 2 is working deep into the strength of the legs and is particularly powerful if you energetically hug the legs together. This turns on the underside of the thighs and requires strength, determination and concentration. All of this is going on, while you are cultivating balance and groundedness.

warrior 2

Reverse Warrior – Viparita Virabhadrasana   

Inhale and lean the torso forward and flip the front palm. Lean back, stretching the front hand up and back, coming into a Reverse Warrior. Stay low in the legs and find strength by hugging the feet to the midline, activating the underside of the thighs.

The key in Reverse Warrior is to stay low in the legs. It might seem like a reprieve and a moment to take rest after a strong Warrior 2, but keep in mind that the mind will often bow out before the body is ready, so see if you can stay low for a couple more breaths!

reverse warrior pose

Eight Limbed Salutation – Ashtanga Namaskara    

Cartwheel the arms down to the ground and push back into a Downward Facing Dog momentarily. Take a deep breath here and then move into Eight Limbed Salutation, also known as Knees-Chest-Chin Pose. Drop the knees directly down, take the chest down in between the palms and have the weight is in the hands. Hips and tailbone are staying up to the sky. Hugging the elbows in towards the body, with the chin slightly resting on the earth.

Knees-Chest-Chin Pose pose can seem tricky at first, but the key is to have the weight in the hands and to be drawing the elbows in towards the body. Everything else is relatively light and the chin is only gently resting on the mat.

Eight limbed salutation - ashtanga namaskara

Upward Facing Dog – Urdhva Mukha Svanasana    

Come down onto the belly and then slide forward into Upward Facing Dog. Make sure the shoulders are down away from the ears and draw the shoulder blades back and together. Exhale, and bend the elbows and lower the torso and forehead back down to the earth.

Here you are stretching and strengthening the spine and shoulders, toning the abdomen and opening the chest and lungs. The key is to really lift the chest and squeeze the shoulder blades back and together. There should be ample room between the shoulders and ears.

upward facing dog

Downward Facing Dog – Adho Mukha Svanasana  

Push back into a Downward Facing Dog and then preparing to move into the other side of the body. Notice the difference between your first Downward Facing Dog of your practice and your last. When the body is stiff this pose can feel like a full workout, but as the body warms and opens, it gets easier and easier to hang out here.

downward facing dog pose

Extended Child’s Pose – Balasana   

After finishing up the other side of the body, drop the knees down as wide as the mat and settle back into a Extended Child’s Pose. Dropping the forehead down to the earth, allow the belly to be soft in between the thighs and take rest.

This is the perfect pose to take rest in, both during and after your practice. It’s an opportunity to bring everything back into balance, to find your breath and to elongate the spine.  

Downward Facing Dog – Adho Mukha Svanasana   

extended child pose

Featured Video How to Start Yoga at Home for Beginners

Yoga Poses for Beginners

If you are still feeling a little lost on your mat, its ok, because Ive got your back :). I want to share with you some very beginner friendly poses that lay the foundations for most of the yoga flows you will be introduced to in a class. It also means if you don’t have access to the internet and an online tutorial. You can simply move through these simple poses two or three times, spend some time is Savasana (laying flat on your back) at the end and bam, you’ve got yourself a solid yoga practice. If you can get comfortable with these poses, and even better their Sanskrit names, you’ll be ahead of the game when you finally do make it into a class.

Cat-Cow – Marjaryasana-Bitilasana Moving through a few rounds of Cat-Cow is extremely juicy and therapeutic for the whole back and neck. The opposing movements allow you to both stretch and compress the spine, inviting more space and increasing mobilisation. Really be dramatic with the postures by pulling the shoulder blades apart when you’re imitating an angry cat and sucking the belly button right back to the spine in Cow. Spend a few extra minutes working into some intuitive free movement, moving the spine back and forth, the hips from side to side and taking some body rolls – anything that feels good in YOUR body in order to warm up the spine.  Downward Facing Dog – Adho Mukha SvanasanaDownward Dog is one of those poses that in the beginning it simply sucks! Your heels refuse to reach the floor, the shoulders and arms are quick to tire and it feels like your instructor is making you hang out there for hours. You’d rather drop the knees and take a Child’s Pose. However, over time, and once you have the proper alignment down, Downward Dog starts to become your home base. It becomes a pose you can relax into and it provides a reset and full body stretch between flows and the more difficult poses. The key is getting the foundations of the pose down right from the get go. I encourage you to get an instructor to guide you into the pose in class or find a tutorial online!  Low Lunge – AnjaneyasanaGet the alignment of the legs and feet right in a simple Low Lunge and you already have the the foundational base ready to jump into other standing poses, such as the Warriors! Here you have the option to work into both your strength and flexibility; and there is always the option to take a modification and drop the back knee down to the earth. This makes this pose very accessible and beginner friendly, yet you will still be working to stretch, strengthen and simultaneously improve balance and focus. Revolved Side Angle – Parivrtta ParsvakonasanaThe trick to finding some ease in the perceived effort of this pose, is to hug the feet towards the midline. This goes for all the standing poses in order to find strength and activate the underside of the legs. This will tap into your power reserves and you’ll be surprised at the strength you have. Remember, the mind will always want to quit before the body does, so when you feel like coming out of a pose, firm into the legs and see if you can find just two more breaths!

Warrior 2 – VirabhadrasanaI invite you to stand in your strength in this pose, as an incarnation of a fierce warrior, Shiva. When that front leg starts to tire, keep in mind that zen archers would practice holding a bow for two years in this position before they were allowed to shoot their first arrow. Find some ease in the effort by energetically drawing the feet towards the midline, as though you want to bunch up your mat at the middle. The aim is to stand firm and strong, yet at the same time relaxed and at ease.Cobra – Bhujangasana An energizing back bend to open the chest and heart. Bhujang means ‘serpent’, and this pose is an essential component of the Surya Namaska – the Sun Salutations. It is a powerful chest opener and at the same time, it is extremely therapeutic for the spine. It also works to stretch and tone the abdominal muscles and organs and stimulate the digestive fires.

Is Doing Yoga at Home Effective?

The more consistent you are with your yoga practice at home, the more effective it is going to become. The same with anything, consistency is the key, but this doesn’t mean that you have to practice for an hour, seven days a week! Spending twenty minutes each day on your mat, to stretch the mind and the body is going to have profound effects on your life across the board. If there are days you don’t feel up to yoga, give some meditation or Pranayama a go.

MeditationIf you are new to meditation, then the chances are that sitting in silence trying to quiet the mind is going to lead to a whole lot of frustration and very little stillness. Meditating in this way is actually very advanced, as you’ll find out quickly that it can be very challenging to quiet down the stories of the mind. A better option in the beginning is to find some guided meditations that resonate. 

Pranayama Breathing is something we do so naturally, that it requires no conscious effort. It is an involuntary action that is happening whether we are awake or sleeping. To breathe, is to live. Pranayama is the practice of controlling the breath, with Prana meaning ‘life force’ and yama meaning extending or stretching in Sanskrit. Controlled breathing can decreases the effects of stress, instil focus and mental clarity and can energize and detox the body.

One simple Pranayama technique, is known as the Cooling Breath Pranayama / Sitali Pranayama. Find a comfortable easy seat. Curl the tongue into a U shape and project it out of the mouth slightly. If you can’t curl the tongue it is fine to make an O shape with the mouth. Take the chin to the chest and then begin to inhale through the mouth, taking the chin up and dropping the neck back as far as is comfortable. Close the mouth and exhale through the nose as you drop the chin back down to the chest.

Repeat for eight to twelve breaths. Any time spent on your mat, is time well spent and over time there is an accumulative effect that takes place and the benefits start to ripple out and have a domino effect across so many aspects of your life.

How to Start Yoga When Overweight

Going into a yoga studio can seem a little daunting if you don’t think you fit the typical yogi image, but yoga can (and should!!), be practiced by everyone. At all ages and stages of life, and by all shapes and sizes. We all start somewhere and there are so many styles of yoga and variations of the poses, that make them accessible to all. If there is some doubt and anxiety in the mind though, there is the perfect opportunity here to start practicing at home.

Jessamyn Stanley is a great role model to check out! She is using yoga to promote positive body image and breaking down mental and emotional barriers to practicing. She emphasizes how you FEEL, as opposed to how you look and she celebrates her students bodies in all the shapes and sizes that they come in. She has a top selling book on Amazon called, Every Body Yoga: Let Go of Fear, Get on the Mat, Love Your Body, and I HIGHLY recommend checking that out!

Yoga is a mindset that cultivates self love and body confidence. Love your body where it is at and show it some kindness by taking this time for self care. With consistency your body will open and start to change, so enjoy the journey and allow the transformation to unfold.

Conclusion

A few things to keep in mind before you jump in! Firstly, always make sure to listen to your body. You know it best and are the only one that can hear its subtle cues. Never force your body into a pose and don’t be scared to take modifications or rest in Child’s Pose when needed. Trust that over time and with consistency your body will open up along with your flexibility. You have the necessary steps in mind now to really get your at home practice going. I promise that the hardest part is just making it onto your mat. Make the time, prioritise this self care and watch yourself blossom and grow.

This article has provided the necessary steps to establishing an at home yoga practice. Grab the essentials, create the space, find some videos online that resonate and schedule the time like a non-negotiable appointment! Prioritise taking care of yourself and loving yourself just as much, if not MORE than you love others. This is not selfish, this is KEY to being the best version of who you already are, for yourself and for others. You have to fill your cup first and yoga is a great tool to do just that.

About

Charlie Hanna

Charlie is a Yoga Alliance certified Hatha, Yin Yoga & Meditation teacher with a psychology degree in her back pocket. She is currently on a mission chasing sun and Read More..