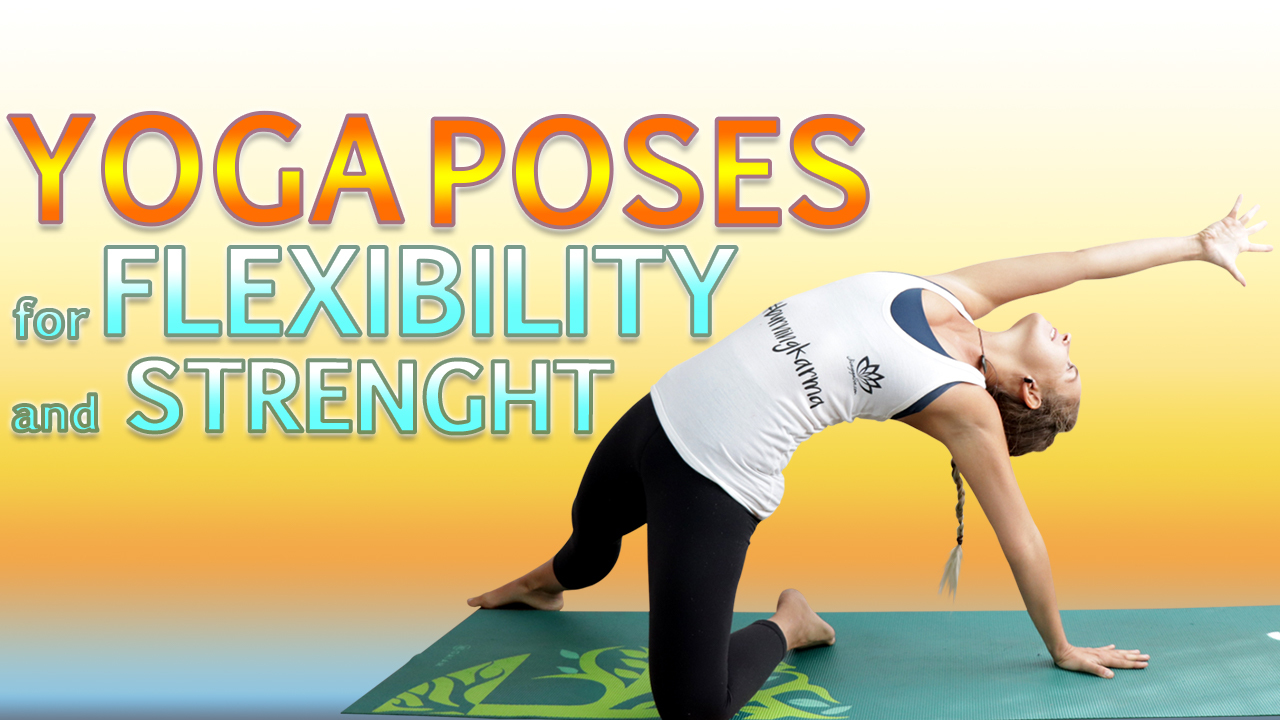
Yoga Poses for Flexibility & Strengthening
As is the story for many, my yoga journey began with the desire to become more flexible and bendy. I envisioned myself gracefully flowing into intricate yoga poses like Bird of Paradise and Forearm Stand, unaware of the deep strength required to support those shapes.
Over time, my focus shifted. Rather than chasing specific poses, I began working on building balanced strength and flexibility throughout my body. Interestingly, the first transformation wasn’t physical—it was mental. My commitment to showing up, breathing through challenge, and staying present helped build resilience and inner strength.
With consistency, I started to notice changes. My muscles became more defined, my posture improved, and my movements turned more fluid and intentional. The stronger and more open my body became, the easier my practice felt. Poses that once seemed impossible gradually became accessible—not through force, but through patient progress.
In my daily practice, I always aim to include a combination of yoga poses for flexibility and strengthening.
TRAINING TYPE: FLOW SEQUENCE
CATEGORY:YOGA
SUBCATEGORY: YOGA POSES FOR FLEXIBILITY & STRENGTHENING
PLANNED TIME:15 MINUTES
LEVEL:BEGINNER
PROPS:NONE
What Are The Best Yoga Poses for Flexibility and Strengthening Training?
Standing Poses provide a great opportunity to work into both flexibility and strength – so long as we are not being lazy and dumping our weight down into our hips! With seated and supine poses we can often utilise the effects of gravity and the weight of the body to pull us deeper into poses, and there isn’t a need to exert too much effort. However, when we come up to standing, we can engage more effort by firming down into the feet and drawing them energetically in towards the midline. This turns on and activates all the muscles of the legs and allows us to simultaneously becomes stronger and more flexible.
High Lunge – Alanasana
We are tasked to find both strength and balance in this pose. The key is to create that stable base with the feet and legs. Rooting down into the feet will lend you more power so you can go a little deeper into your flexibility and open up the back hip flexor. This is notoriously tight for most people as a result of countless hours of sitting. As this area begins to stretch and open, we are simultaneously strengthening the front thigh, hamstring and glute. Warrior Two – Virabhadrasana II
This pose will strengthen and lengthen you from head to toe and is renowned for being one of the most powerful lower body strength builders. It’s important to build this pose from the ground up; firm down into the feet and activate the legs by hugging them toward the midline. Stand in your strength here and welcome any shaking in the legs, as this is a sign that you are really working into the muscles. This pose is also doing wonders above the belt, as it stretches the back, neck and shoulders. Tap into strength and relaxation and don’t forget to breathe!
Reverse warrior – Viparita Virabhadrasana
When moving into this pose, there is a tendency to back off and come up out of the bend in the front knee, as you look for some relief from your Warrior Two Pose. However, the key is to staying low in the legs! If you can get away from your mind and any thoughts of perceived effort and commit to your depth here, you are really encouraging strength to build in that front leg. At the same time you are opening and stretching the side body and solidifying the core.Remember to balance the whole body and take each of these poses to the other side!
Yoga Stretches for Beginners
You will learn beginner friendly sequence that will lay the foundations for deepening into your flexibility. Although the poses are simple, they are great building block asanas to start to open the body in a way that is safe. I invite you to grab some props if you have them available, if you don’t have a block or a bolster, a book and a rolled up blanket or cushion will work great. The poses you will learn will work to open your legs, groins, hips, back, chest and neck. These poses include; Standing Forward Bend, Garland Pose, Seated Forward Bend, Head to Knee Pose, Half Wild Thing Variation, Bound Angle Pose and Half Lord of the Fishes Pose. If this is the very beginning of your yoga journey, expect there to be a little tightness in the body and be ok with that. They body will open over time, but you only if you respect its boundaries and work with where it is at.
INFROGRAPHIC: Yoga Poses for Flexibility & Strengthening Beginners

Upward Salute – Urdhva Hastasana
Begin with the hands together at the center of the chest in Prayer and then inhale as you raise them overhead. Take a moment here to move and stretch the arms and body and then settle into Upward Salute, arms raised above, palms facing the midline.
Upward Salute is usually one of the first opportunities you get to create some space in the body. It stretches the sides of the body, spine, shoulders, armpits, and belly.

Standing Forward Bend – Uttanasana
Hinging at the hips, start to fold forward, keeping the spine straight and the neck and head in line. The hands are extending forward as you come down into Standing Forward Bend. Hands can come down to the mat or we use a block to bring the earth a little closer. Inhale and press down into the feet and slowly start to roll up to standing, neck and head coming up last.
This is a great beginner pose for opening up the back of the legs as there is not much physical effort required, as the torso hangs down heavy and gravity does the work of elongating the spine. Especially when starting out, it is perfectly fine to have a slight bend in the knees and to rest the hands down onto the thighs or the shins.

Garland Pose – Malasana
Take the feet slightly wider than hip width and with an inhale raise the arms up, palms come together to touch and then bending the knees, drop down into Garland Pose. Press the palms firmly together and bring the elbows into the thighs to create a resistance and stretch into the inner thighs.
Garland Pose stretches the thighs, groin, hips, ankles, and the torso and is often easier than it looks, especially for beginners. The heels don’t necessarily have to touch the earth, but try to keep the spine straight and the chest open.

Seated Forward Bend – Paschimottanasana
Come down to sitting, legs extended out long in front, making sure your strap is handy. Remove the flesh from underneath the sitting bones and create a long spine through to the crown of the head. Begin to fold down, forehead aiming towards the toes, the heart towards the knees. Looping the strap around the soles of the feet and settle into Seated Forward Bend.
The seated Forward Bend offers a deep stretch for entire back side of body from the heels to the neck and is an opportunity to relax down over yourself. As you go internal with this pose, focusing on the breath and the sensation of stretching, you can calm down the mind and relieve stress

Head to Knee Pose – Janu sirsasana
Bring the right leg out on a diagonal and the left sole of the foot in to meet the right thigh. Keep the strap handy and turn the torso to face the extended leg. Inhale the arms up and exhale, folding down. The strap can go around the sole of the foot in order to keep the leg straight.
Head to Knee Pose is going to stretch the spine, shoulders, hamstrings, and groins. It is calming and relaxing, while offering a deep stretch.

Wild Thing Variation – Camatkarasana
Bring the left hand to the base of the lower spine. Press into the palm and into the toes of the front foot. Come up onto the left knee. Sweep the right arm and hand up and behind, coming into Wild Thing Variation. Bring the hips back down to the earth. Take Head to Knee Pose and Wild Thing Variation to the other side.
This variation of Wild Thing is an more accessible way to open up the shoulders, lungs, and chest. It also opens the hip flexors and the front of the legs. It is one of the juiciest counter stretches out there.

Bound Angle Pose – Baddha Konasana
Bring the soles of the feet together and interlace the fingers around the toes. Walk the groins towards the feet for a more intense stretch. Inhale the spine straight and exhale, start to lean forward. Elbows can come into the calf muscles. Drop the head down, coming into Bound Angle Pose.
This pose is great for beginners because you can take it as deep or as easy as you like. While the hips and inner thighs are receiving a deep opening, the spine is being elongated from the base right through to the crown of the head.

yoga poses for flexibility beginners Video

Yoga for Flexibility and Balance
When practicing balance poses you want to cultivate a lightness of body and mind, and by that I mean to try not take yourself so seriously! When you wobble, it is a sign that the body is building strength. When you fall out of a pose, you simply jump back in. The balance in the body is different from day to day – whether that be the fault of the moon or a reflection of your state of mind, who knows, but even the most advanced yogi can and will have an off day. Another thing to keep in mind, is that you should never expect both sides of the body to feel the same as we are not perfectly symmetrical beings. Here are three poses if practiced daily, you will start to find yourself a little more balance body and mind, both on and off the mat.
Better balance is something we can all benefit from, especially if we are engaged with other sports. A 2017 study on The Effects of Yoga on Flexibility and Balance, found evidence to support that yoga was able to boost athletic performance across a range of activities and that a regular practice could lead to significant improvements in a little as six weeks.
Lord of the Dance Pose – Natarajasana
This pose is an expression of power, grace and strength. Multiple things are happening in the body as we stretch into the shoulders, chest, thighs, groin and abdomen. Simultaneously you are strengthening the legs and ankles. However, the cherry on top of the mindfulness cake, is the ability of this pose to improve the quality of the mind. You are required to find balance and concentration, yet remain graceful and poised. Frustration will likely come as you fall out of this pose time and again, so your patience and resilience can be tested. Find balance in the body with this pose and you’ll cultivate more balance in the mind.
Eagle Pose – Garudasana
This pose requires endurance and unwavering concentration to find the balance. The trick is to squeeze everything to the midline of the body. Squeeze the elbows and knees and try to keep them stacked in one line. This pose really has it all when it comes to flexibility and balance. The challenge really comes from having your Drishti Point (single point of focus) obstructed by the hands. When you come out of this pose and unwind the body there is a beautiful experience of unbinding the mind too.
Half Moon Pose
This pose relies on the stability of the standing leg and ankle; while you extend the top leg straight and strong, to find that perfect tipping point of balance. In Hatha Yoga, Half Moon is an expression of channeling the lunar energies in order to maintain a sense of body orientation in space. You are building strength in the lower body as you work to firm down into the standing leg – at the same time you are encouraging a dynamic sense of balance in both the body and the mind. Repeat these poses on the other side to work with both the yin and yang aspects of the body. This balances the masculine and the feminine energies to ensure whole body harmony.
TEACHERS INSIGHTS

Don’t be afraid to use props and take modifications, especially in the beginning. The body wants to open and will become more flexible over time. Moving slowly and taking the options for support are only going to strengthen your practice, and the key is not how far you can push yourself in a single practice, but instead showing up over time and practicing with consistency.
Conclusion: Yoga Poses for Flexibility & Strengthening Training
These poses are excellent foundational asanas for beginners looking to build both flexibility and strength throughout the entire body. It’s common to fixate on achieving advanced postures like the splits and focus solely on opening the legs—but true progress often comes when we take a more holistic approach. The body is deeply interconnected, and by practicing yoga poses for flexibility & strengthening, we support overall mobility and balance.
This broader view is especially important when addressing common issues like low back pain, which often stems from tight hips or weak supporting muscles. When we prioritize full-body integration over isolated goals, we not only prevent injury but also move more efficiently toward those milestone poses.
Stay consistent, trust the process, and believe in your body’s natural ability to open, strengthen, and transform through mindful movement.
How to Start Yoga at home for beginners PDF, will guide you through the best way to start yoga at home. Includes a beginner sequences designed to give you the best poses to get started. Easy poses accessible to all ages and levels, you will find in this pdf simple poses and their benefits, Images and tips. Included in this Free Yoga PDF Download:
- Yoga asanas names with pictures and benefits
- Printable Sequence Infographic
- Teacher Tips
- Resource Links
Ready to deepen your practice? Click here to explore the yoga courses designed to build strength and flexibility.


